ZP19081 Concord Light Post with Planter Box
Concord Light Post w/ Planter Box
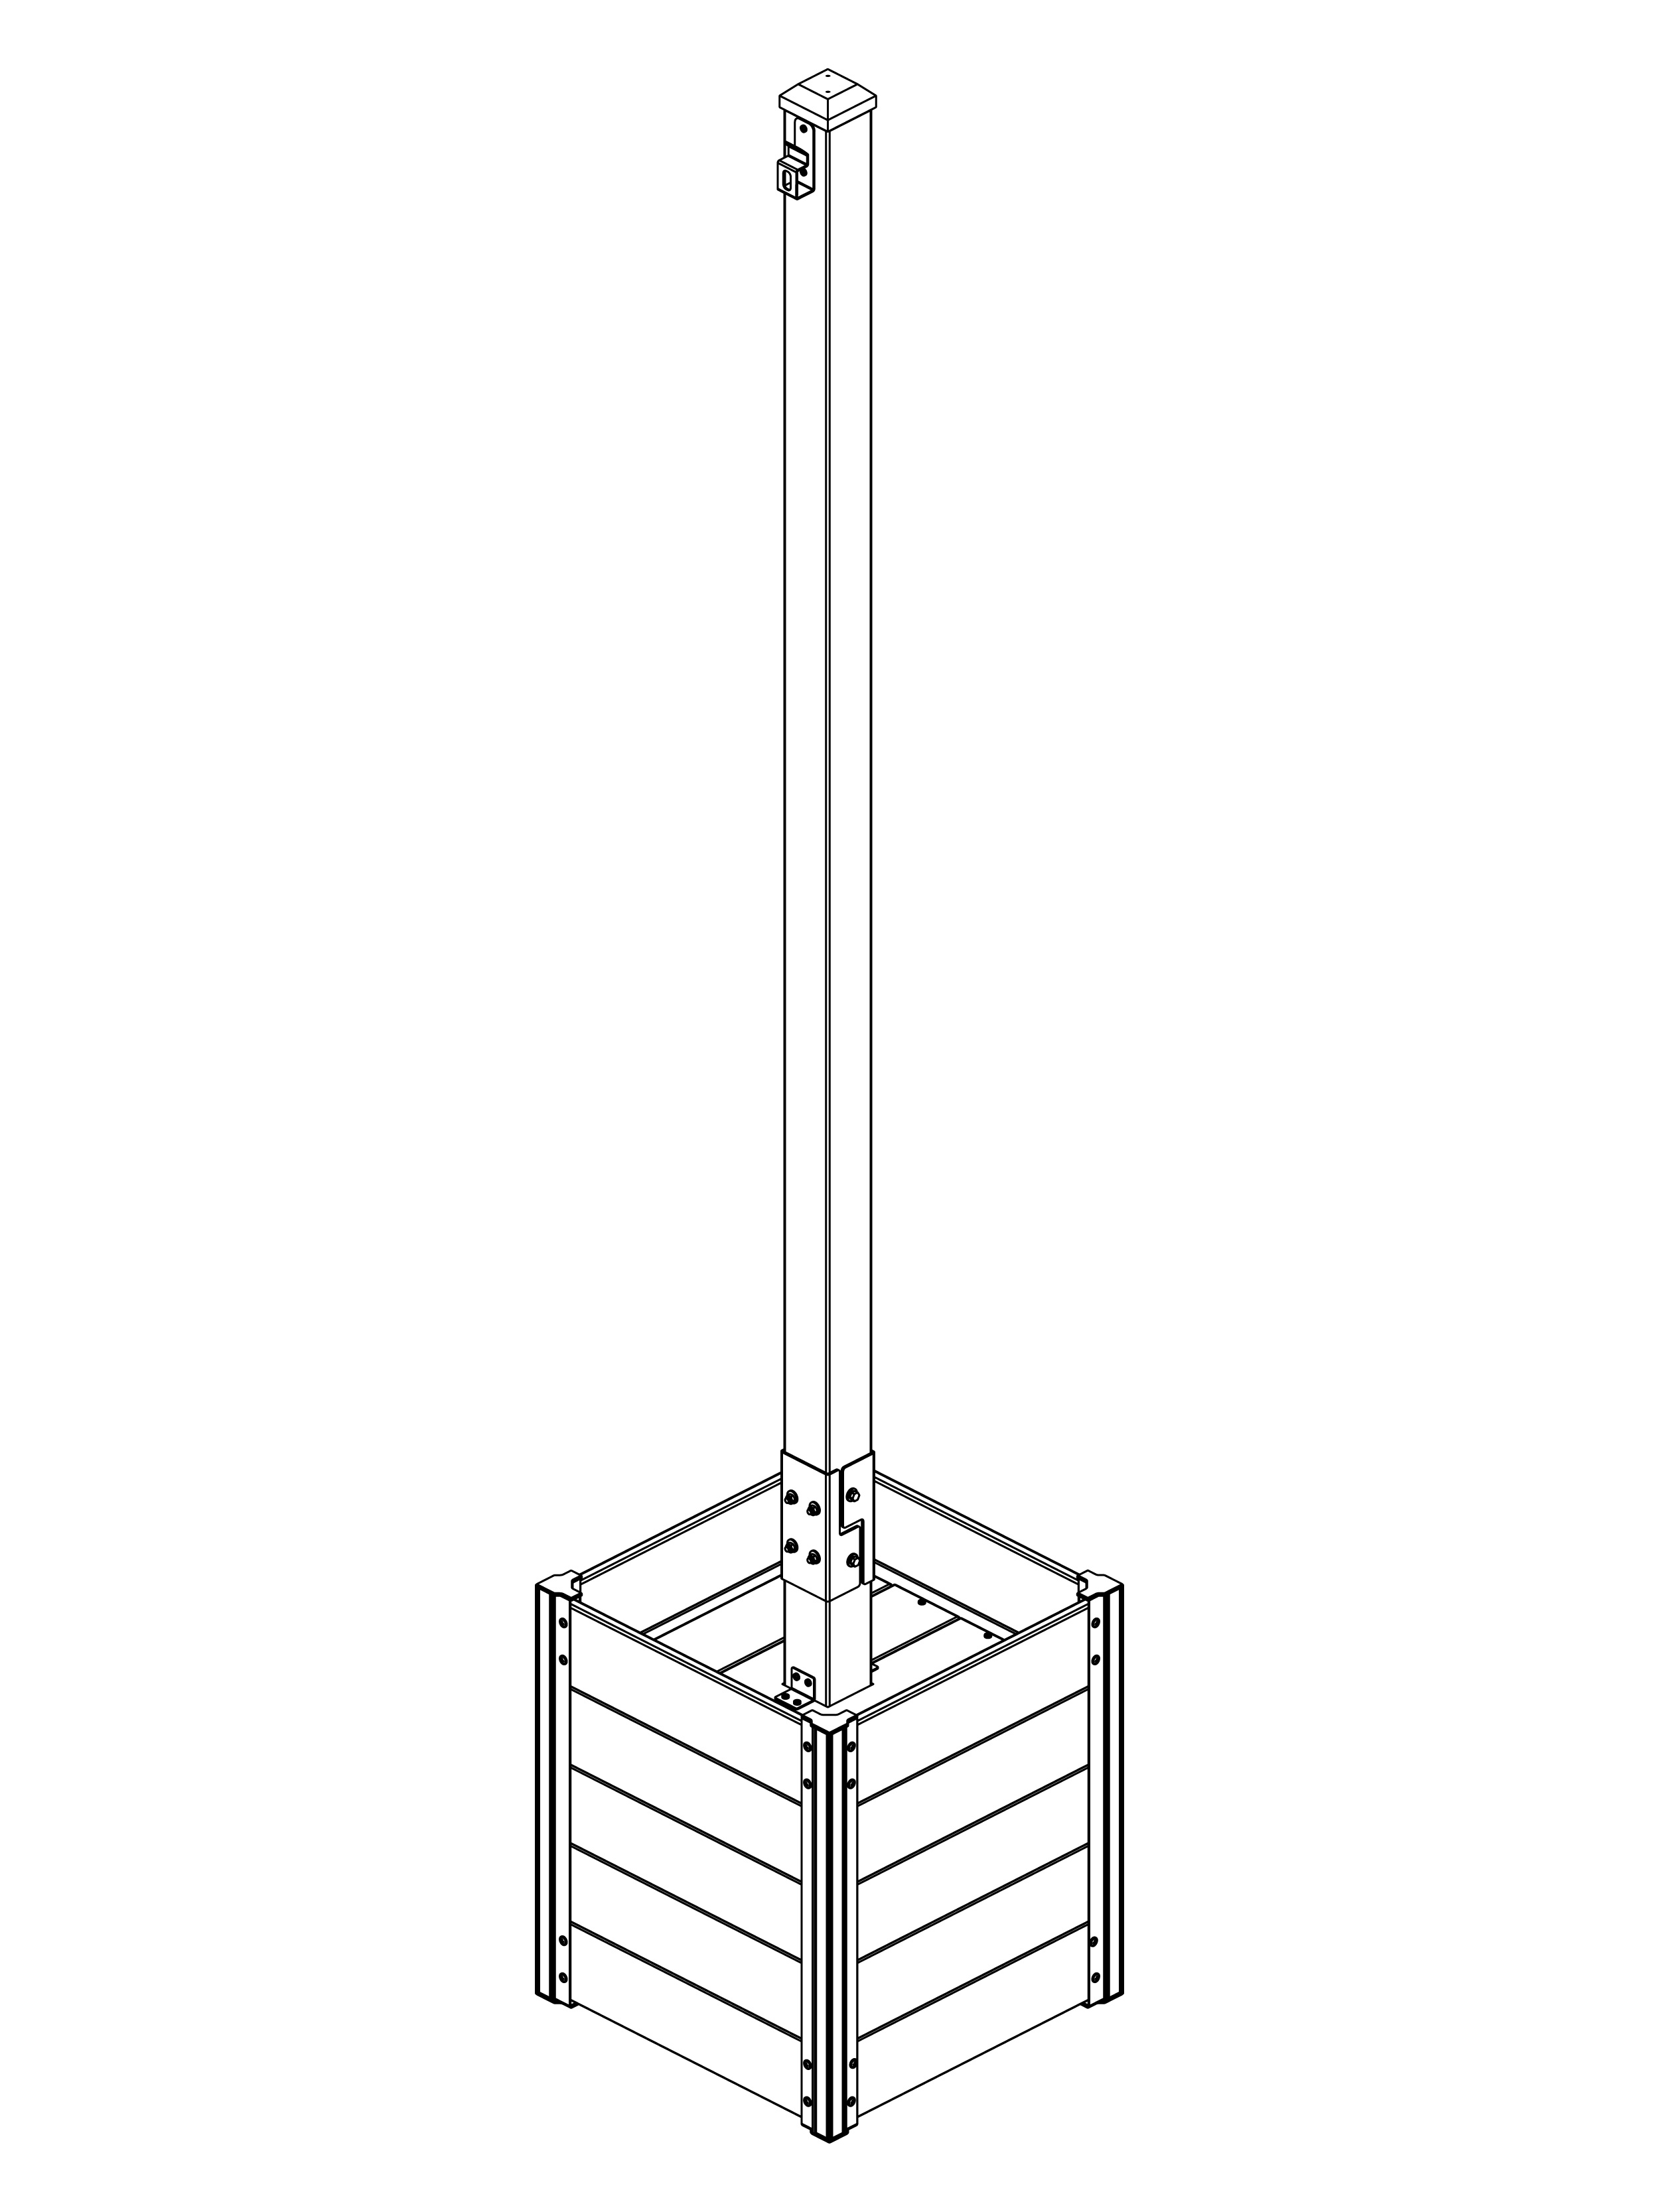
ZP19081
Approximate assembly time: 60 min
Click here to watch an installation video.
Introduction
General Information
Important Safety Notes:
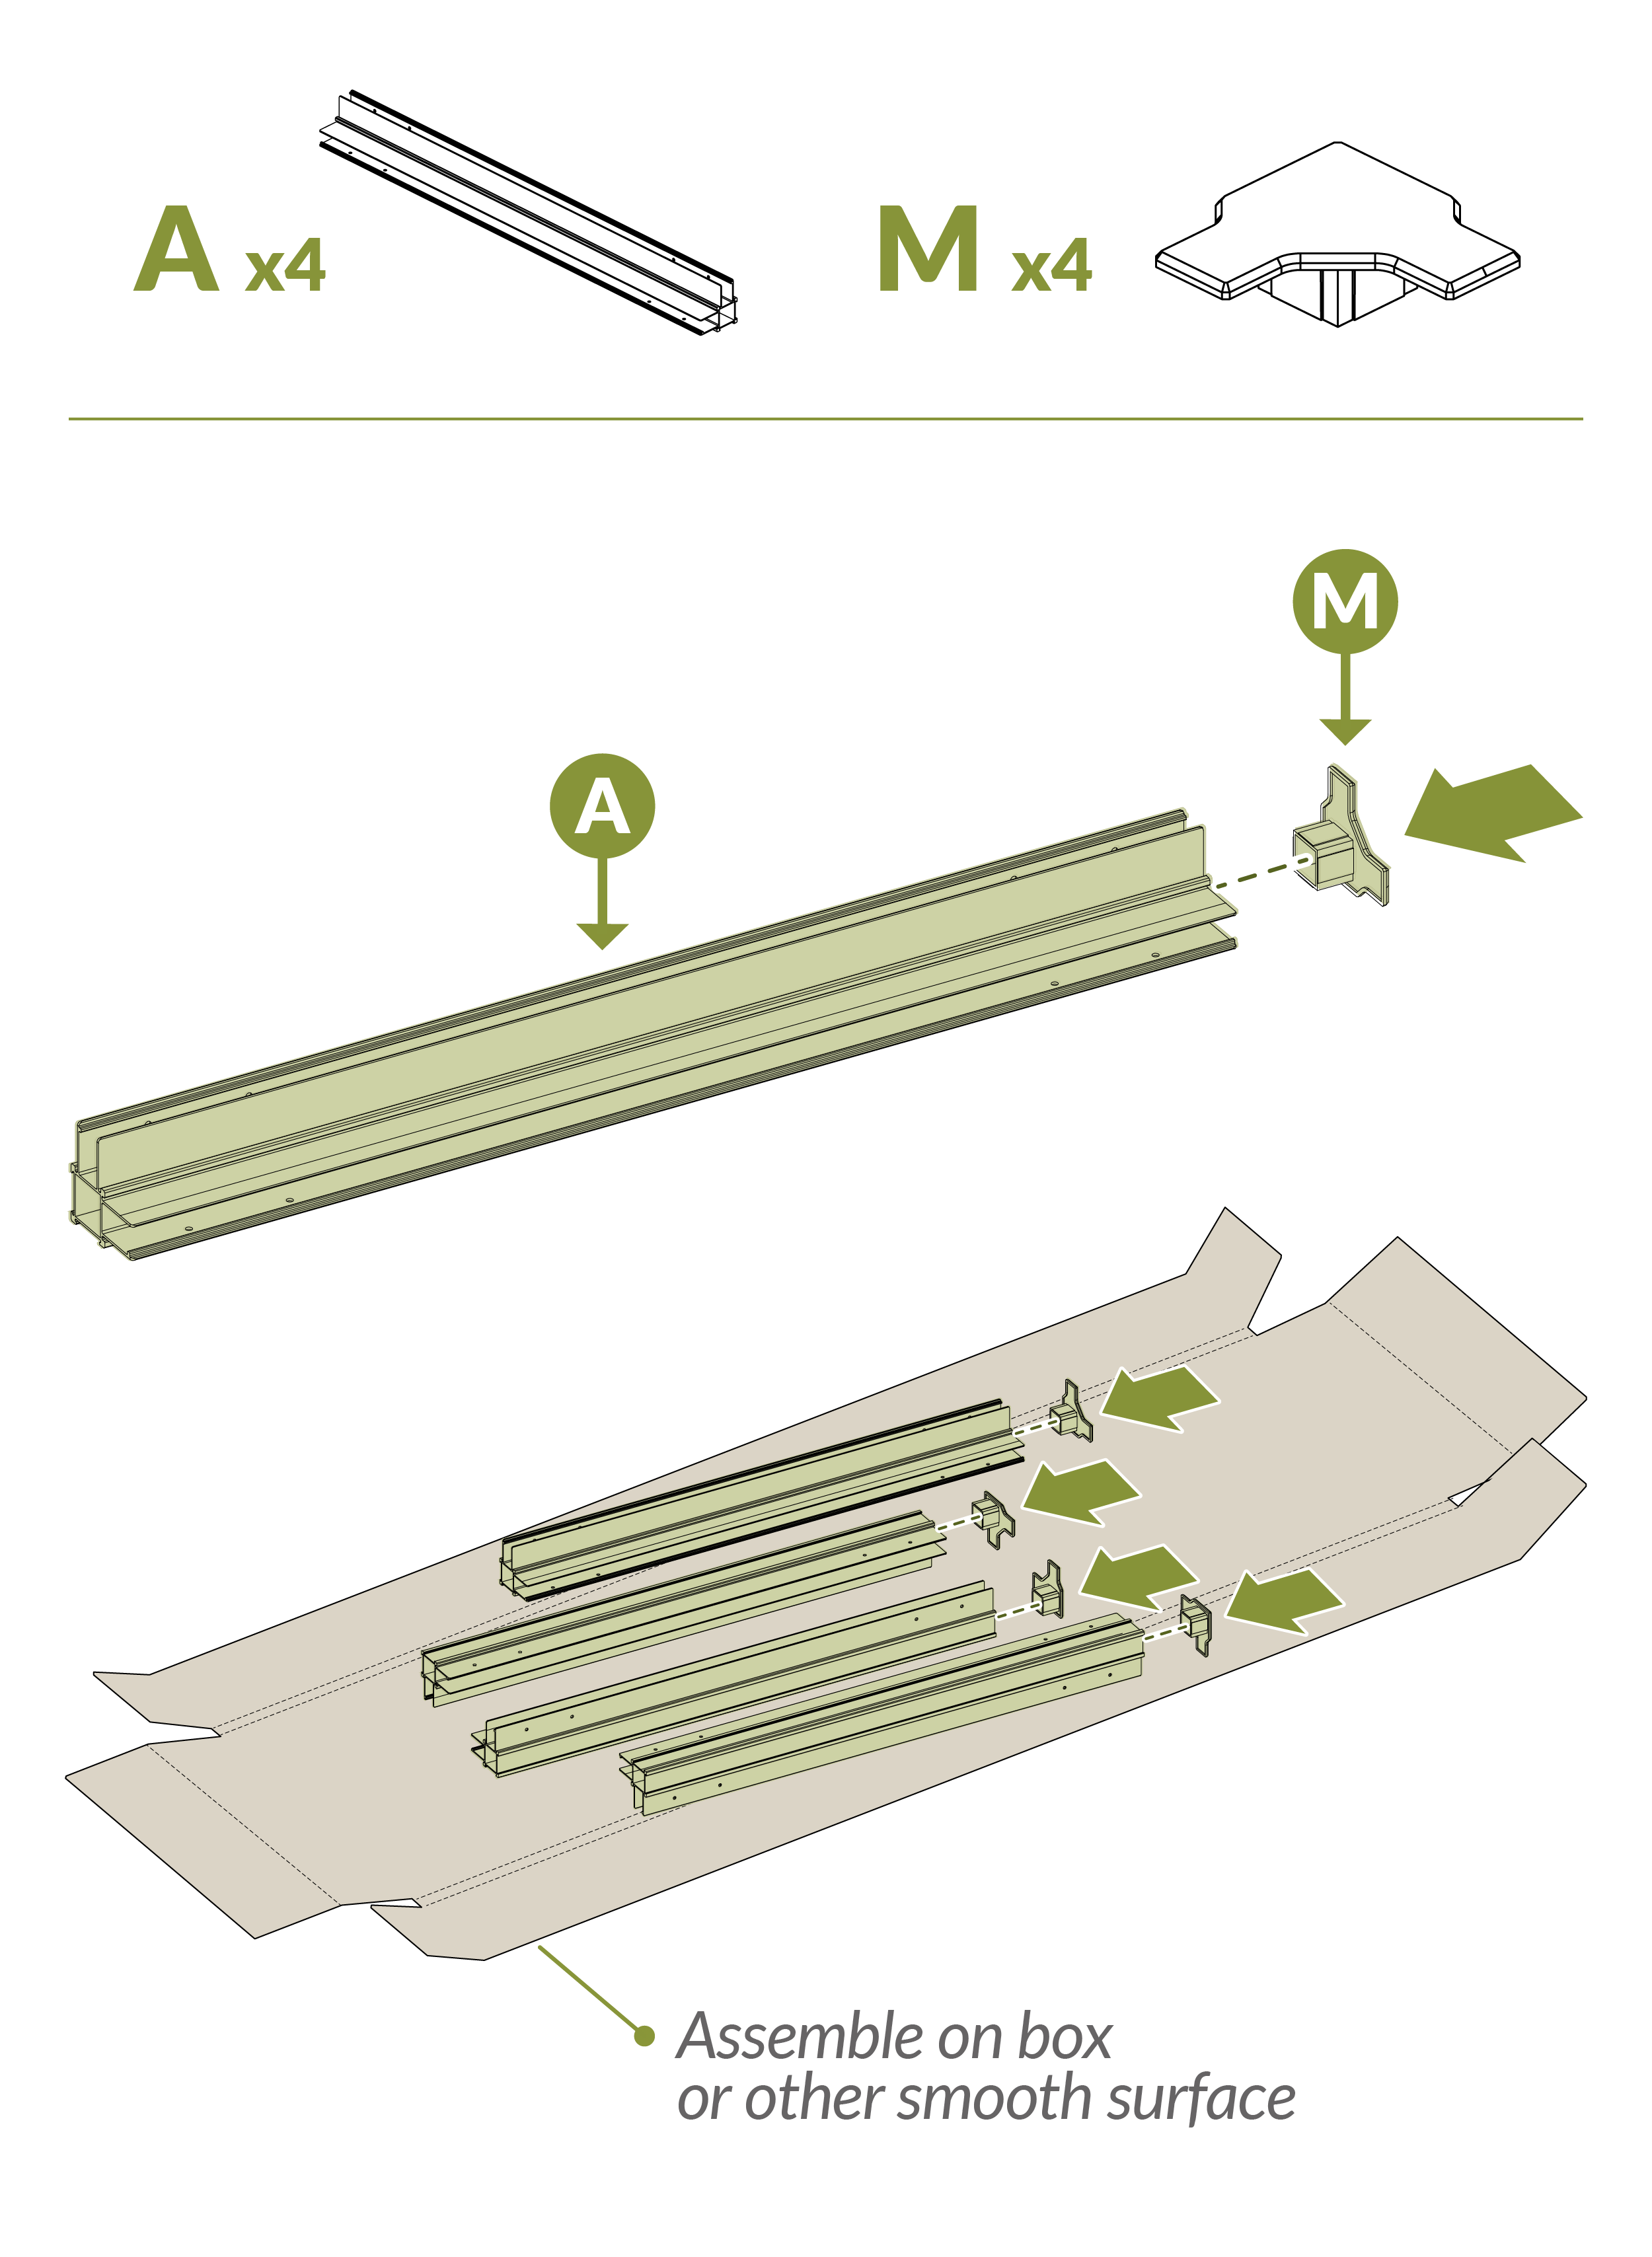
- Assemble components on a box or other smooth, non-abrasive surface to prevent scratching.
- We recommend two people for a smoother and safer assembly.
- Ensure posts are level and vertical before securing with screws.
- For optimal stability, fill the lower planter chamber with at least 50 lbs of sandbags, small rocks, or similar dense material before adding soil.
Returns:
If you wish to return your product, please contact us first — we can often help resolve the issue right away.
If a return is still necessary, it must be initiated with the retailer where the product was purchased.
Need Help or Replacement Parts?
Although great care has been taken to ensure proper packaging and handling of this product, occasional issues can occur.
If you need replacement parts, assembly assistance, or have questions about the product, our customer service team is ready to help:
- Website: https://parts.nychbrands.com
- Email: support@zippity-outdoor.com
- Phone: 704-892-5222 or 877-234-6196
Customer service agents are available 9am–5pm EST, Monday–Friday.
For Quick Assistance:
- Have reference item number ZP19081
- Provide the specific part name
- Include the batch lot number found on the end of the box
Product Specifications
Detailed Dimensions & Specifications
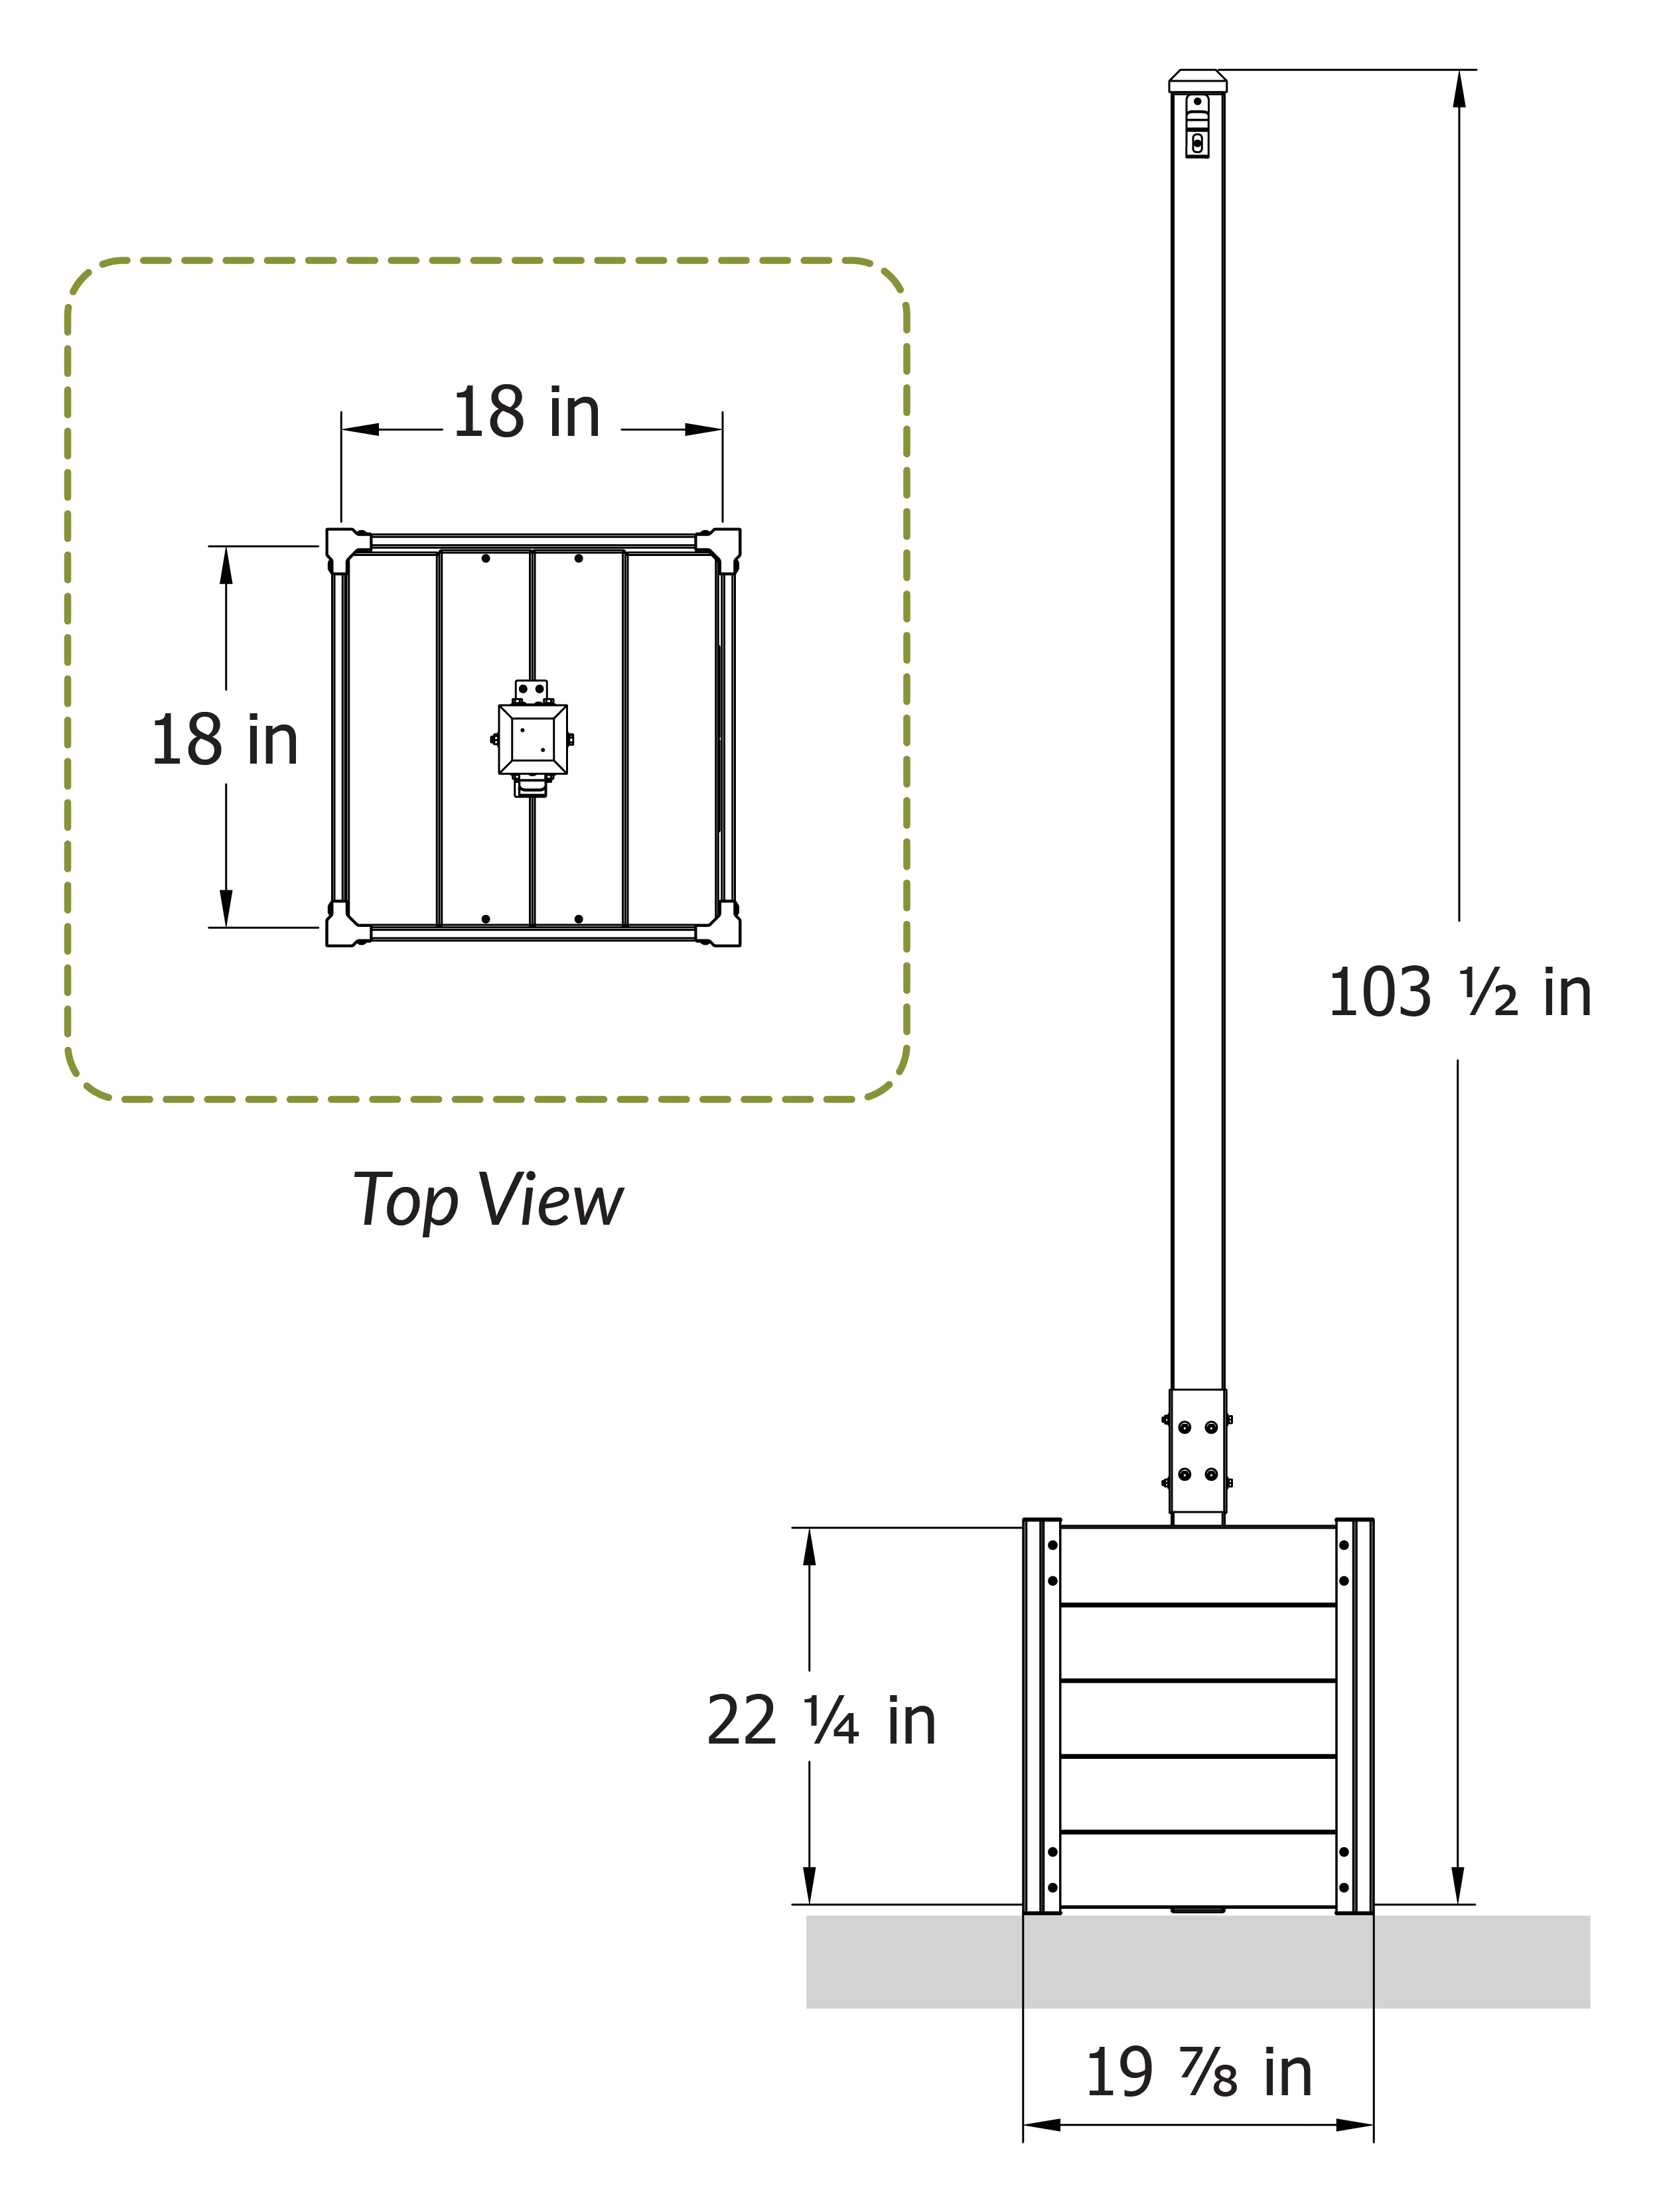
Product Specifications:
- Post Height: 103½"
- Planter Width: 19⅞"
- Planter Height: 22¼"
- Planter Depth: 5" or 9½" (See Steps 7a/7b for details)
- Planter Volume: 0.9 cu ft or 1.75 cu ft (See Steps 7a/7b for details)
Recommendations
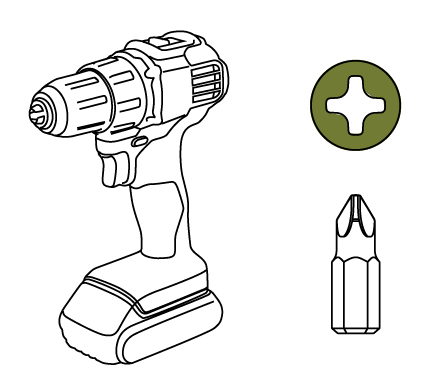
Power Drill with Phillips Bit
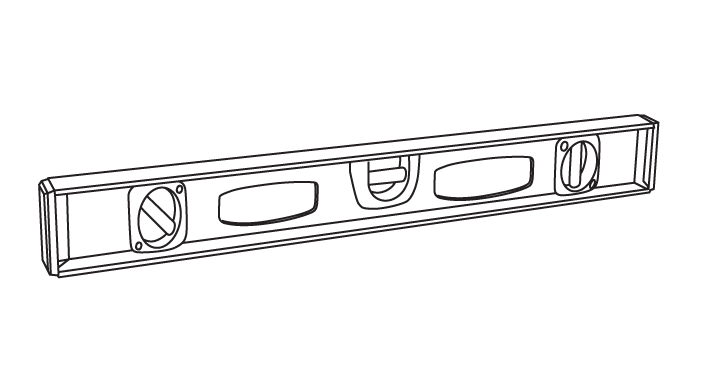
Level
Stability Recommendation
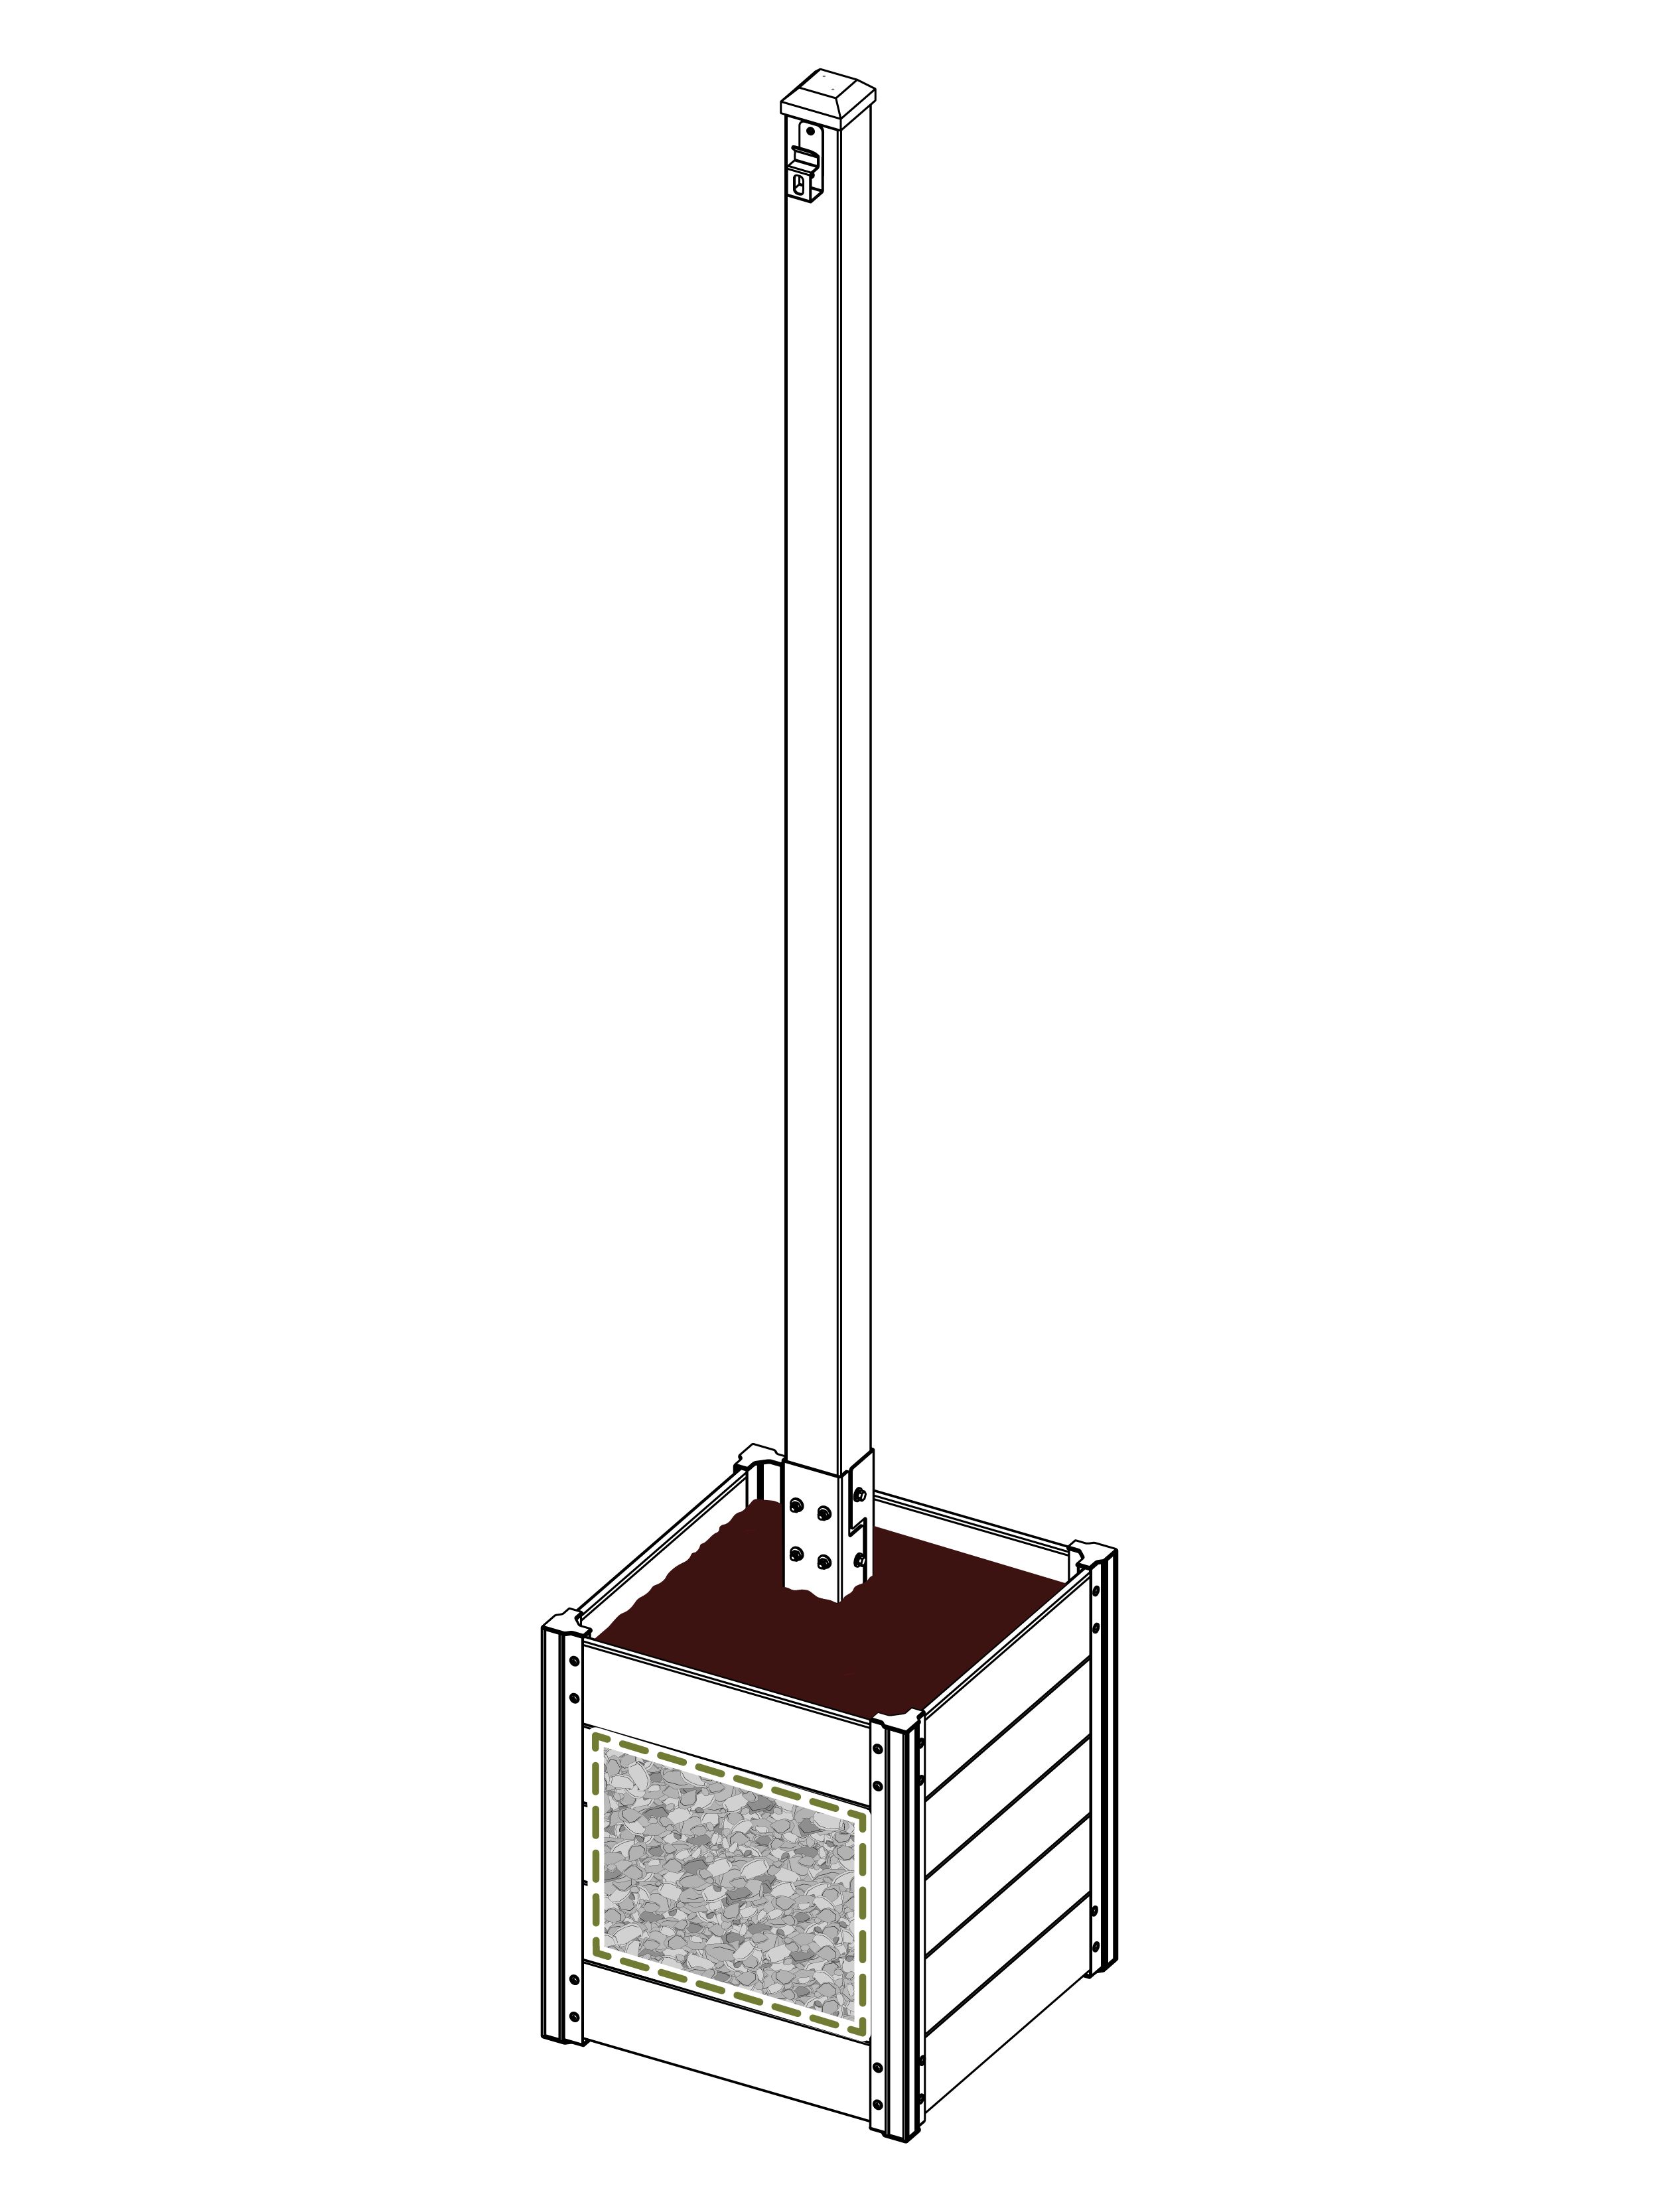
- For optimal stability, fill the lower chamber with roughly 50 lbs of weight. Sand bags or small rocks are recommended.
We recommend 2 people for ease of installation.
Lay Out Materials
A. Corner Post (4)
2⅛" x 2⅛" x 22"
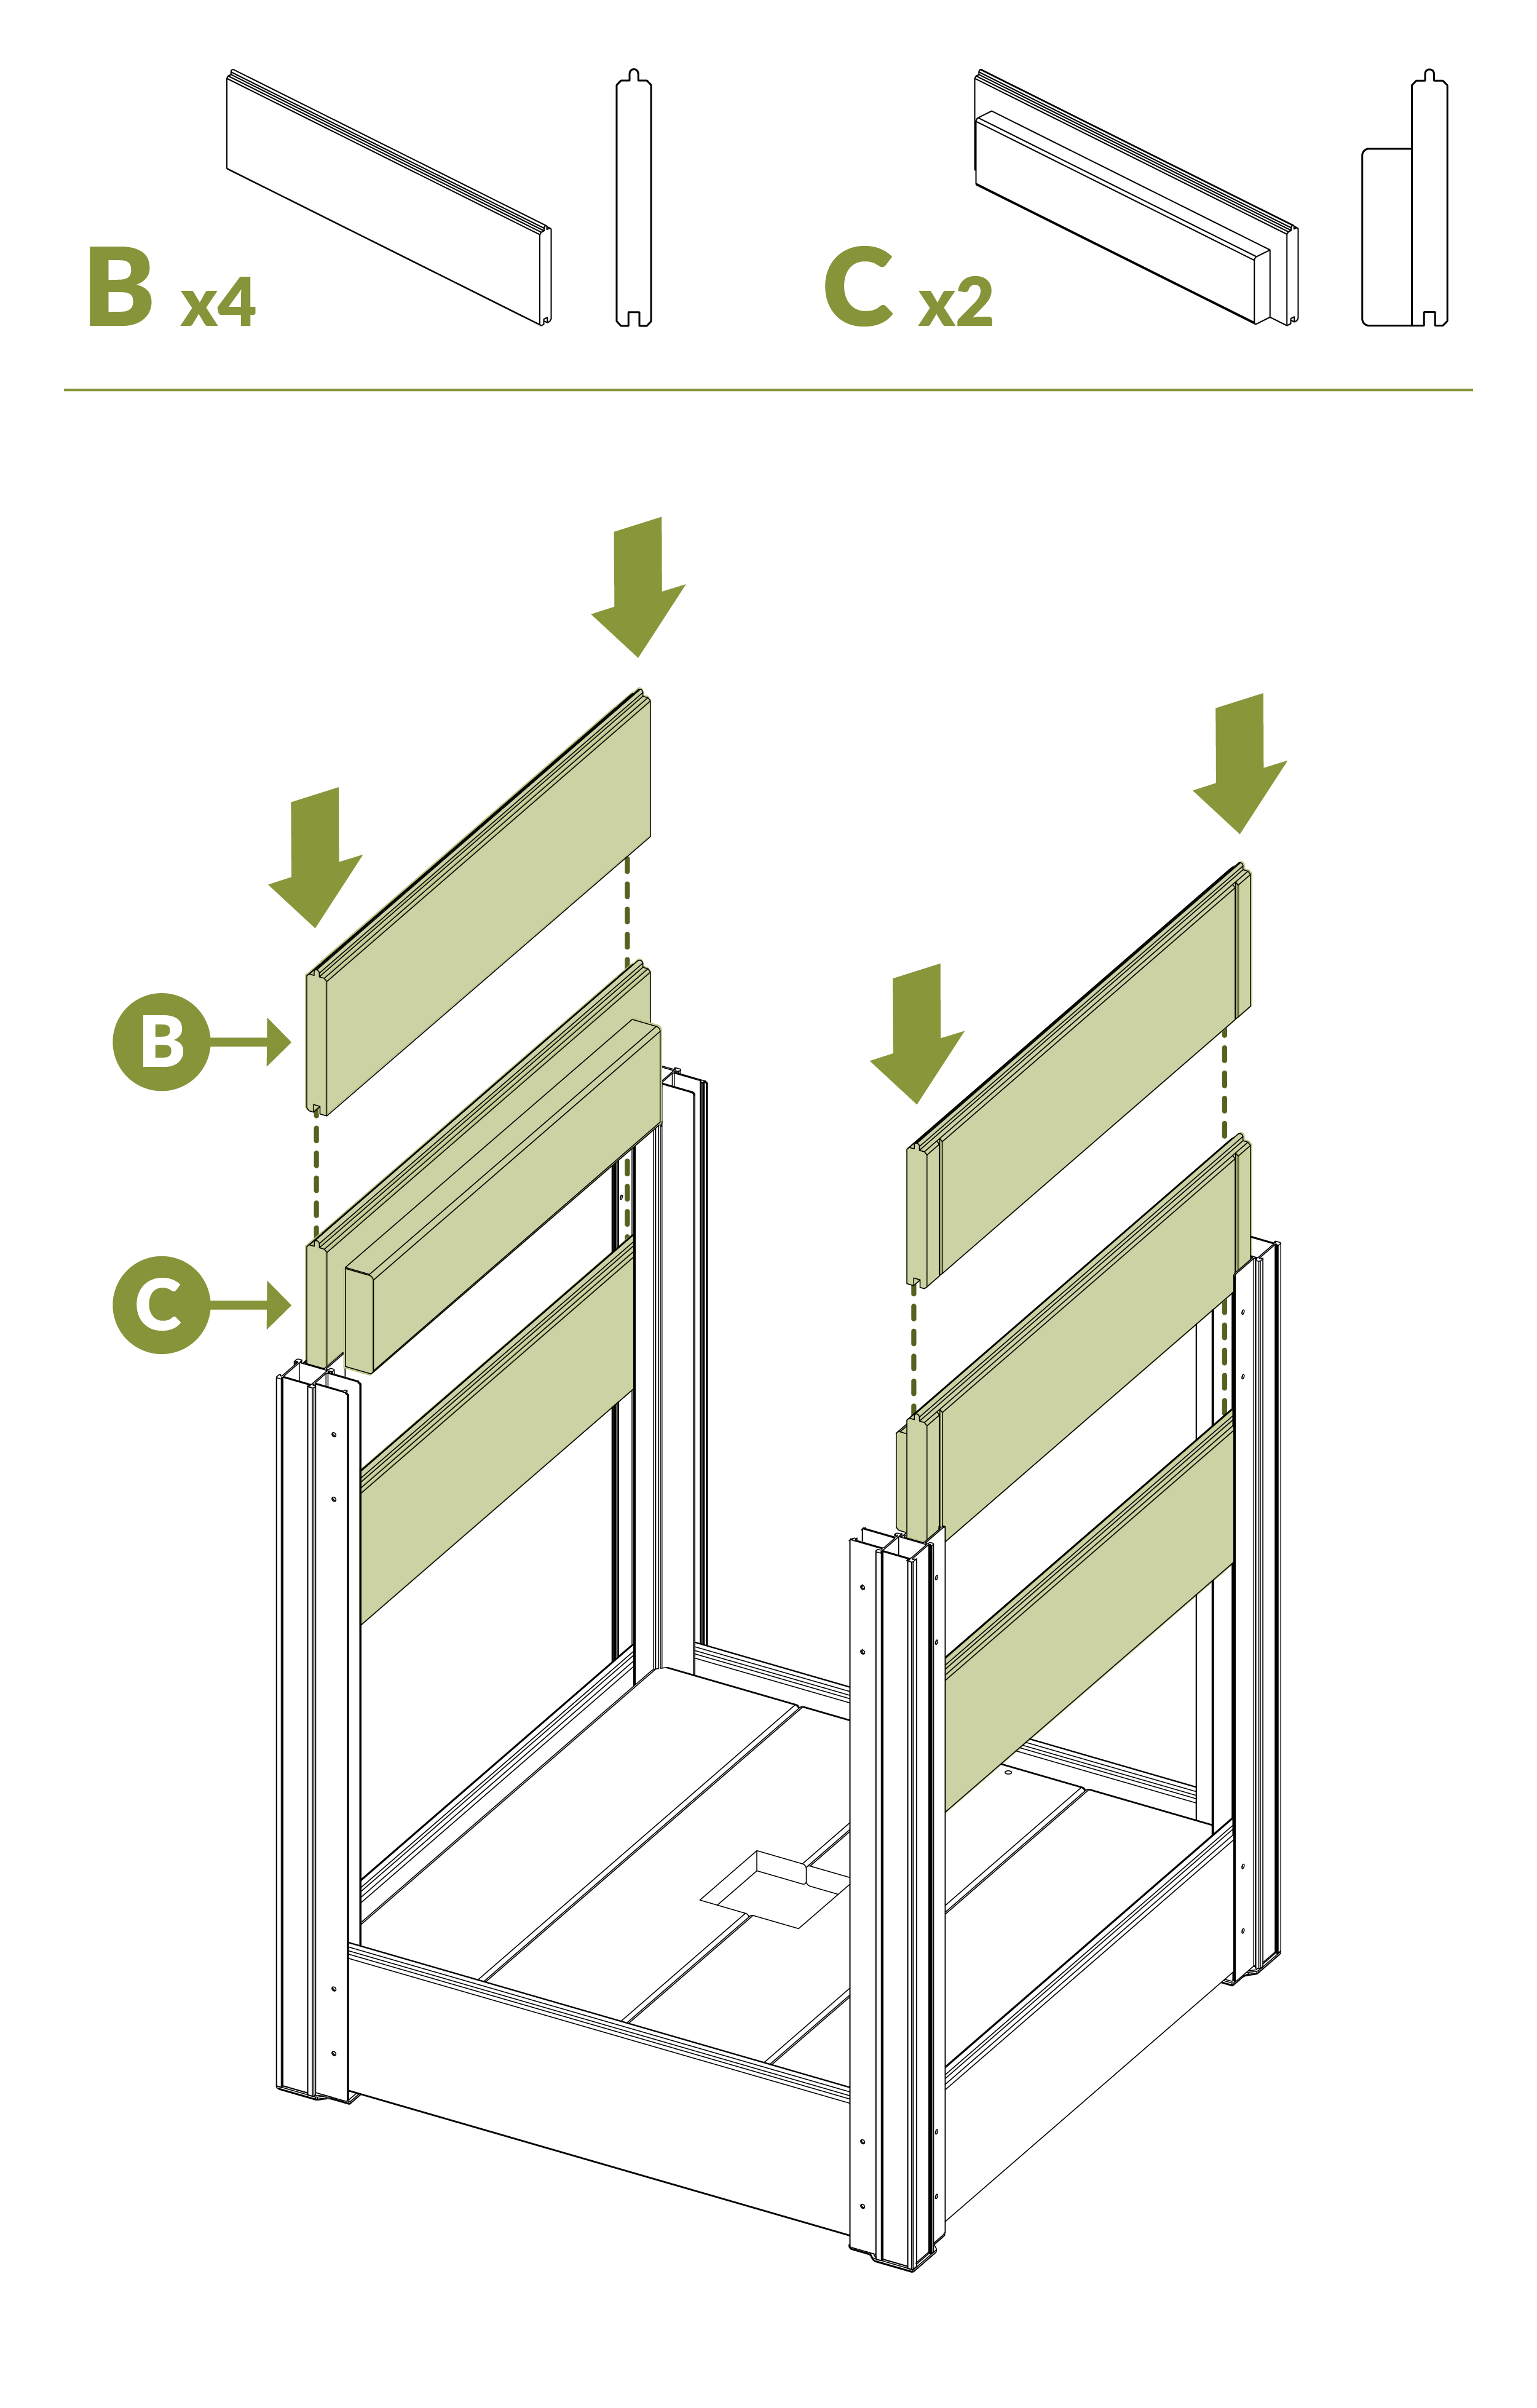
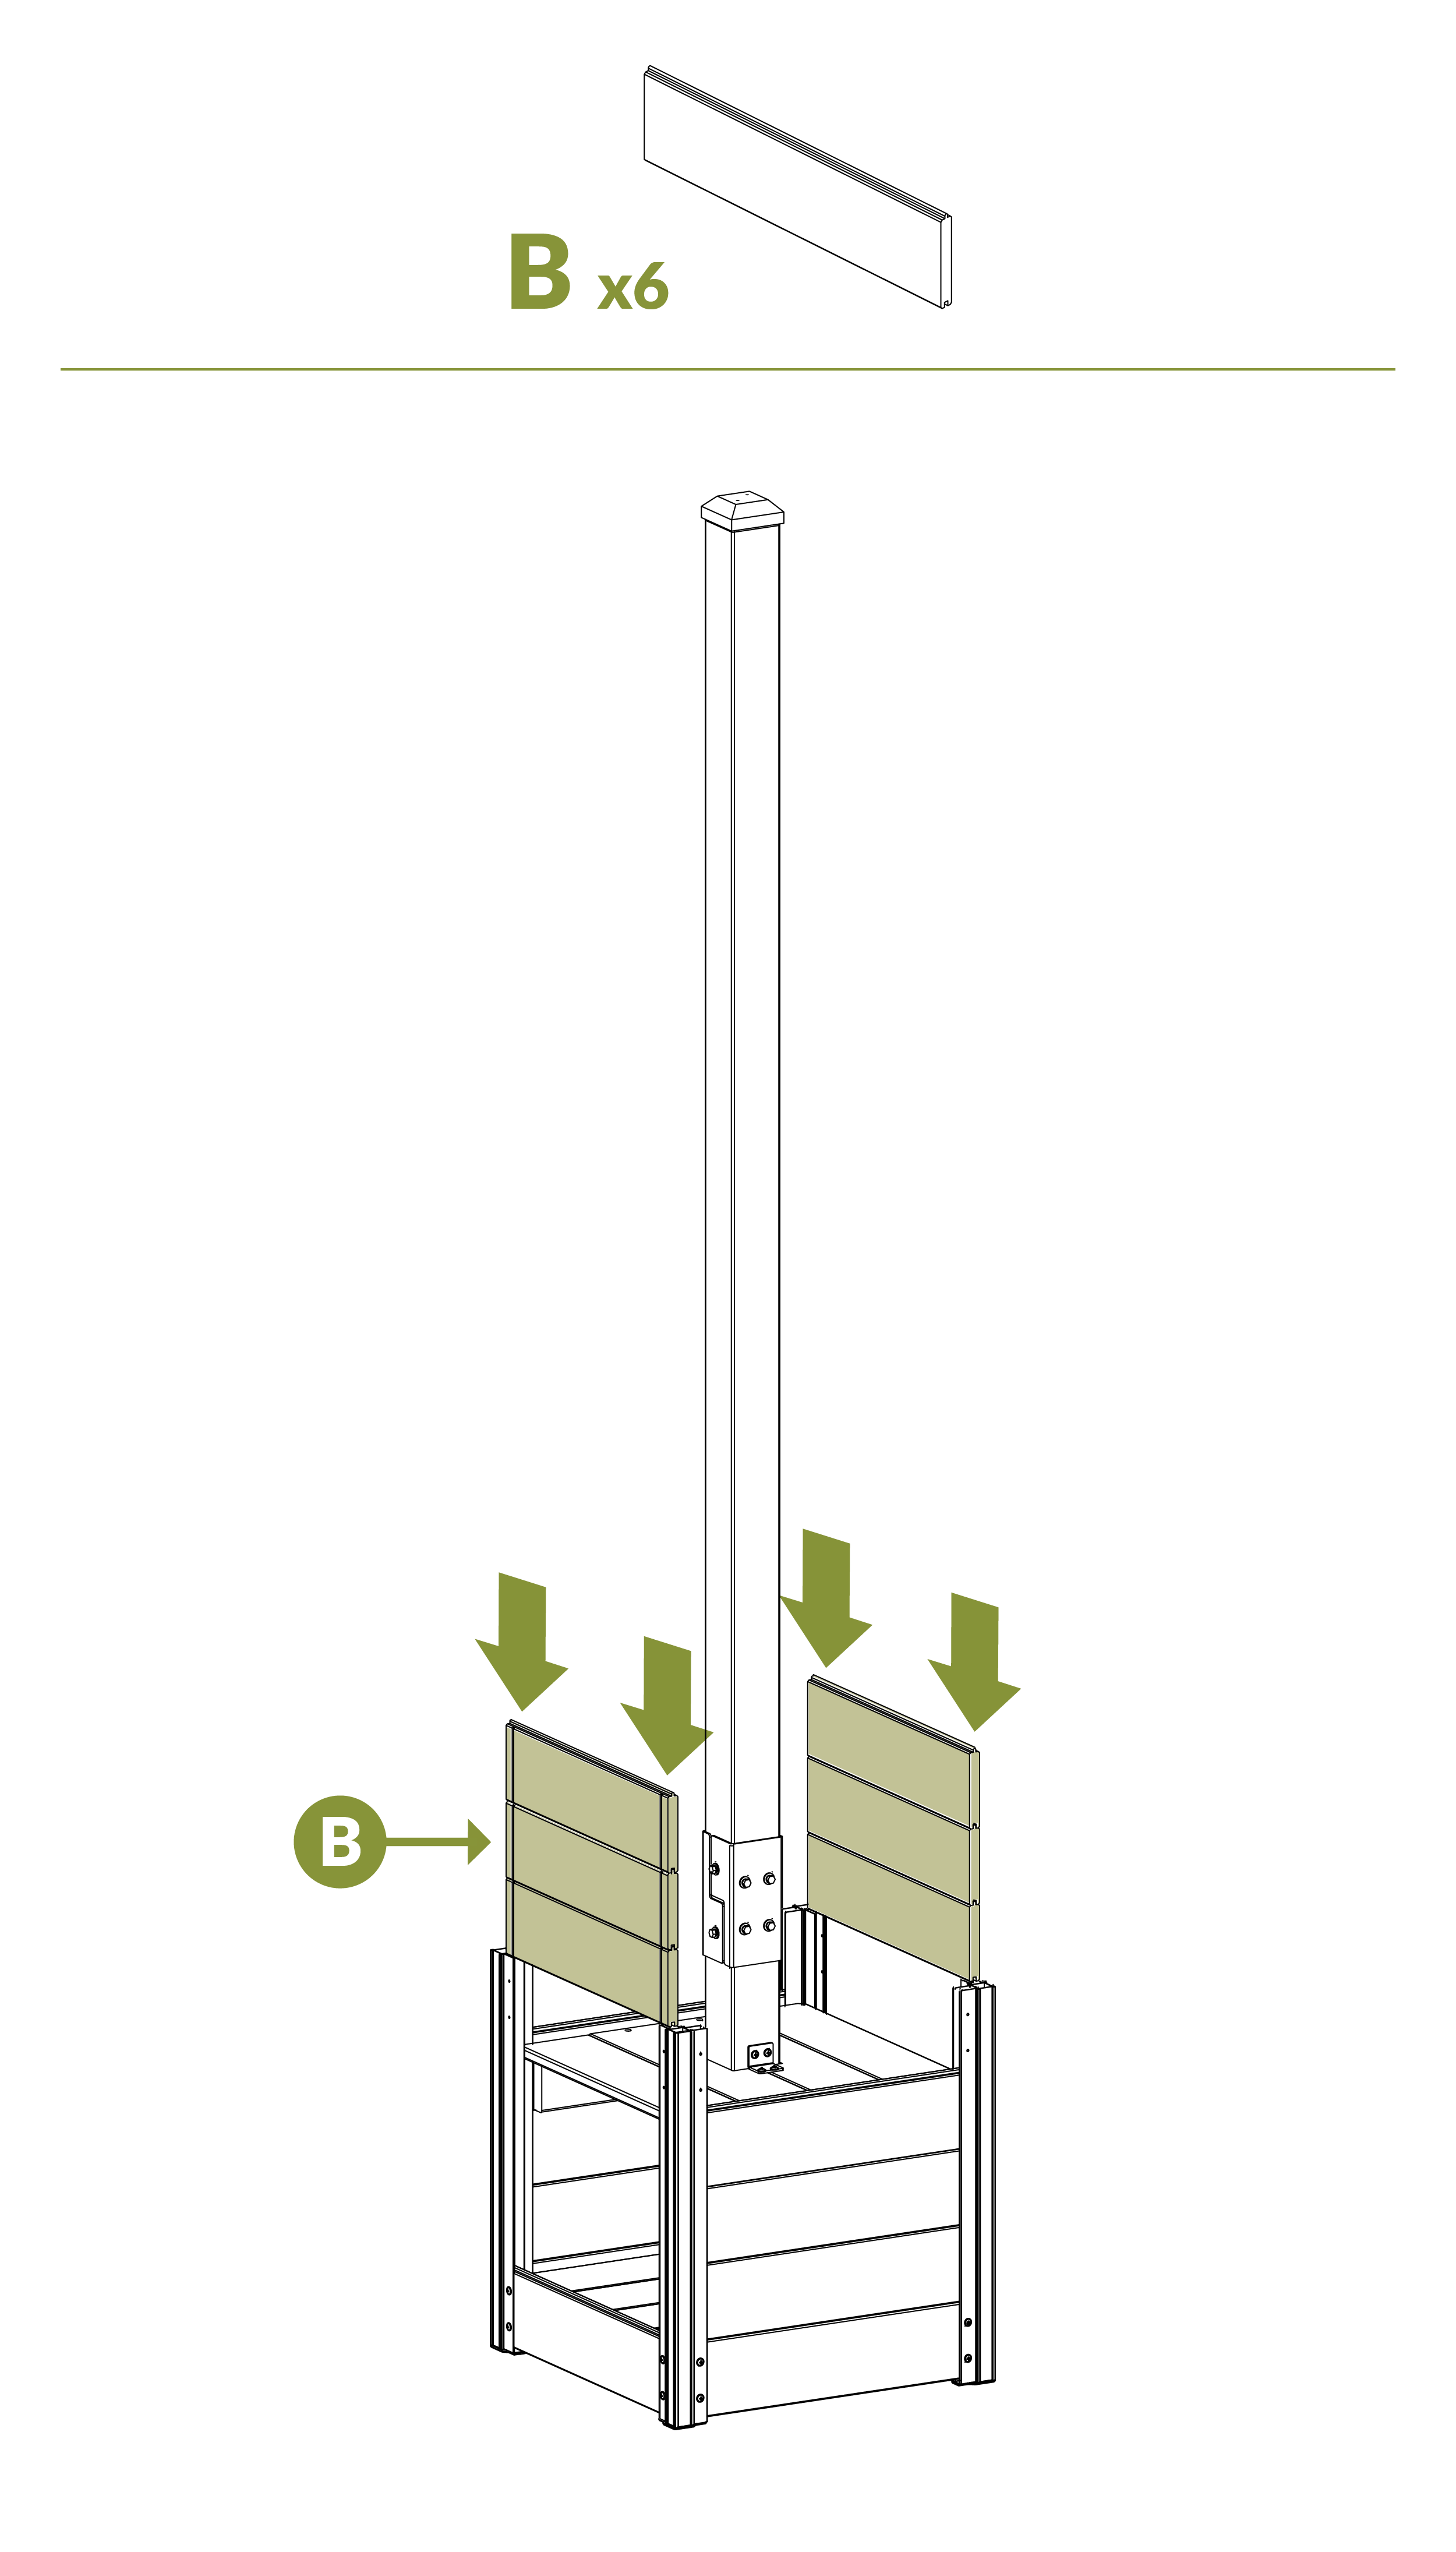
B. Board (12)
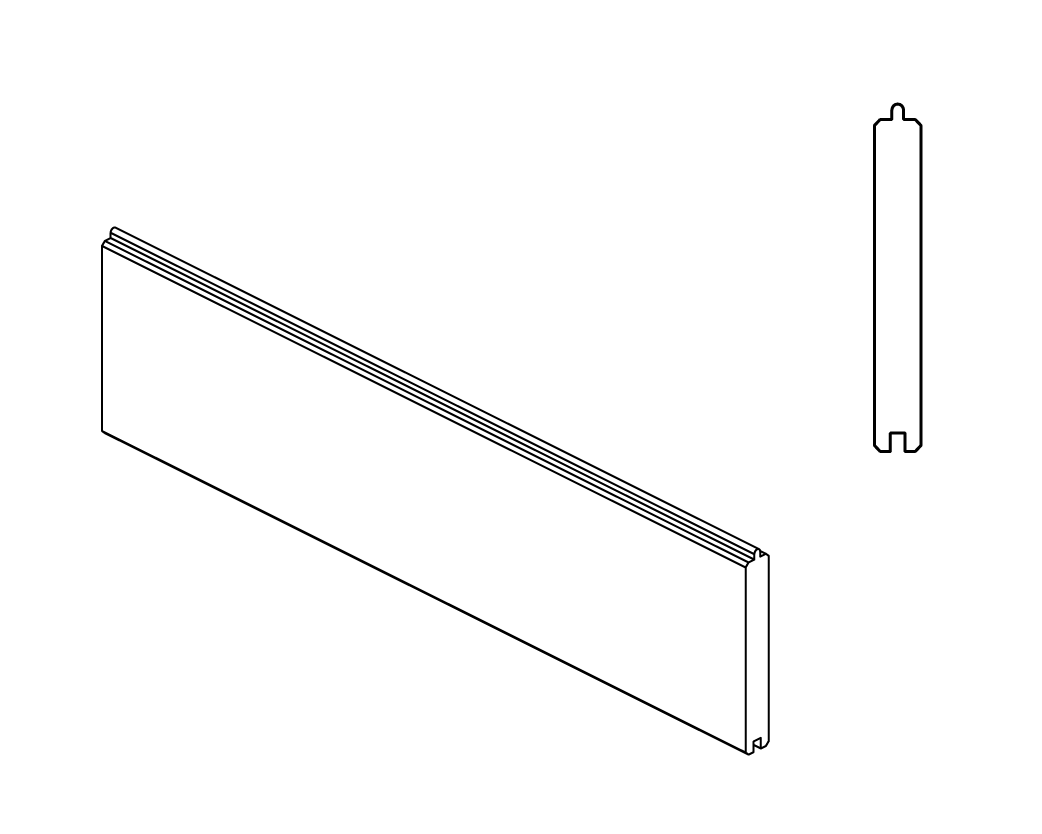
⅝" × 4½" × 17½"
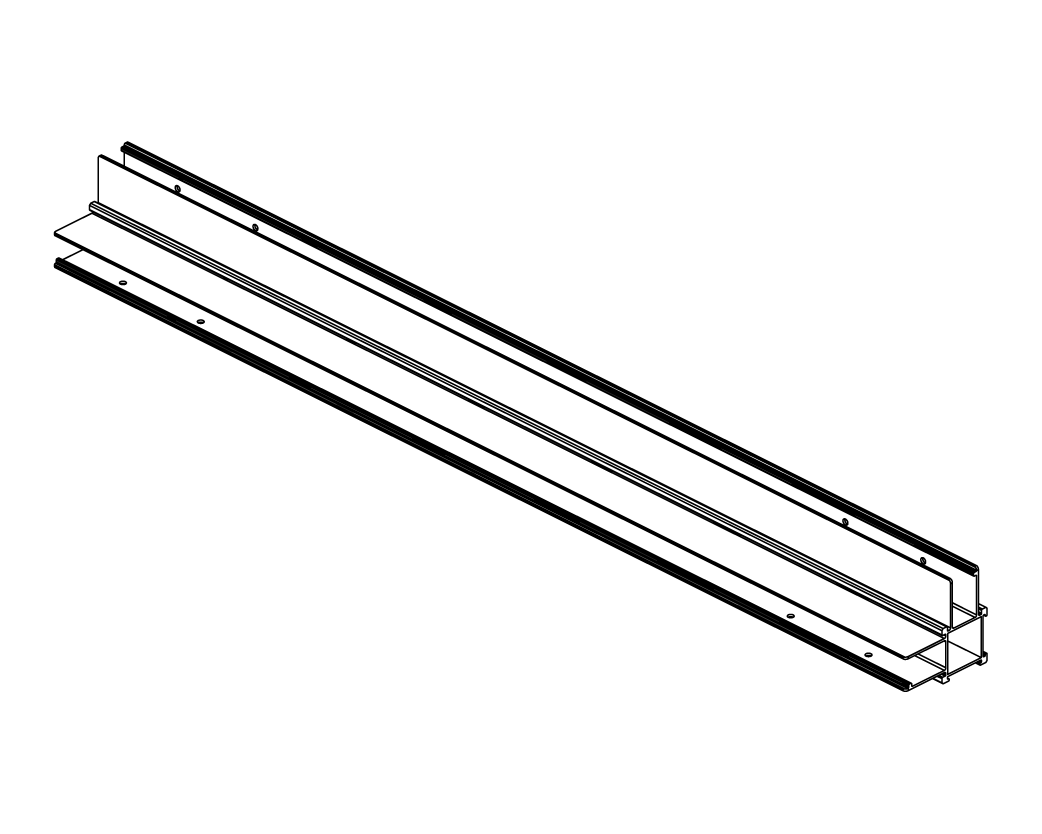
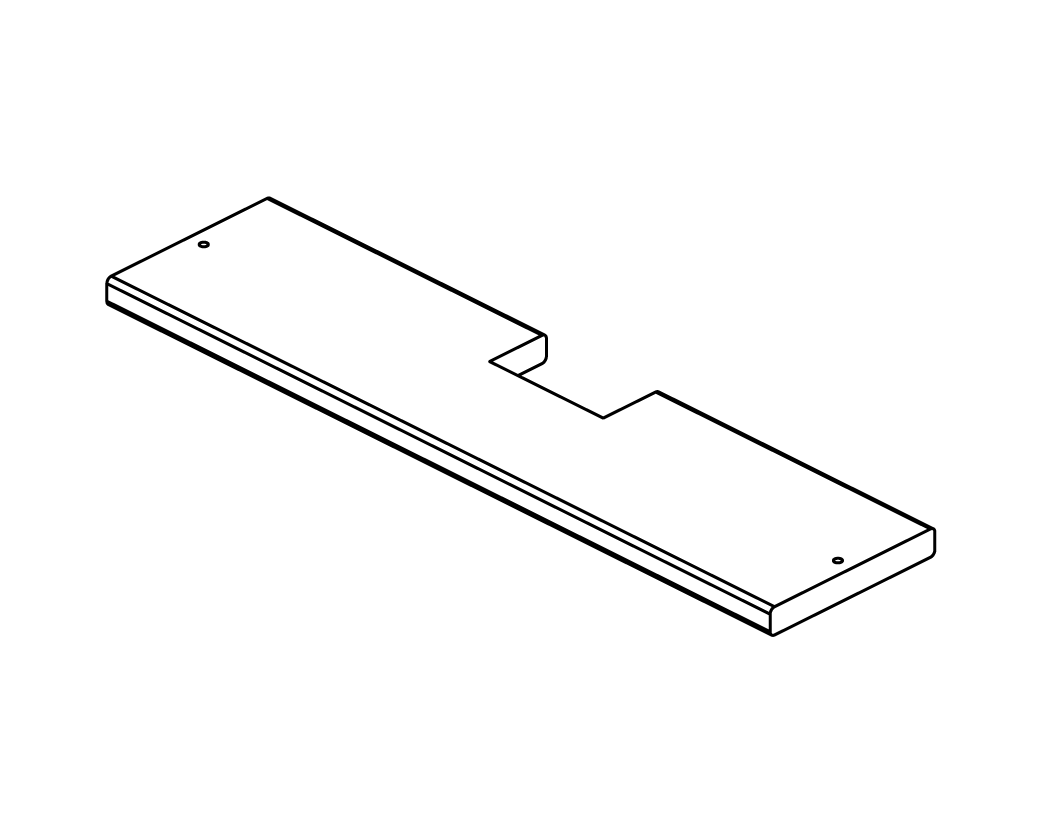
C. Floor Support Board (4)
1½" × 4½" × 17½"
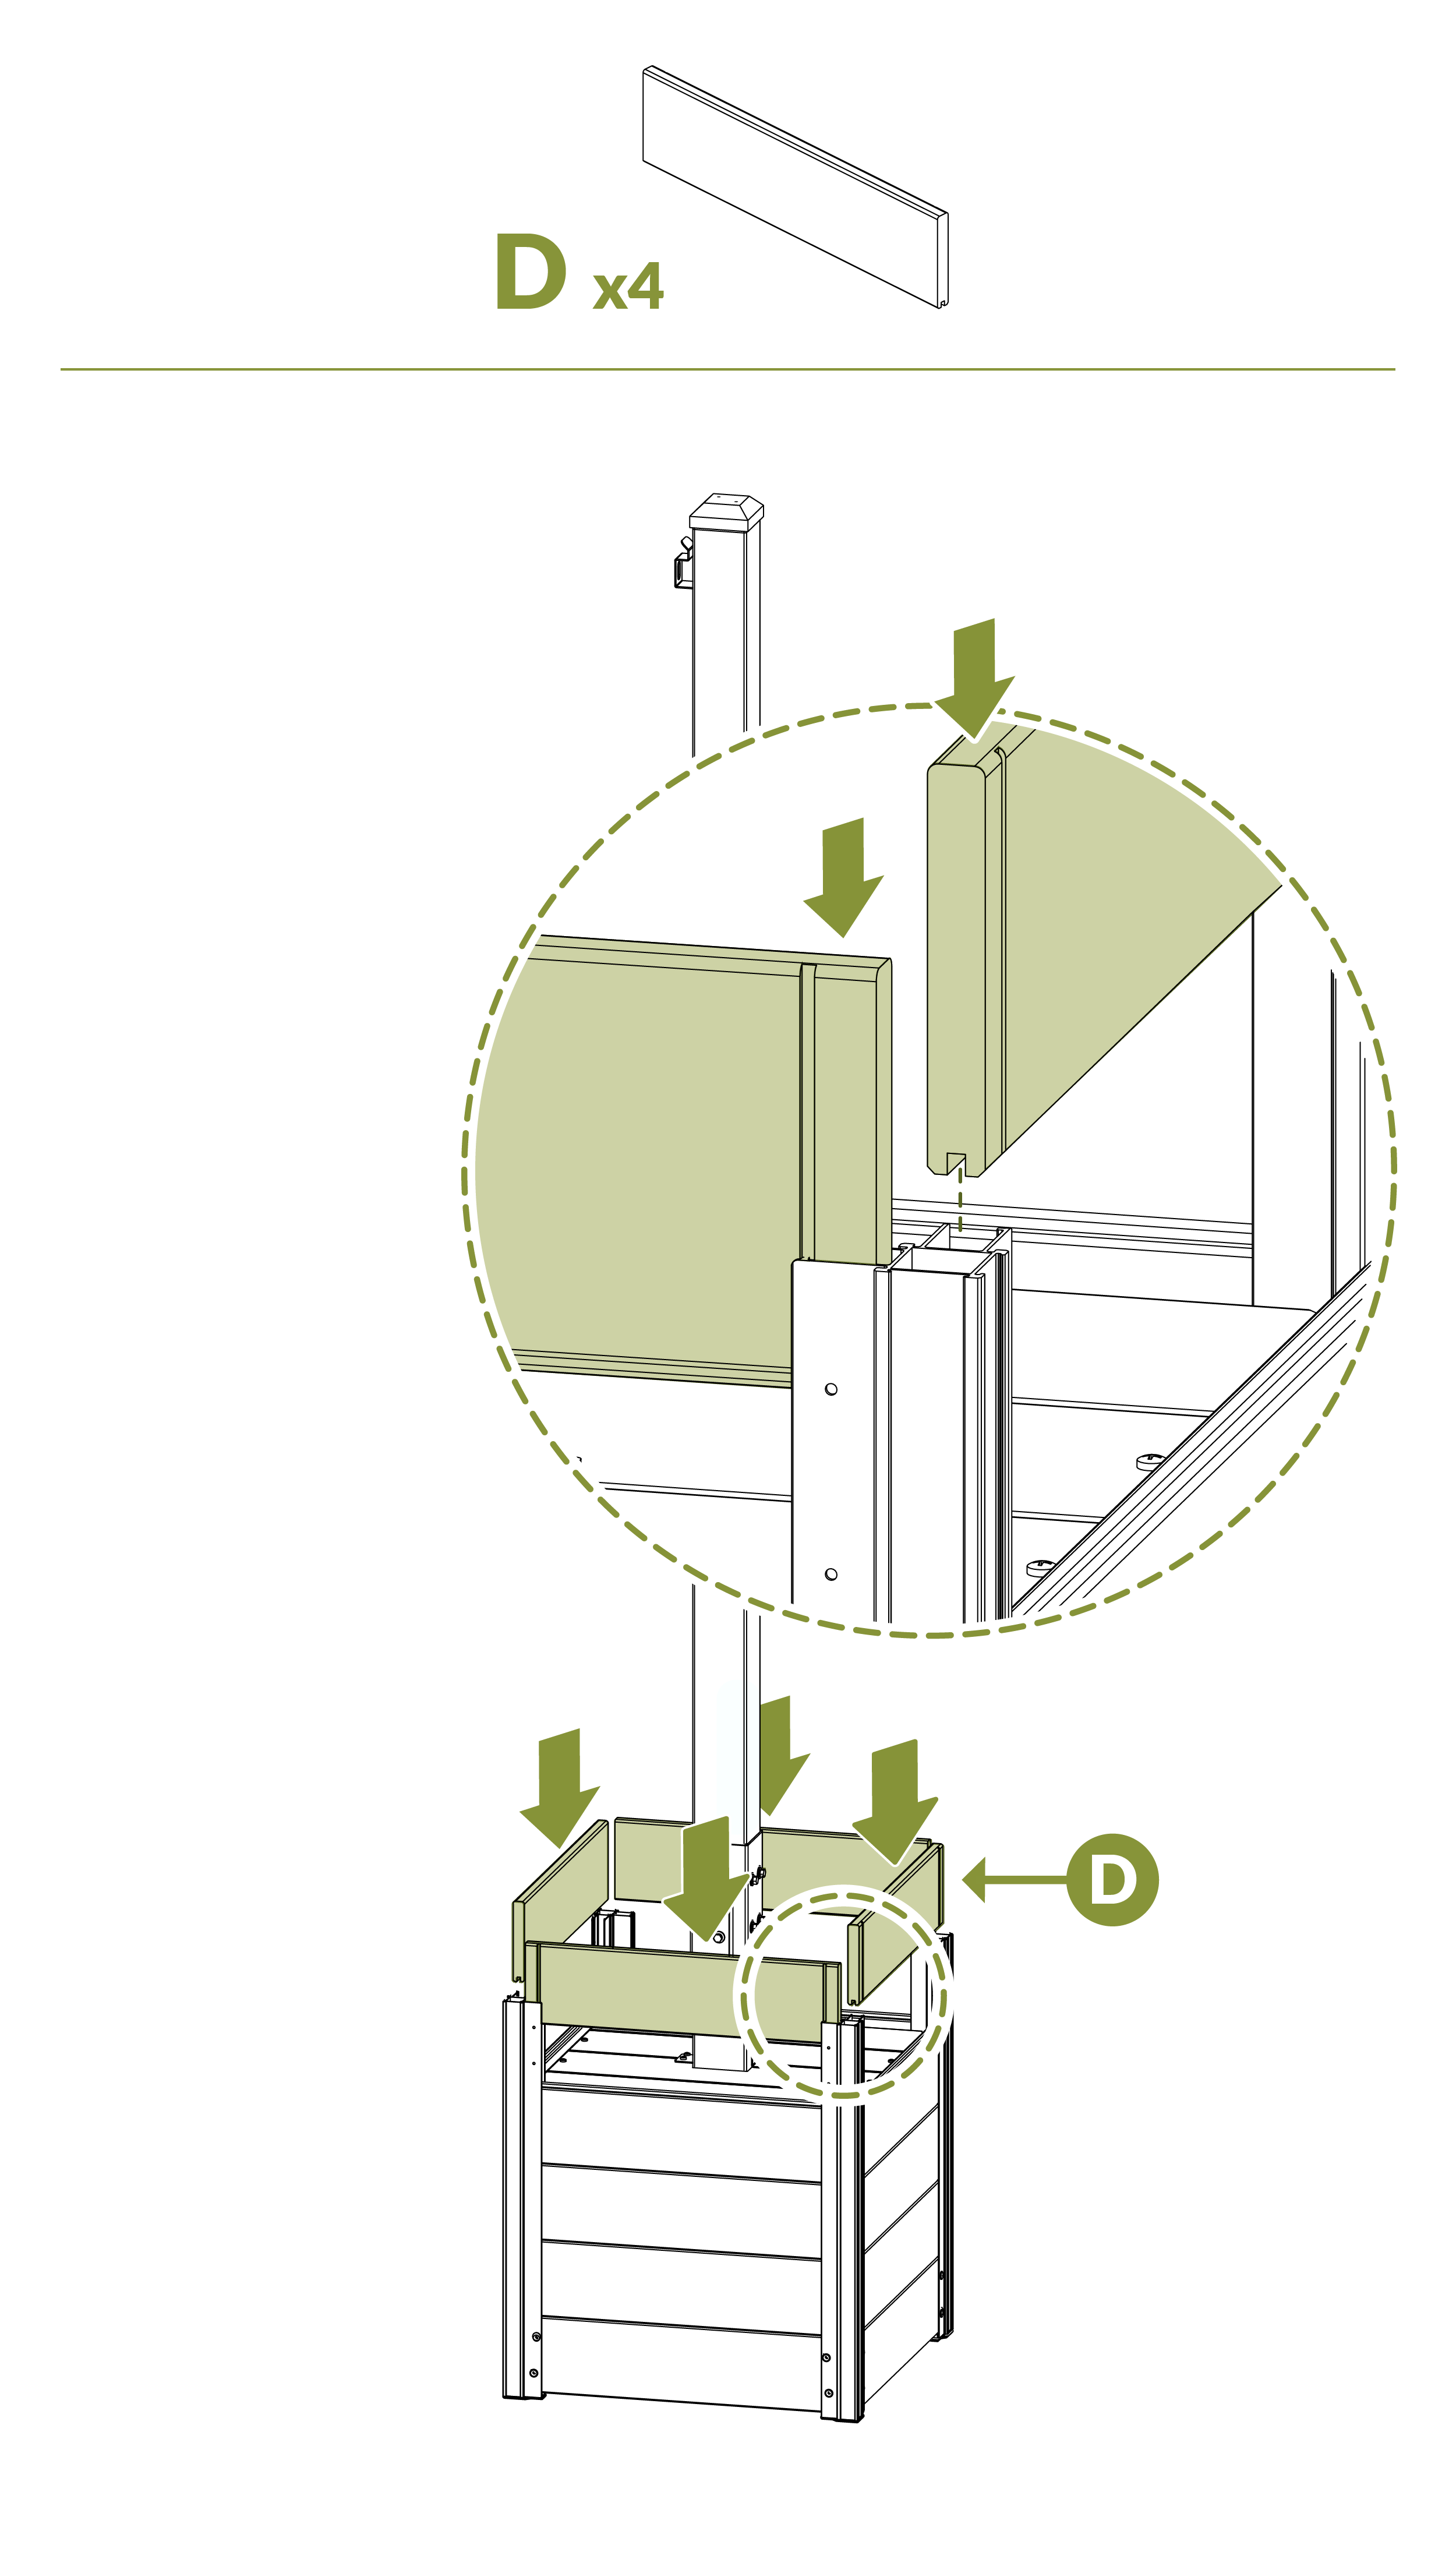
D. Top Board (4)
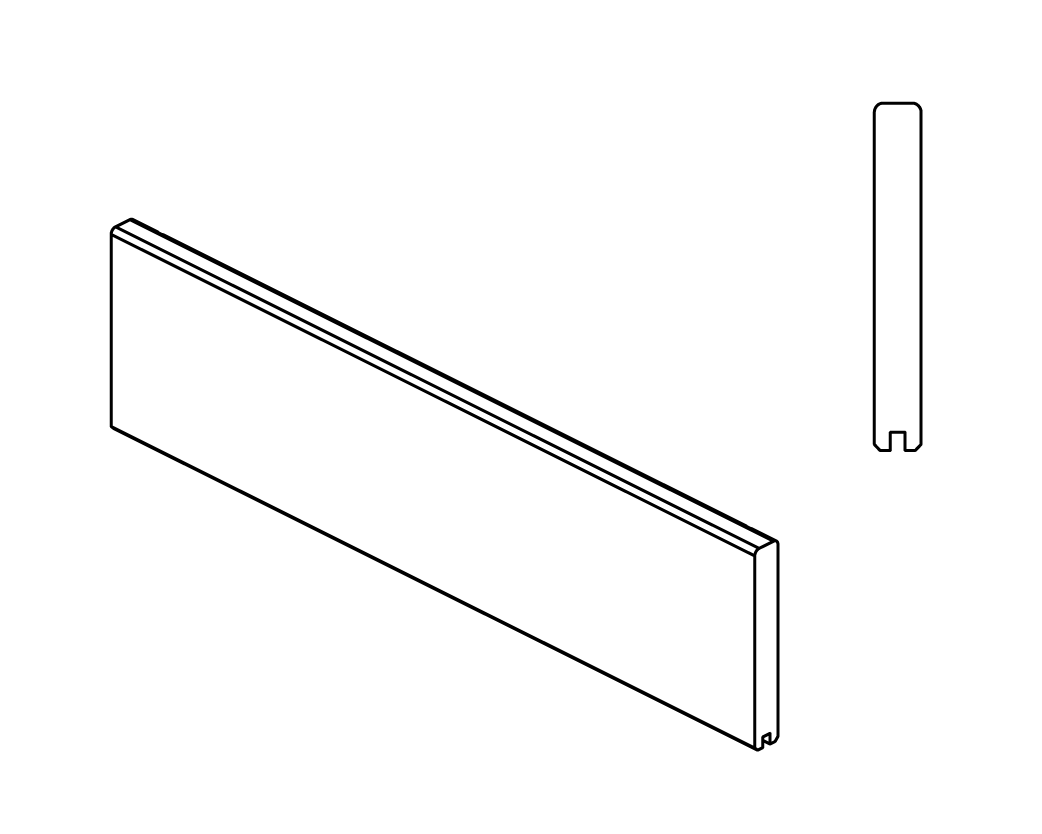
⅝" × 4½" × 17½"
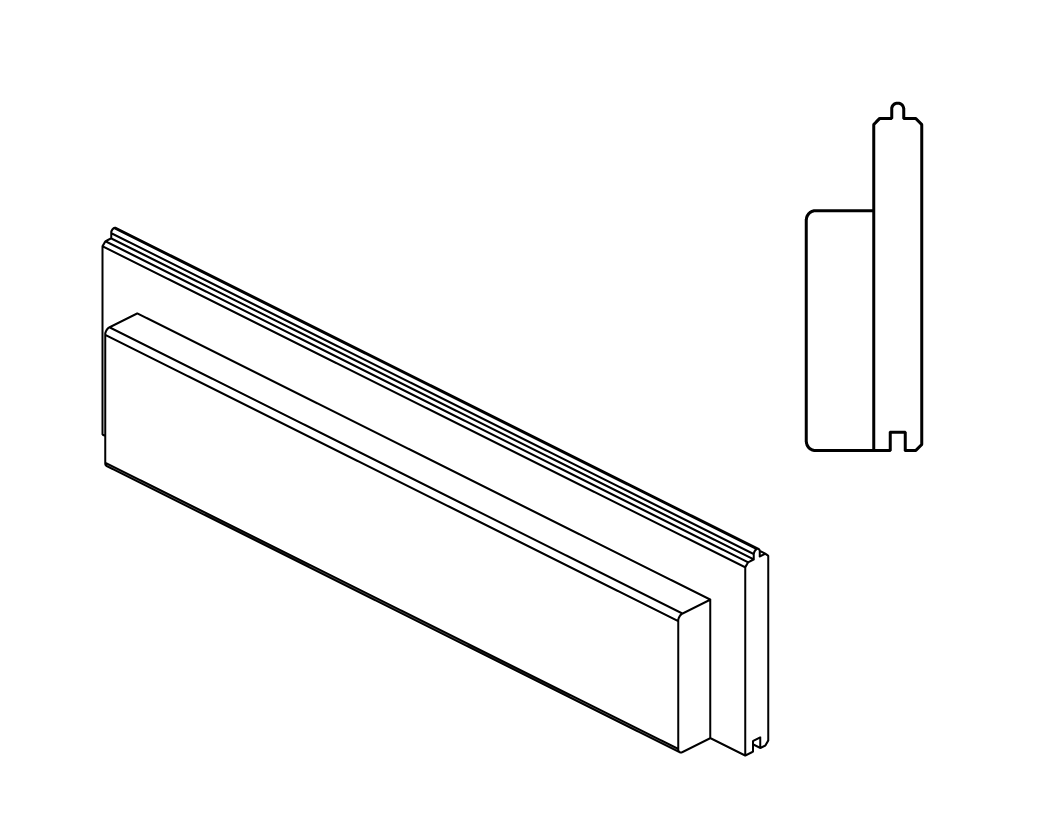
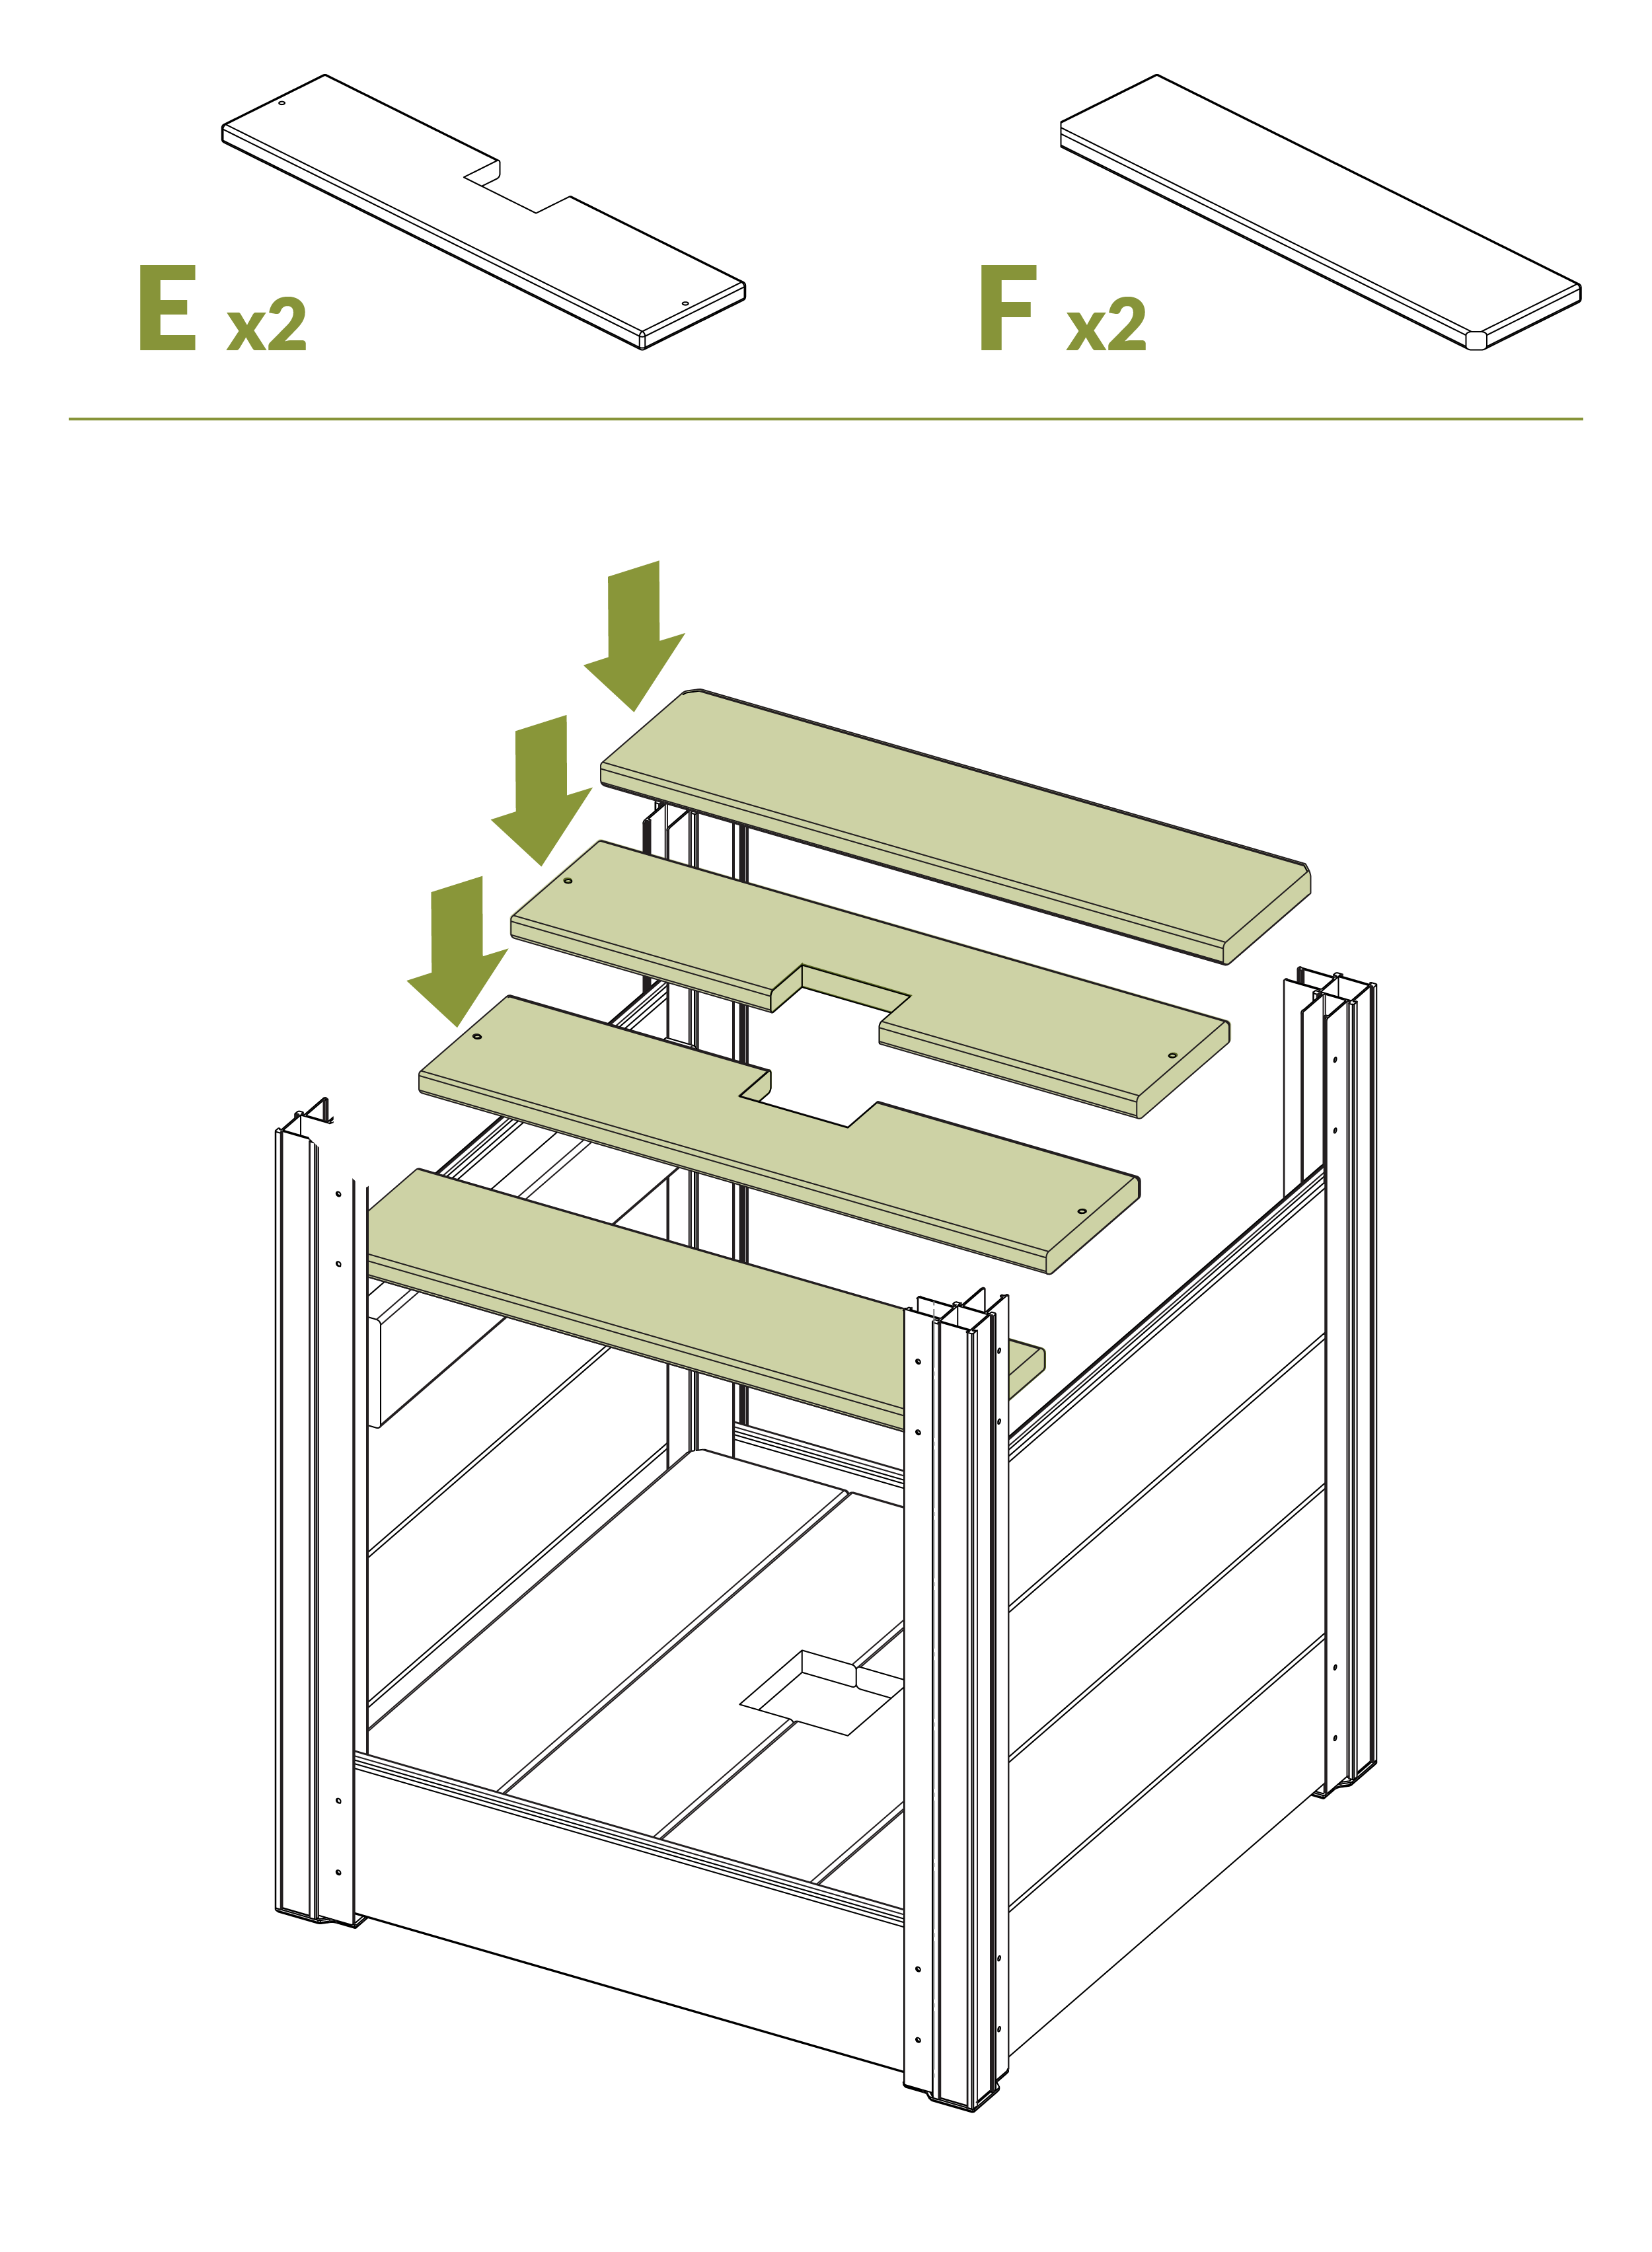
E. Inside Floor Board (4)
⅝" × 4½" × 17¾"
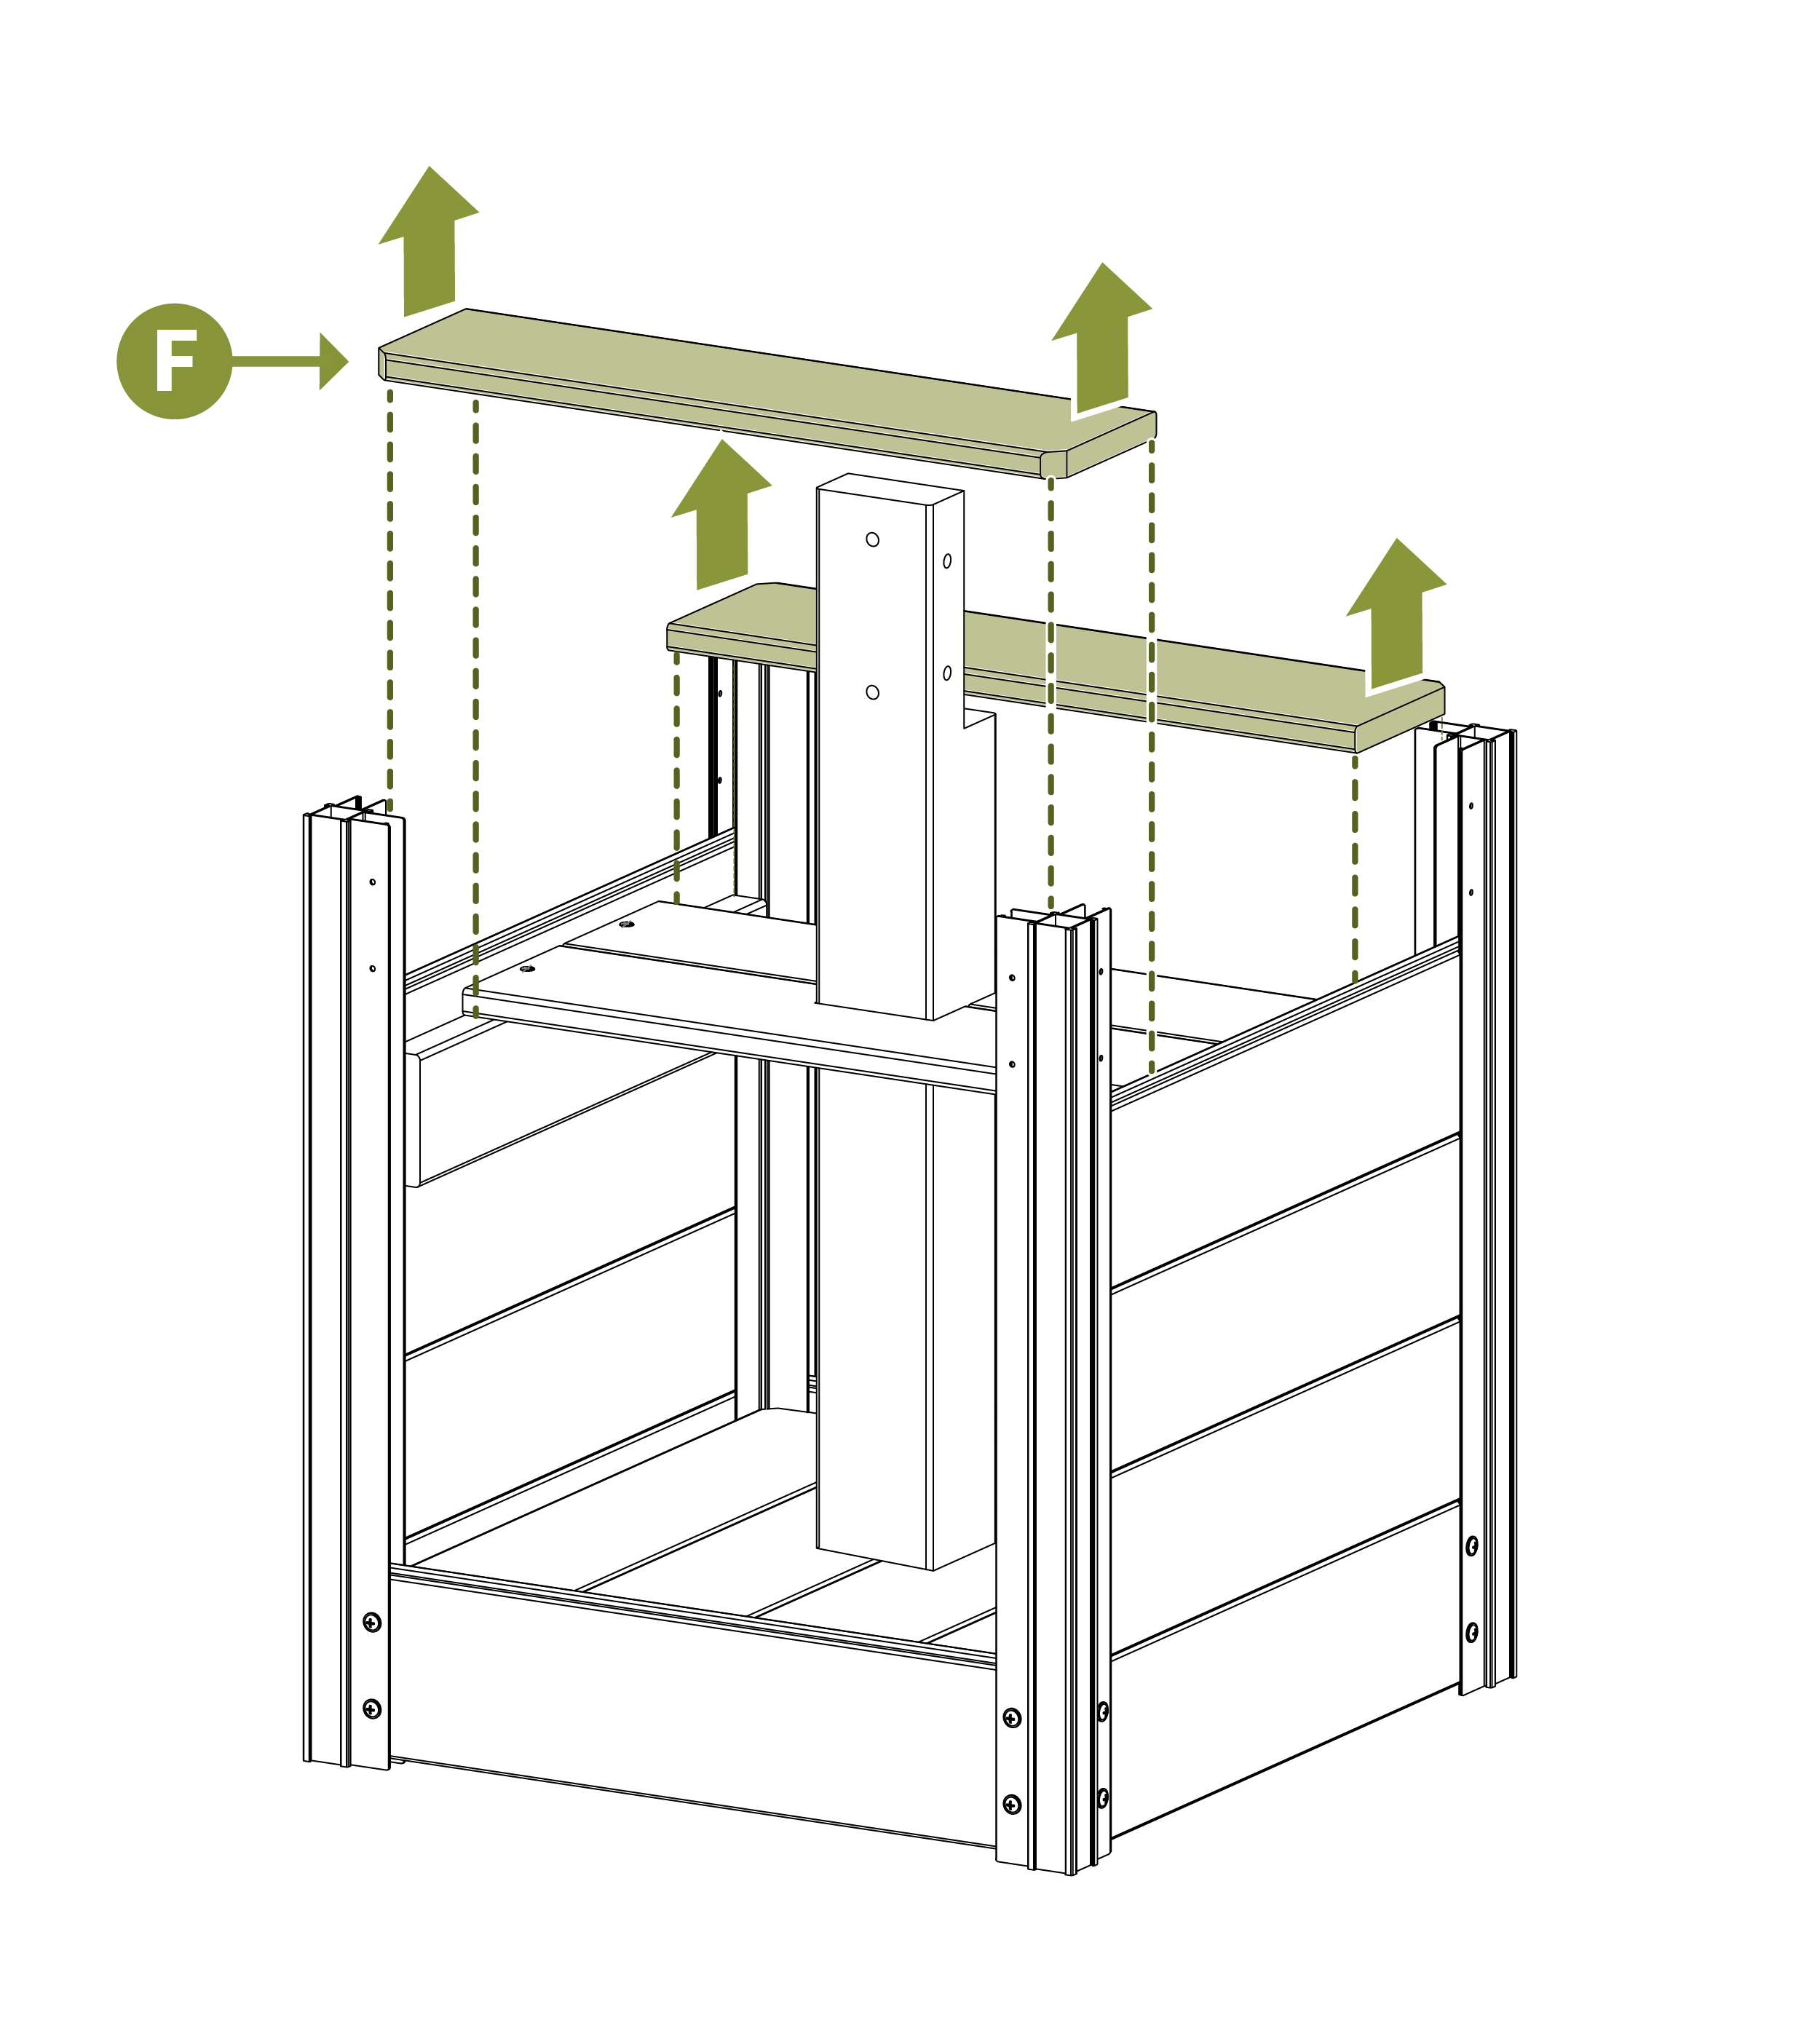
F. Outside Floor Board (4)
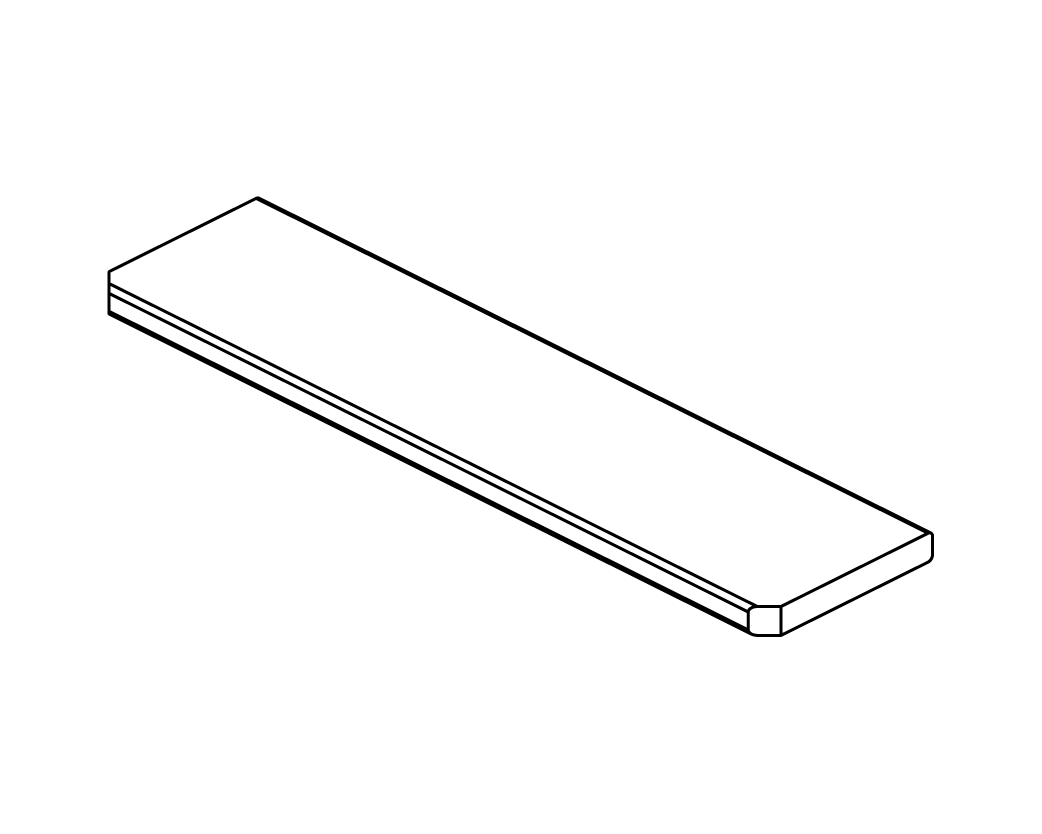
⅝" × 4½" × 17¾"
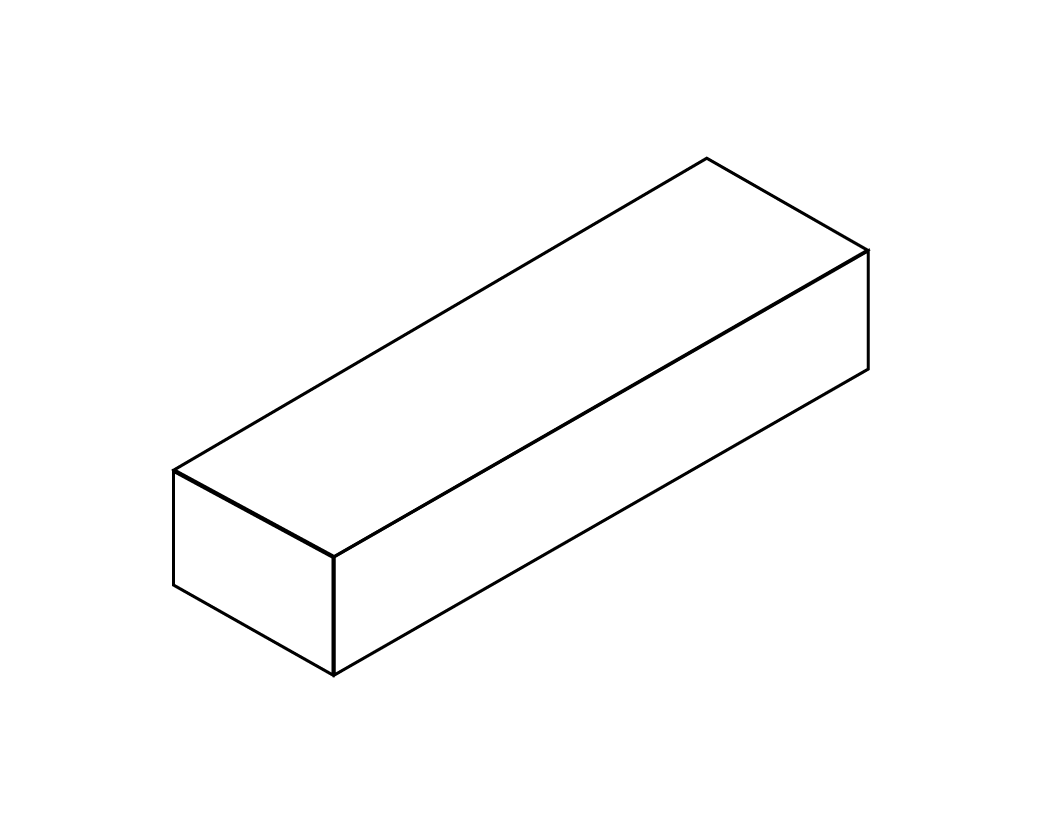
G. Wooden Post Cap (1)
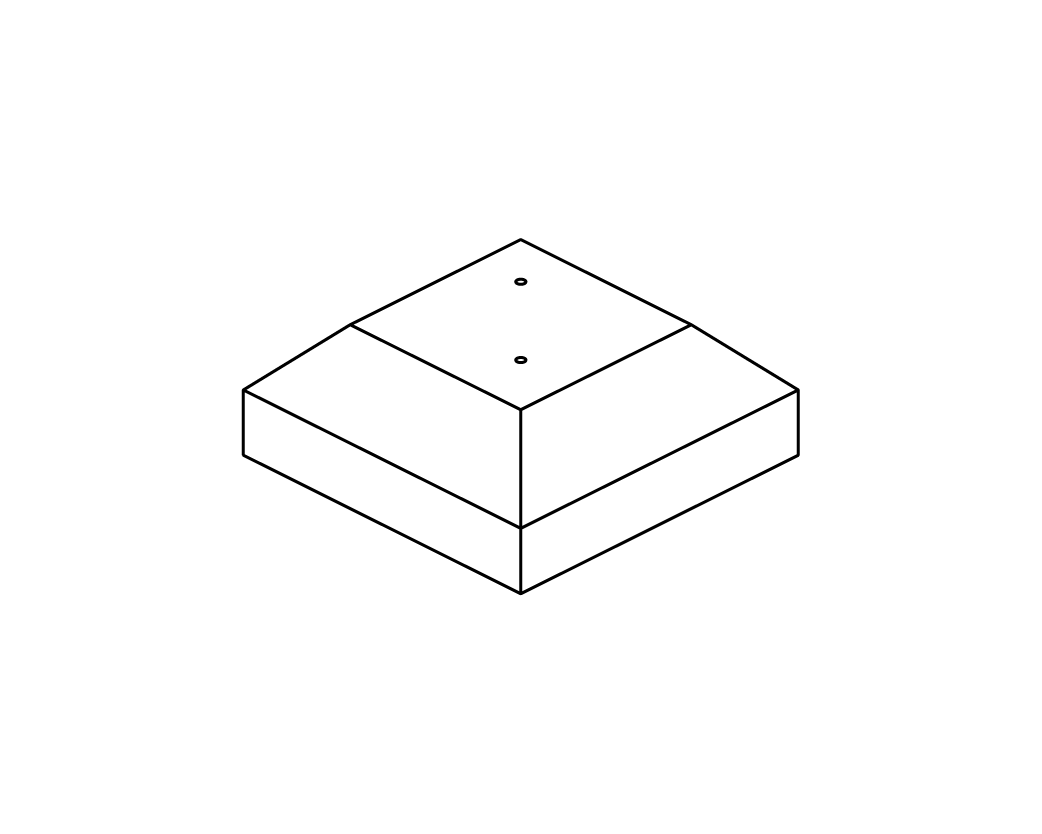
3¼" × 3¼" × 1¼"
H. Bottom Light Post (1)
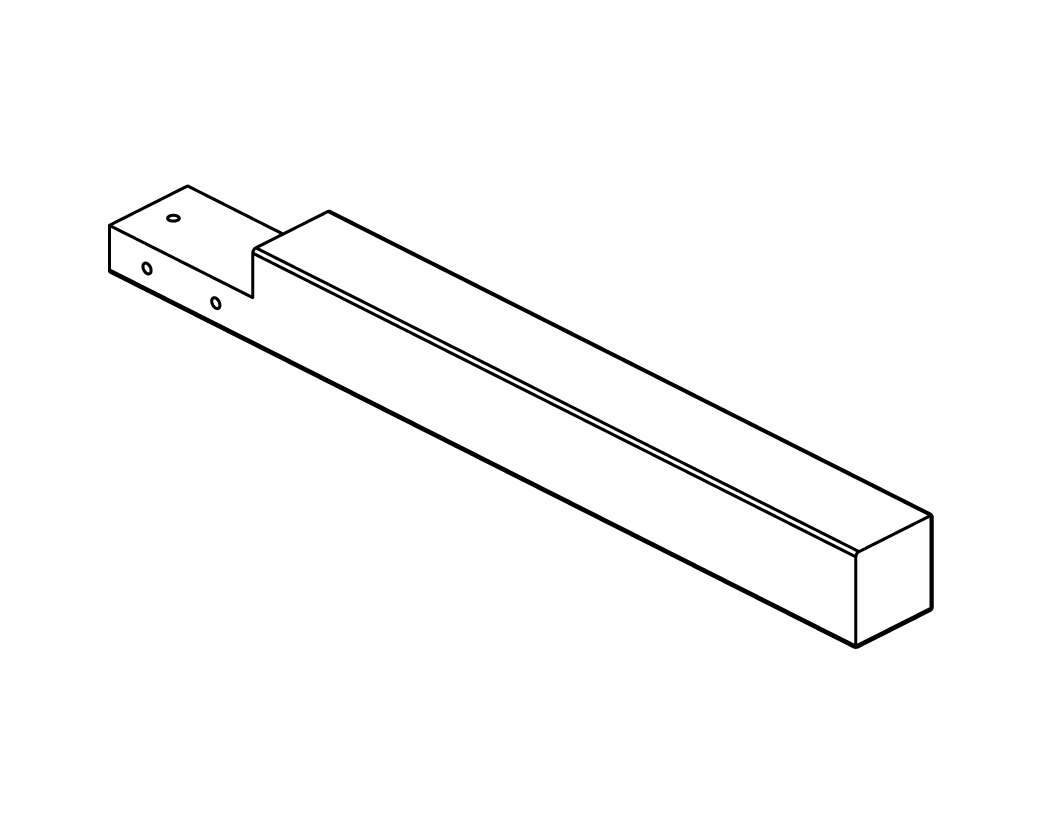
3" × 3" × 28⅝"
I. Top Light Post (1)
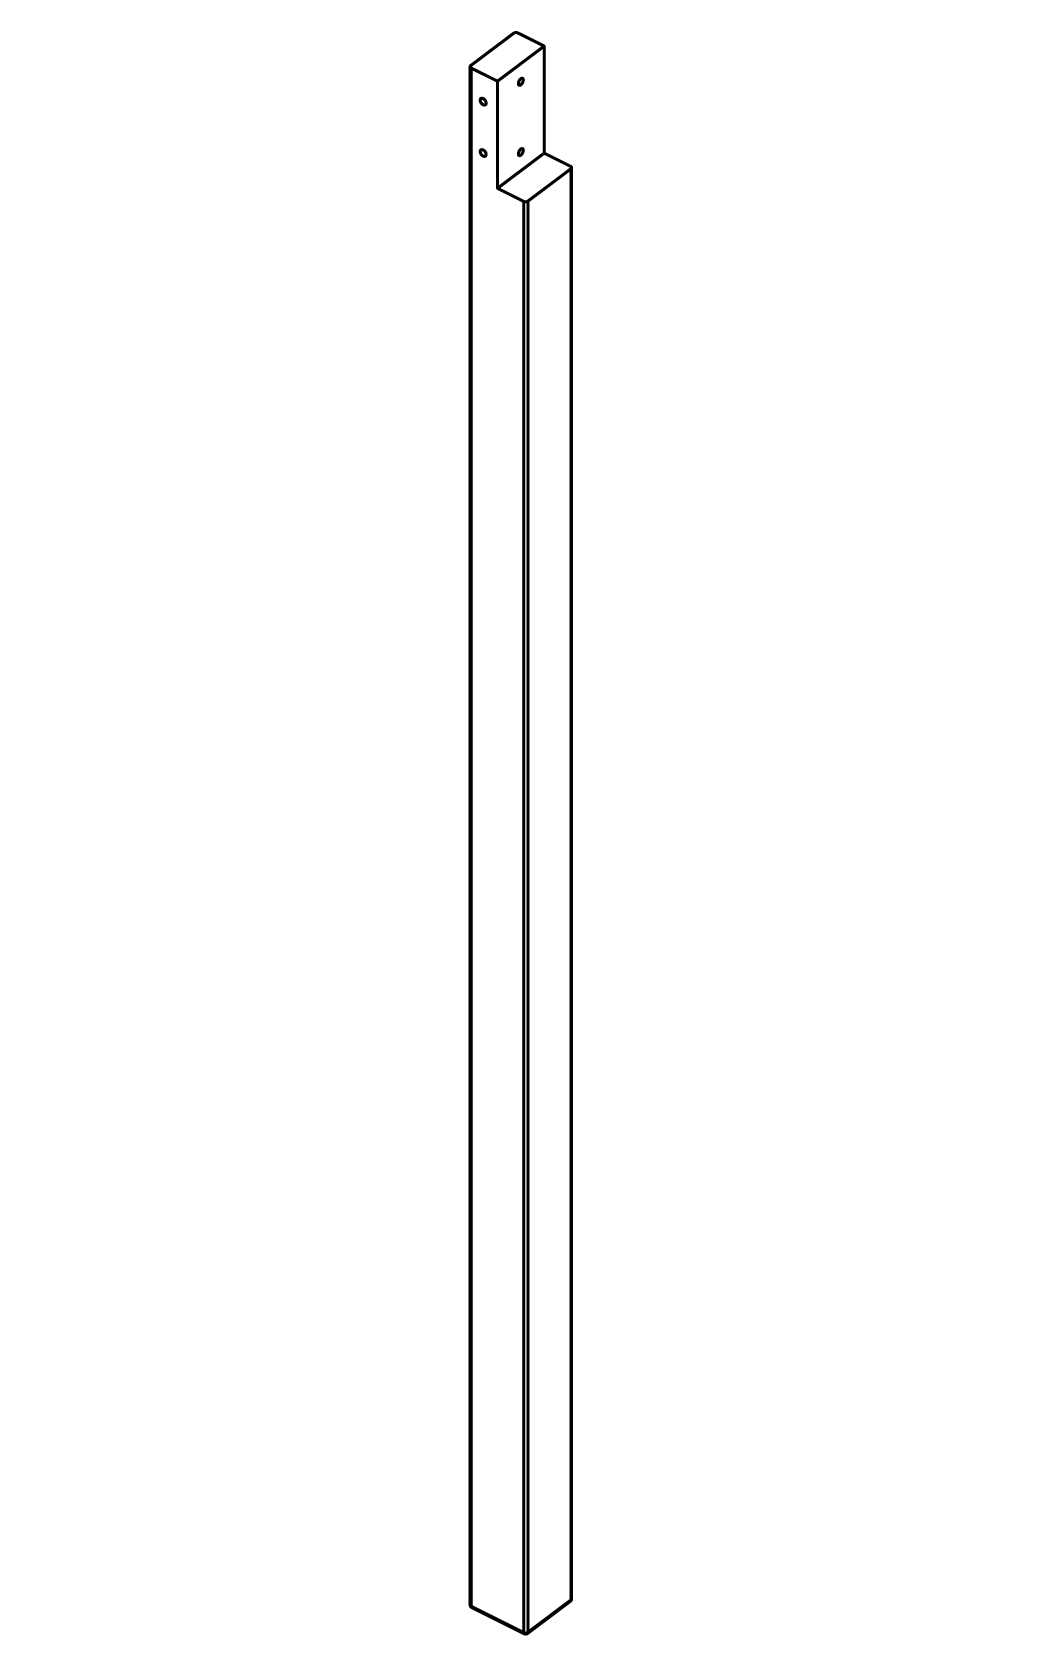
3" × 3" × 79⅛"
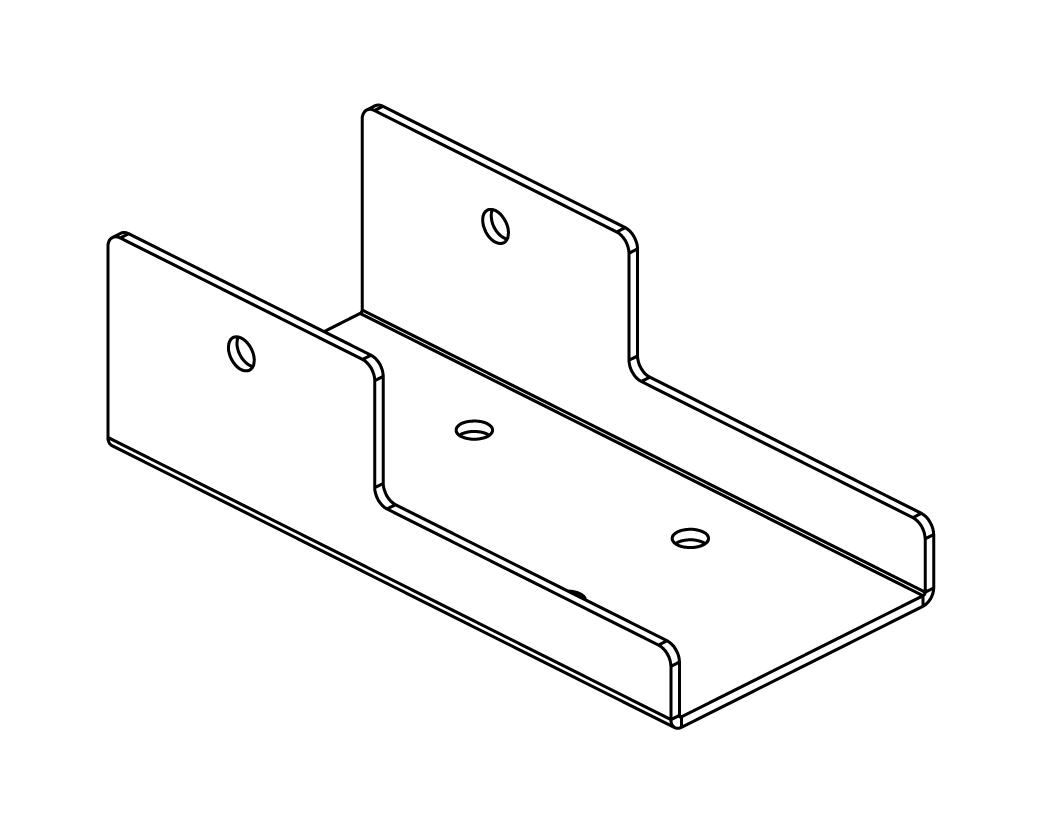
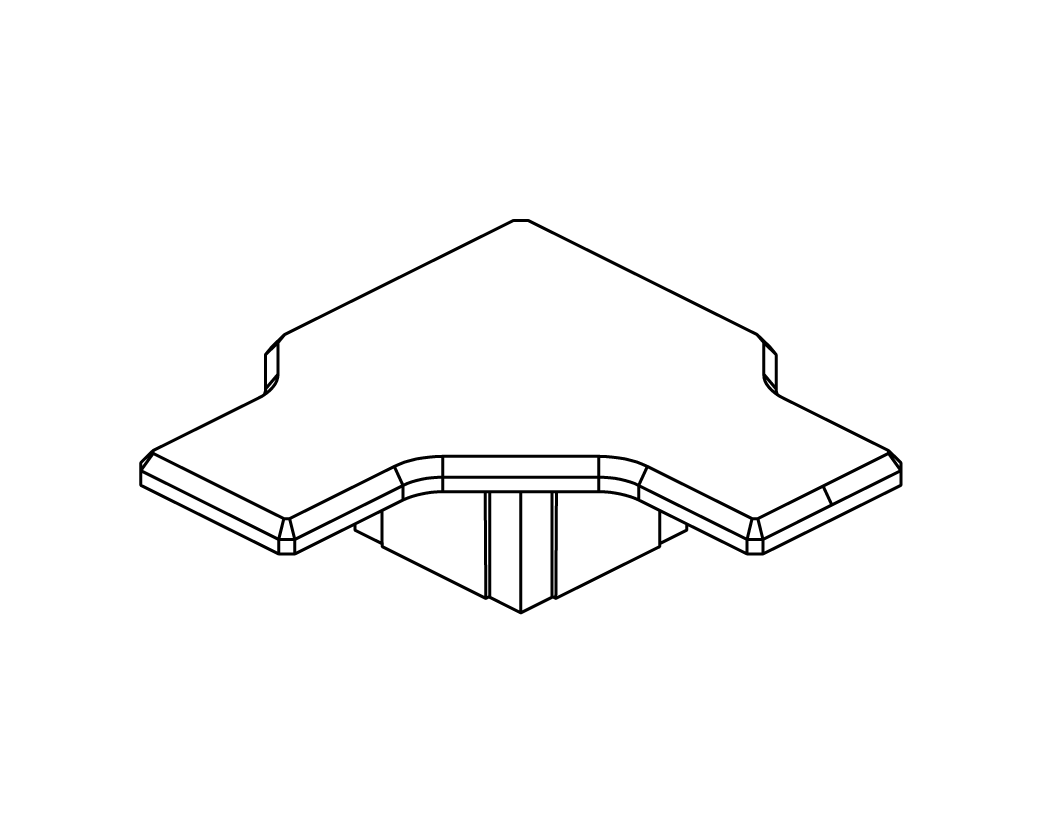
J. Post Bracket (2)
K. Hook (1)

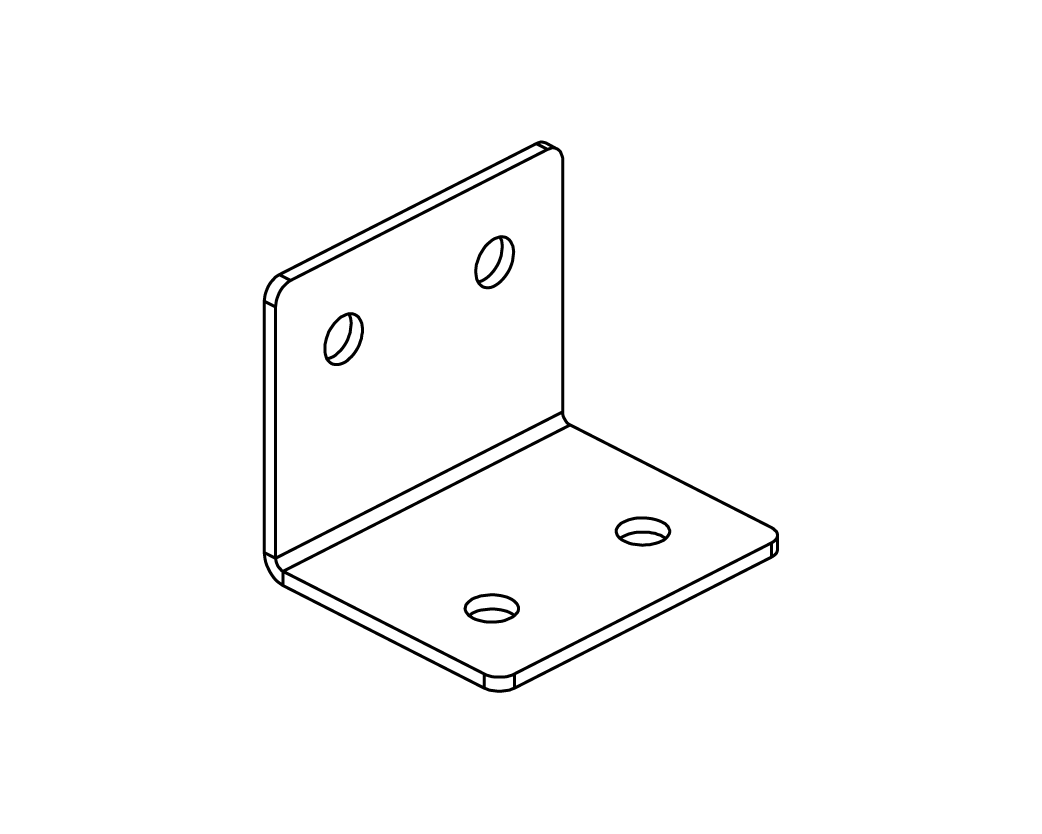
L. L-Bracket (4)
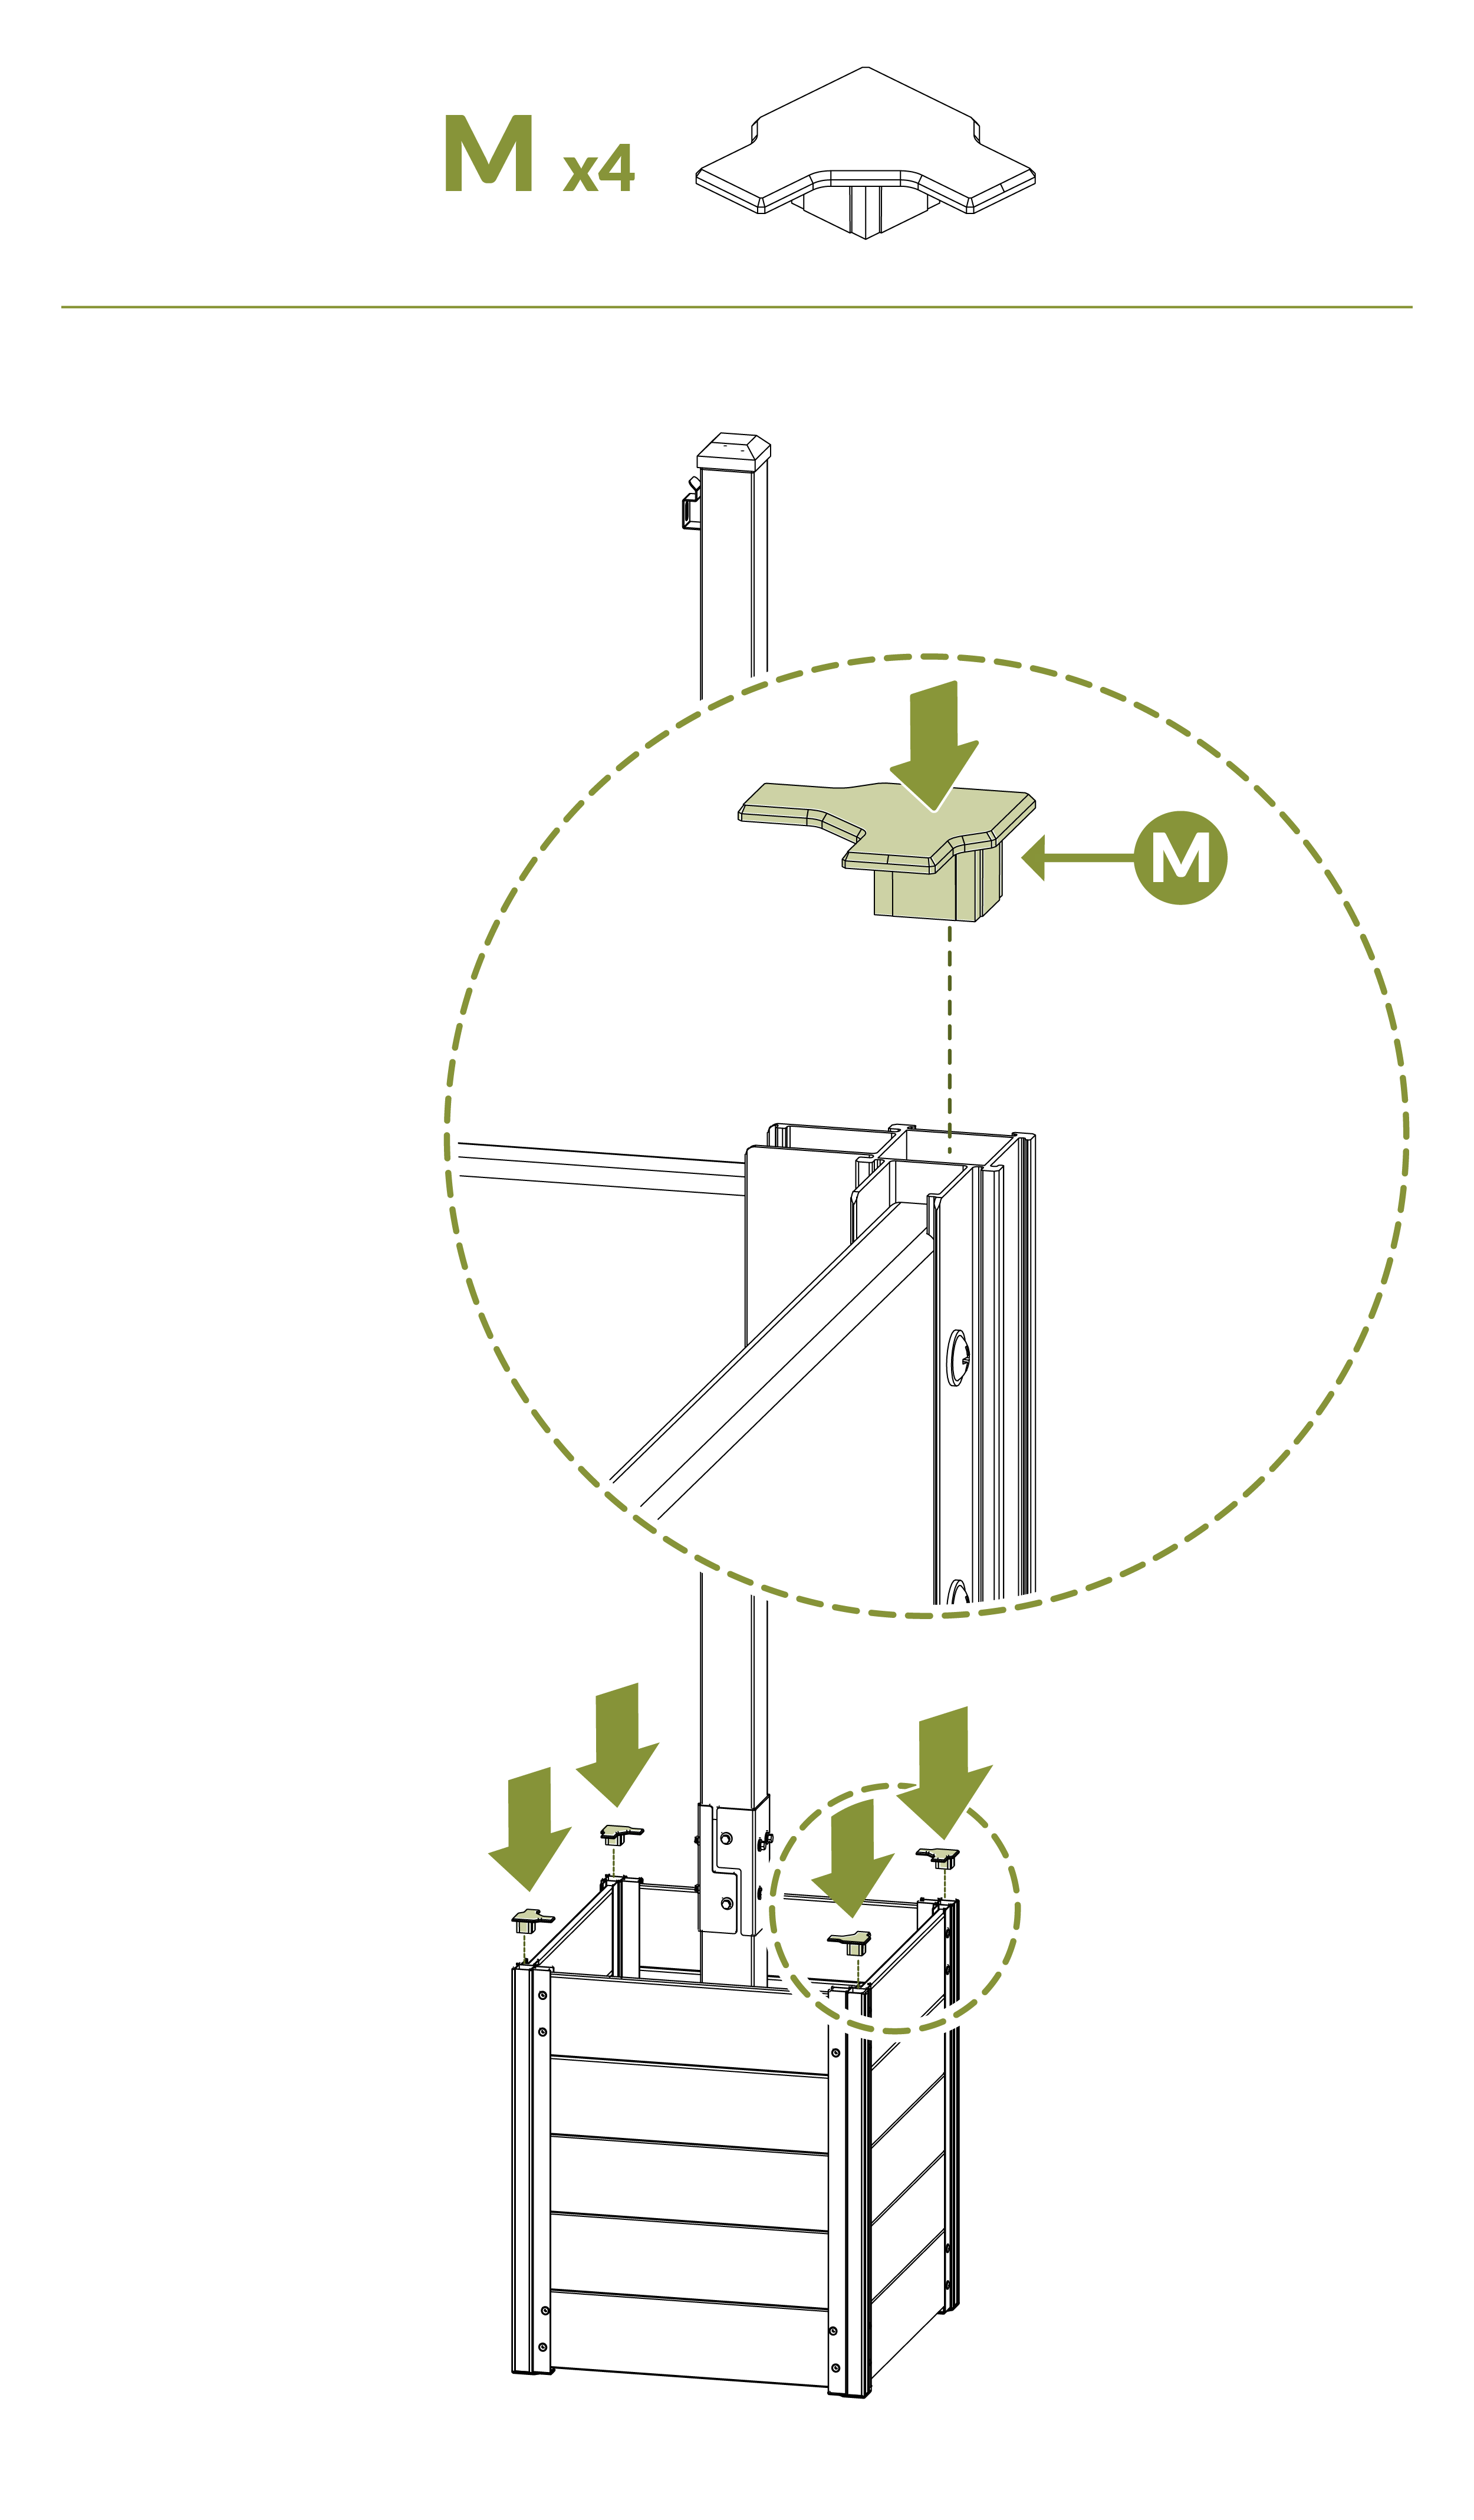
M. Post Caps (8)
N. Spacer (4)
O. 2" Countersunk Wood Screw (2)

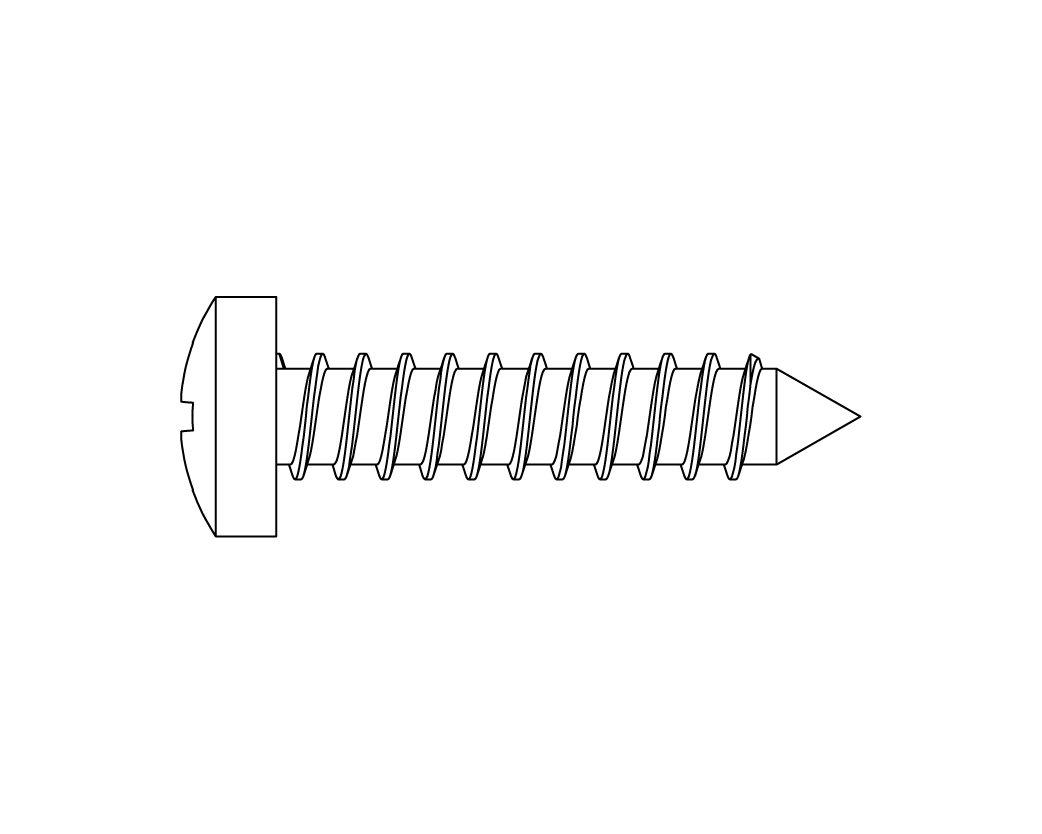
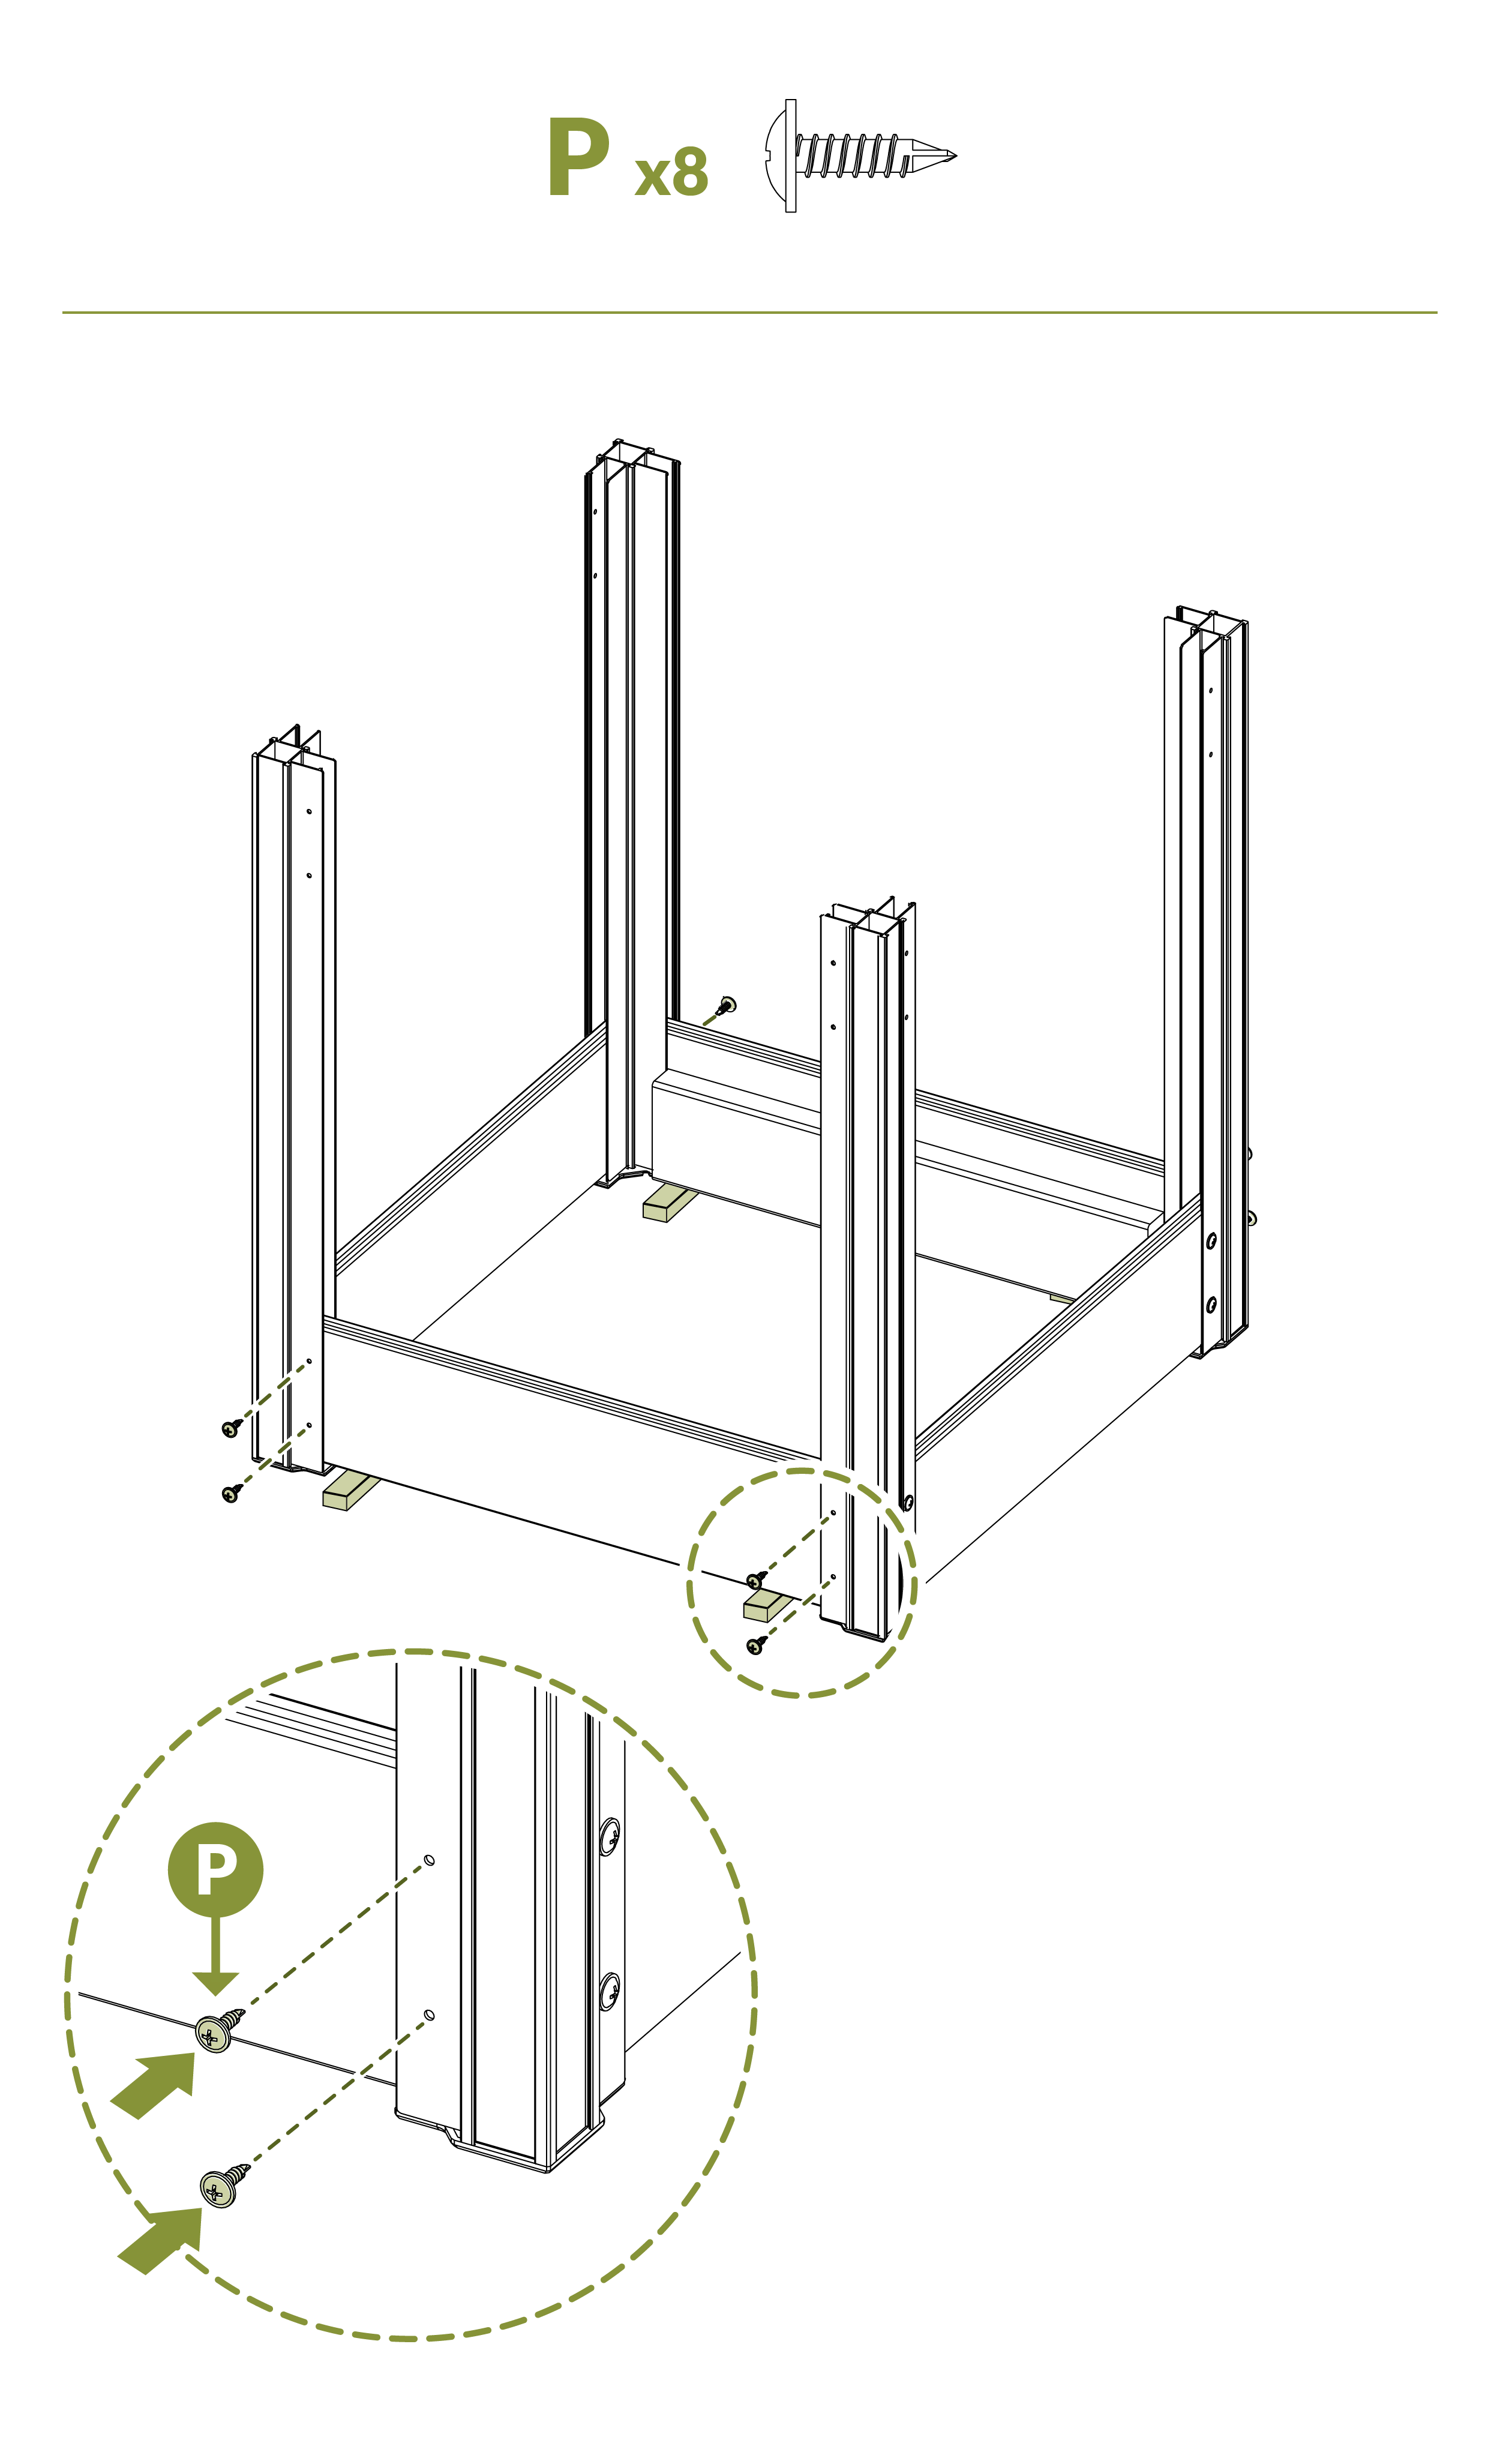
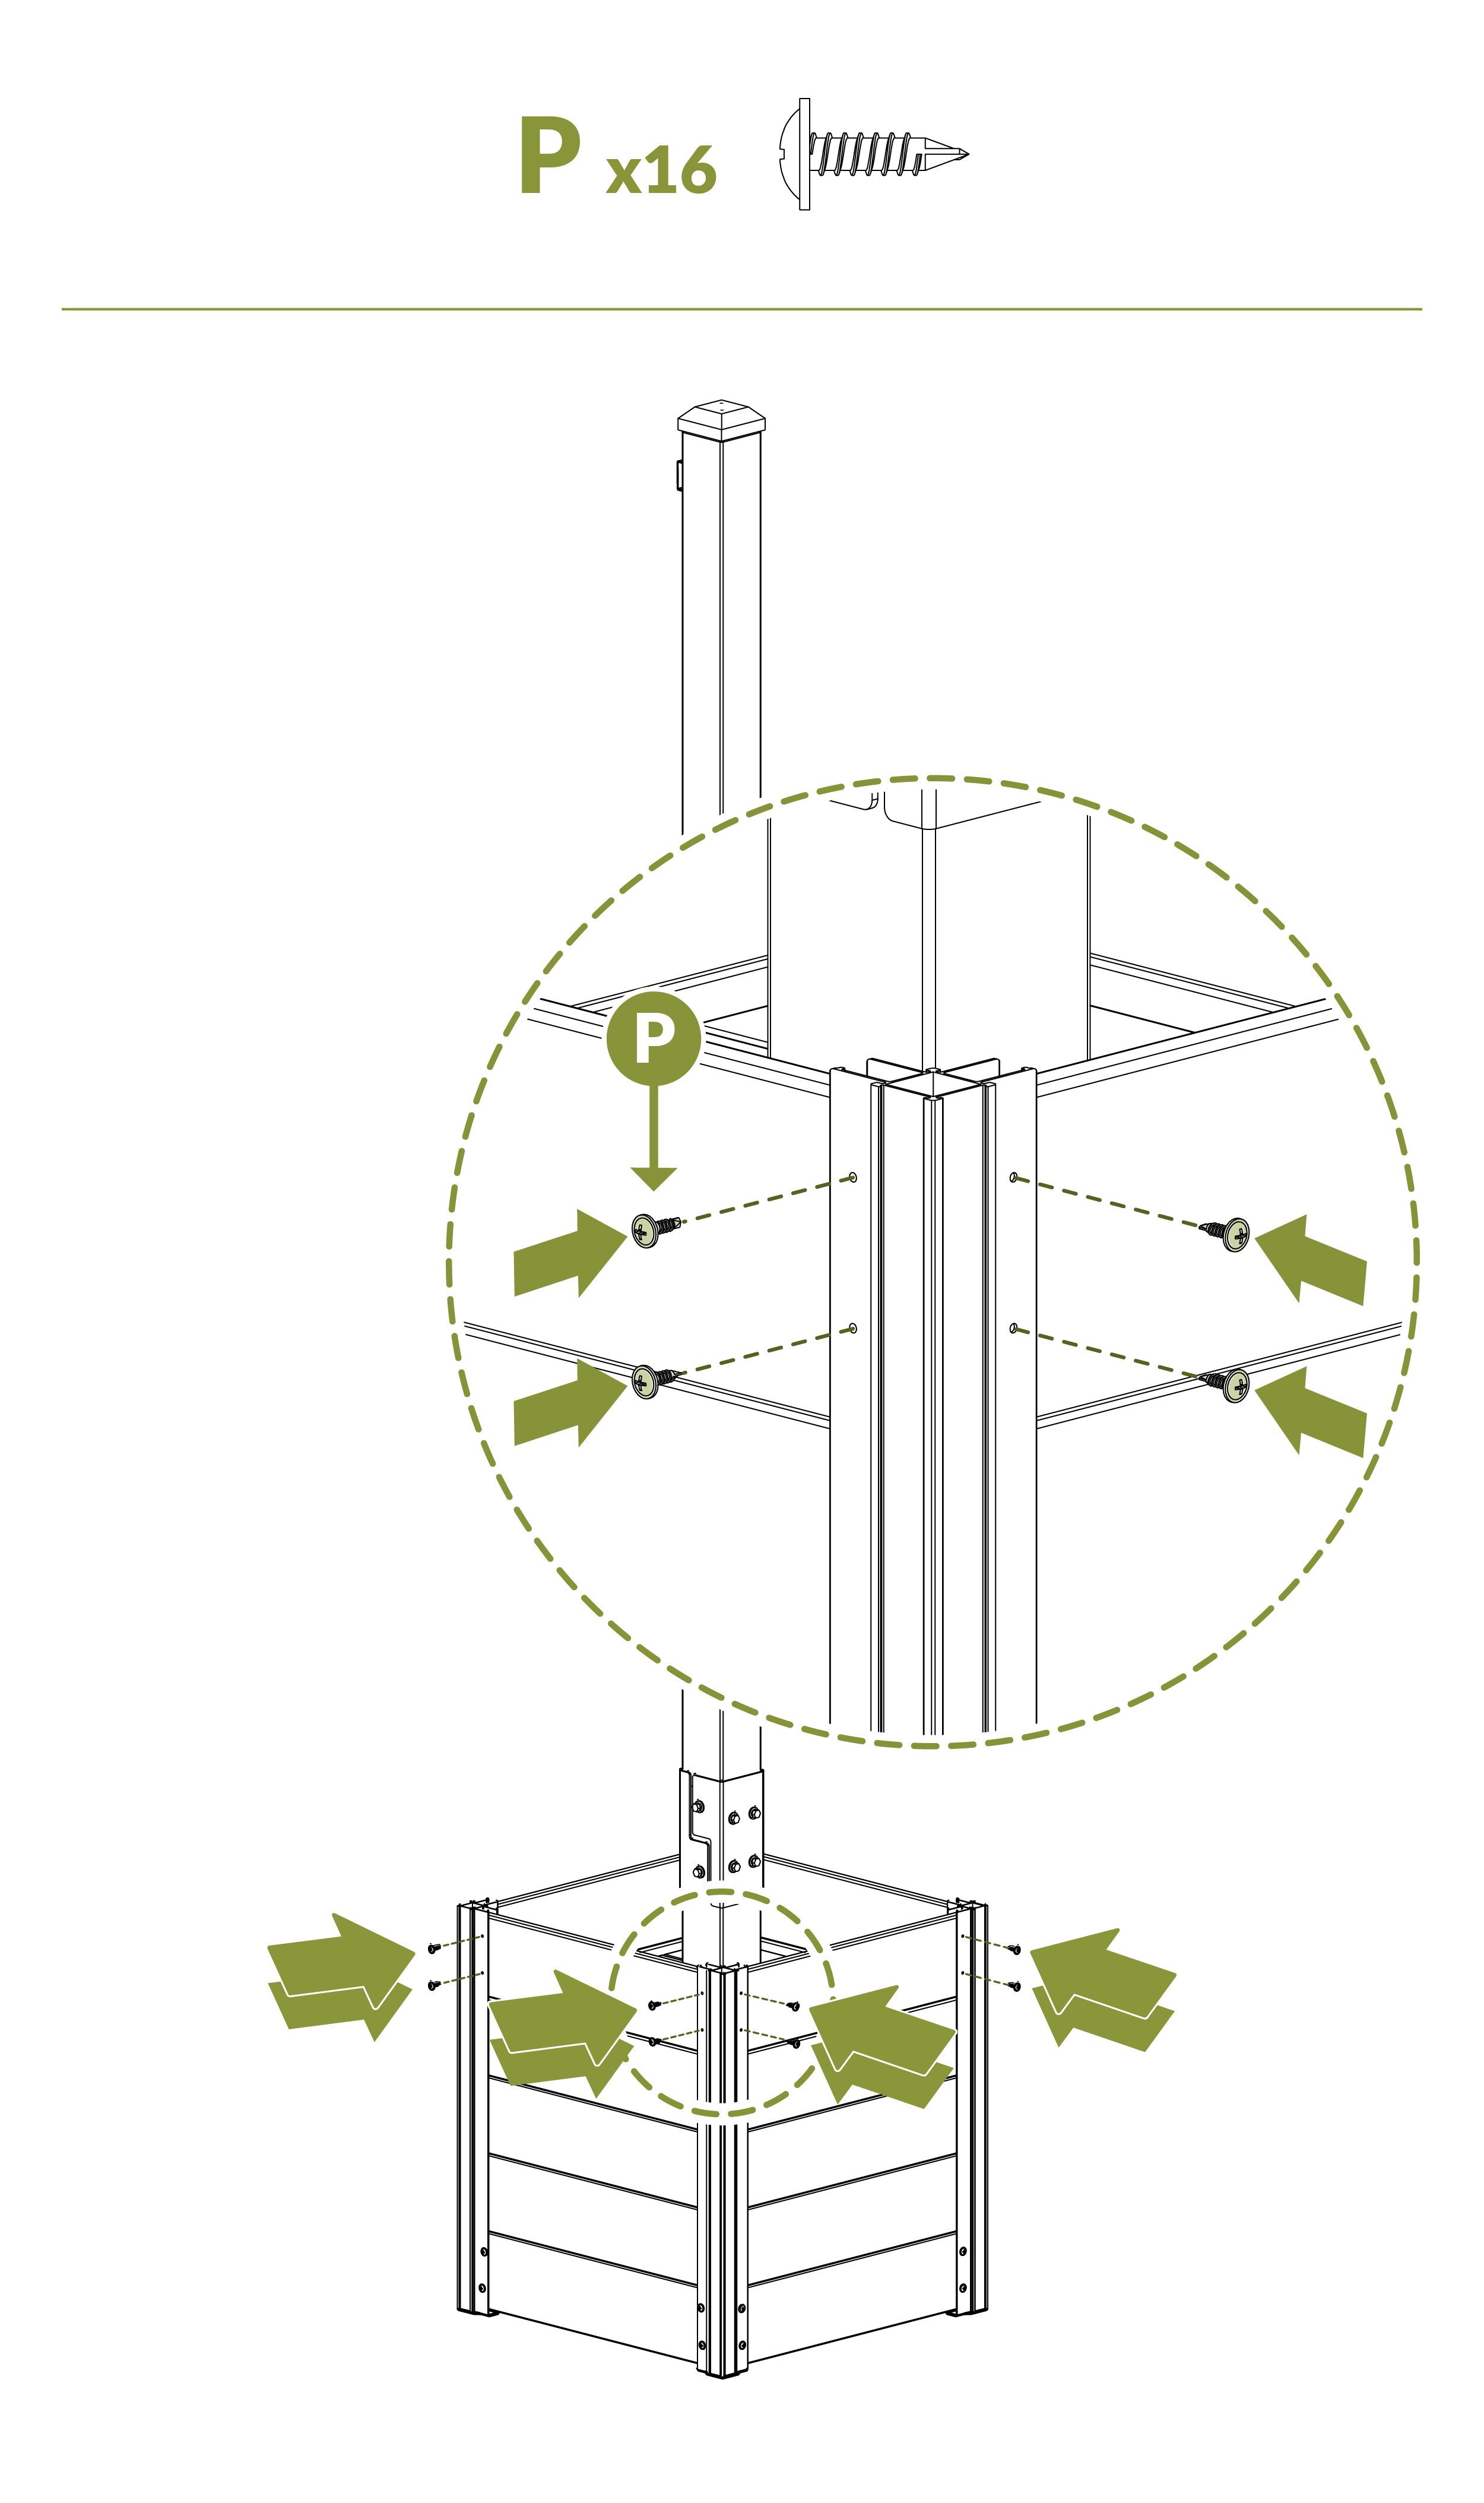
P. ⅝" Round Head Self-Drilling Screw (32)
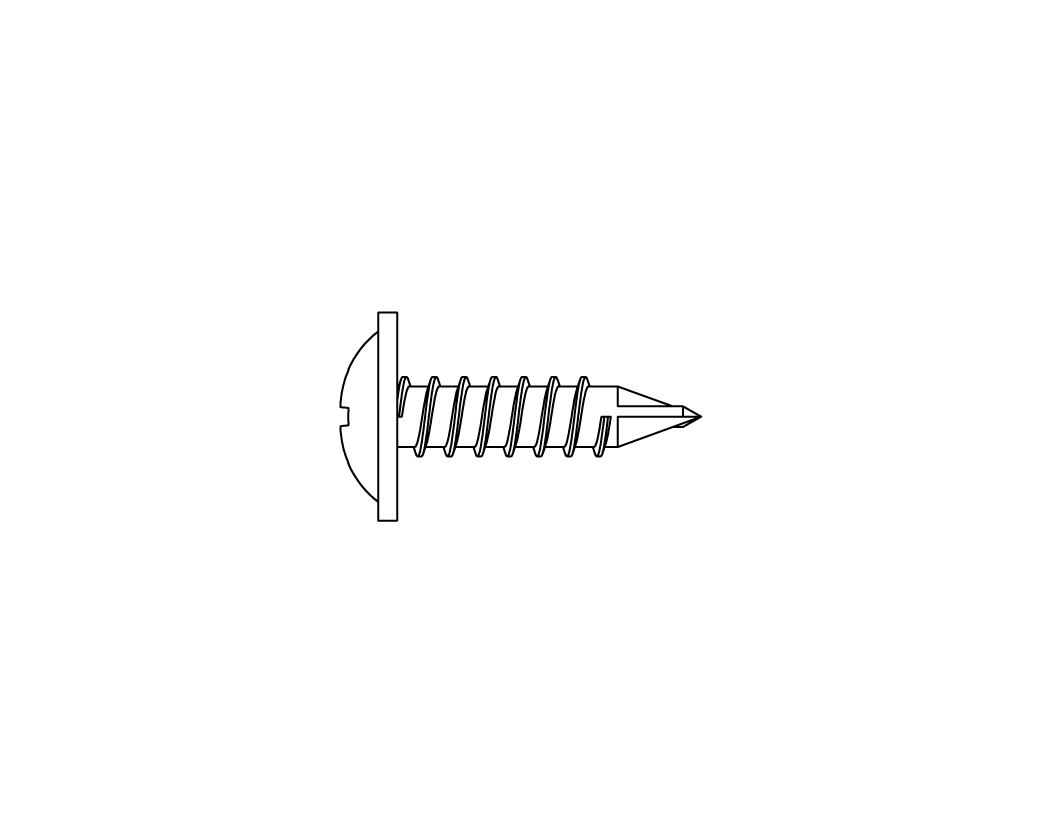
Q. ⅝" Self-Tapping Screw (18)
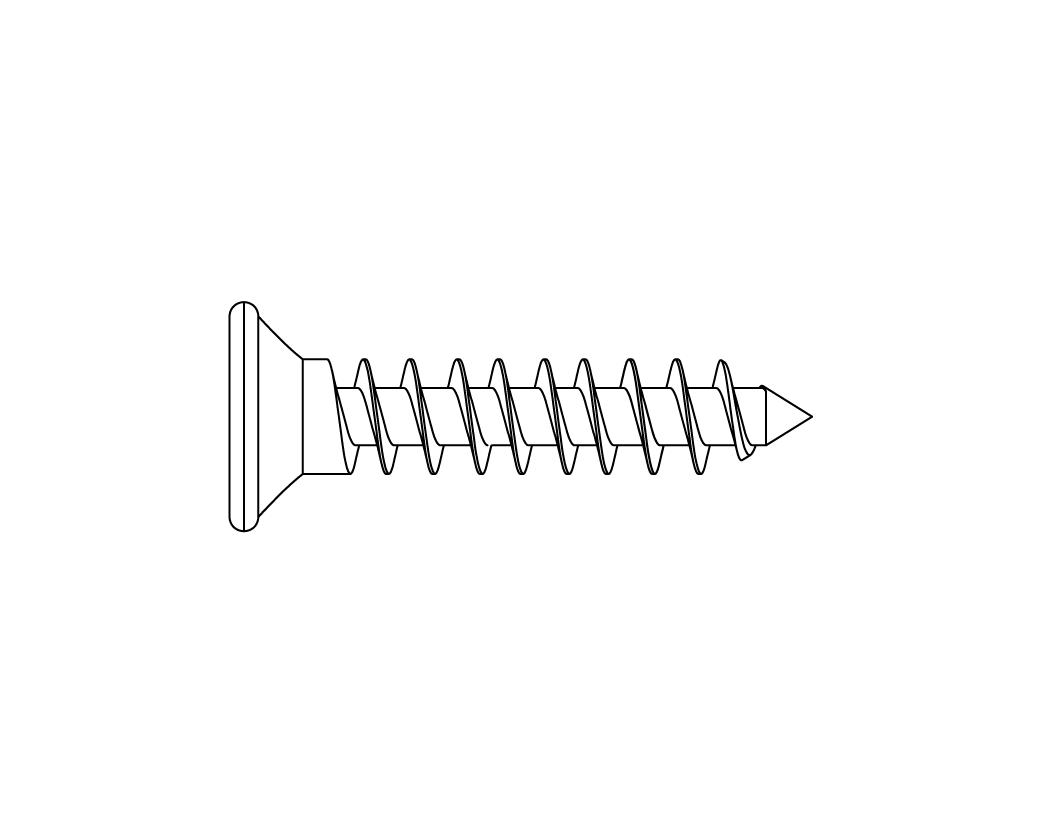
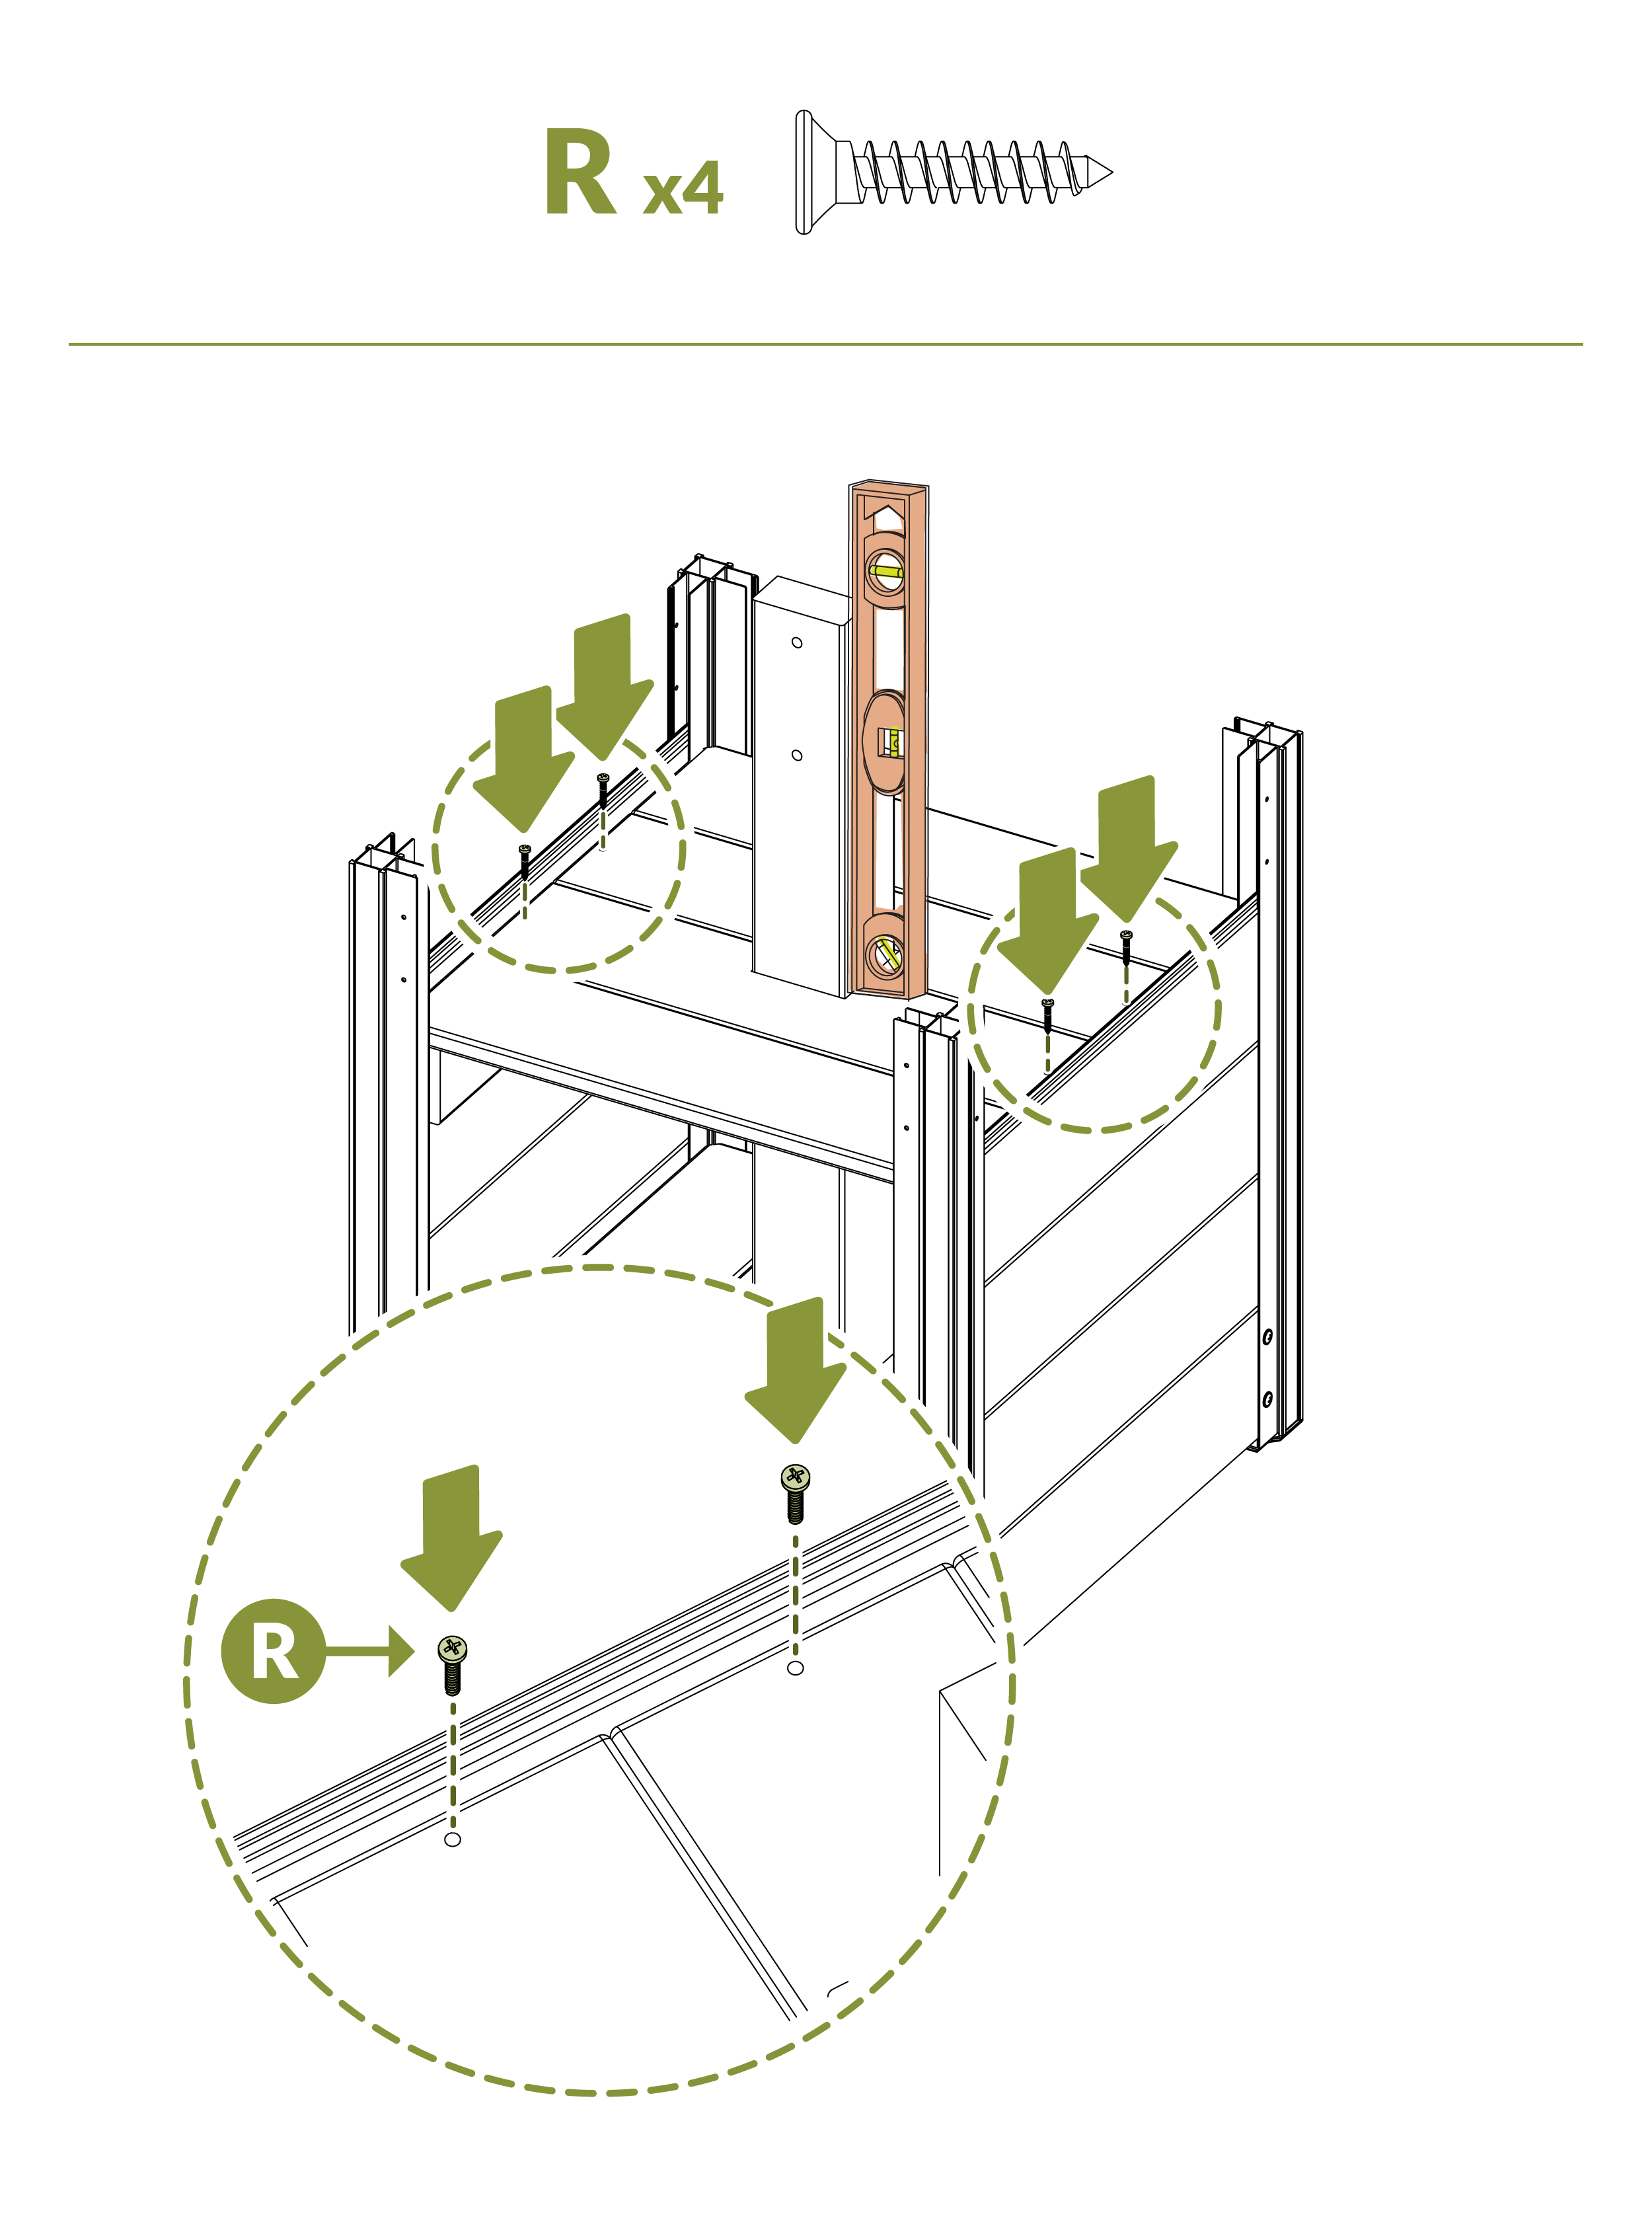
R. 1⅜" Countersunk Wood Screw (8)
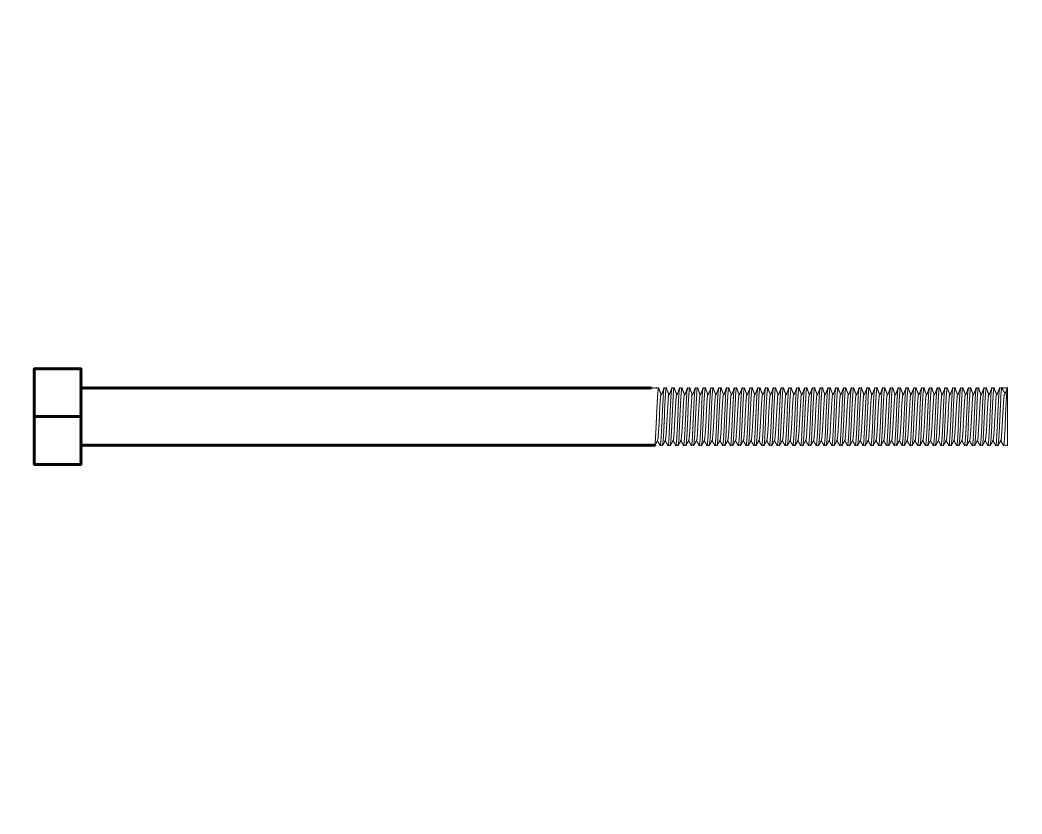
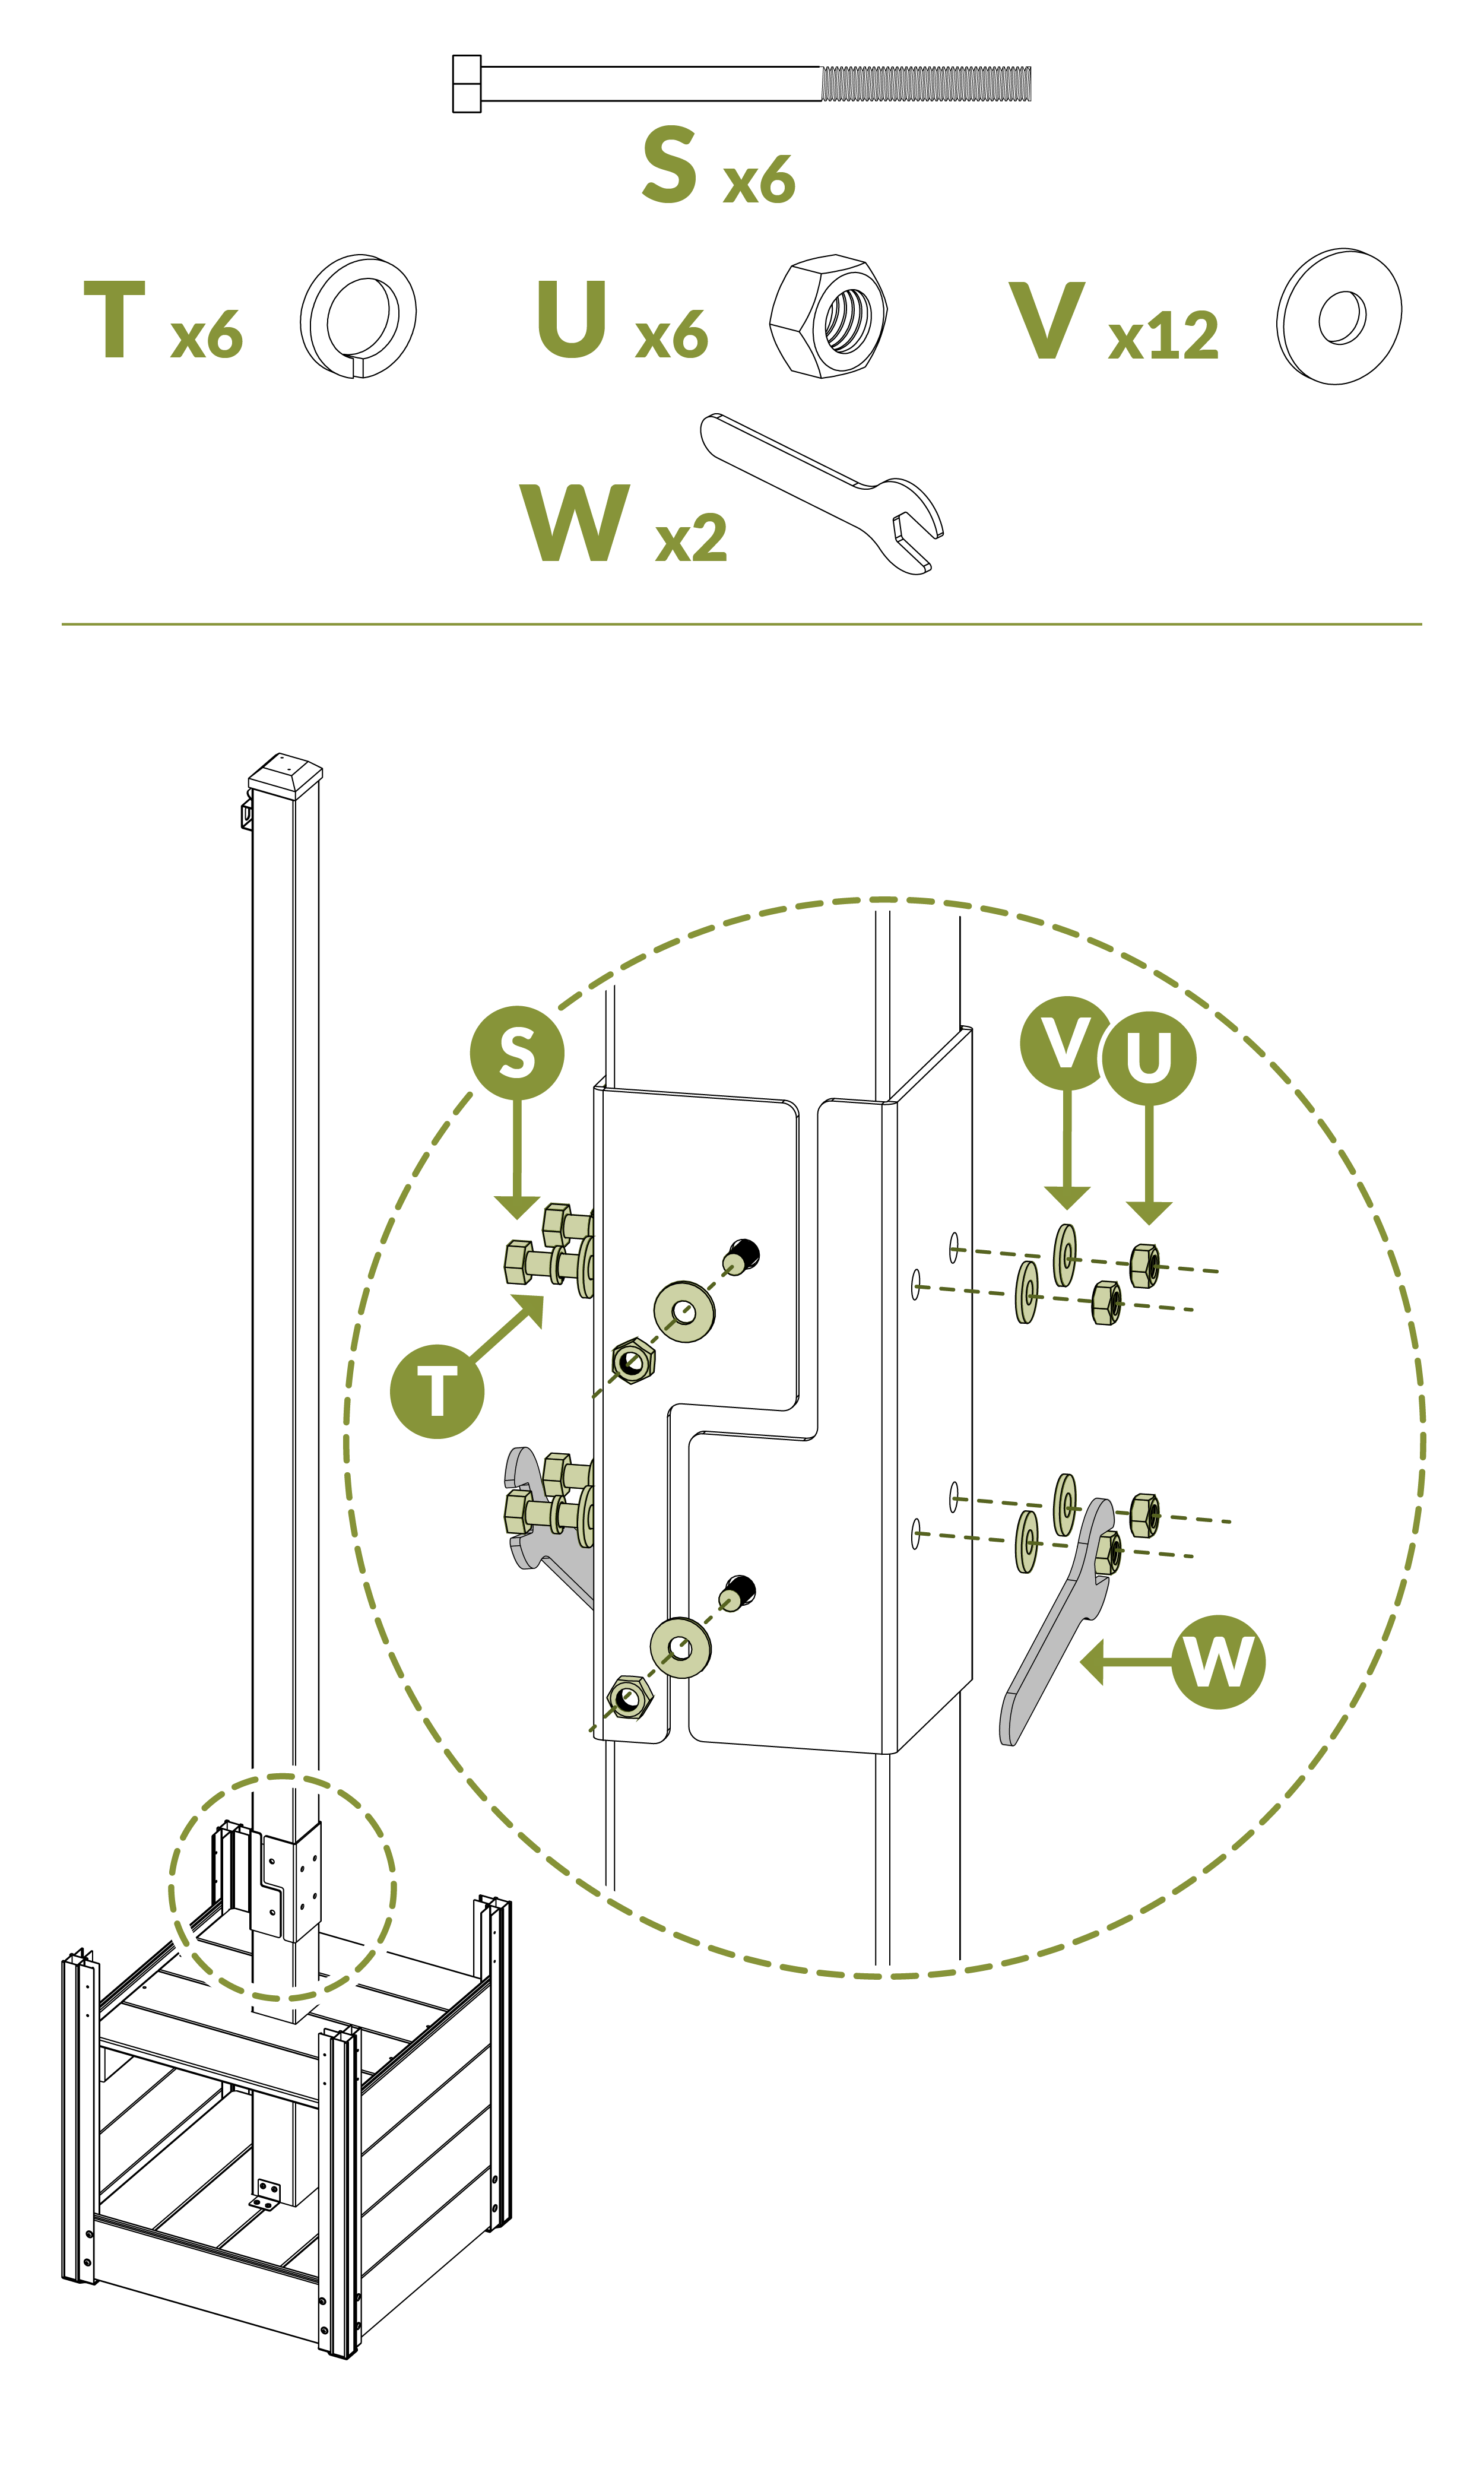
S. 3¾" Hex Bolt (6)
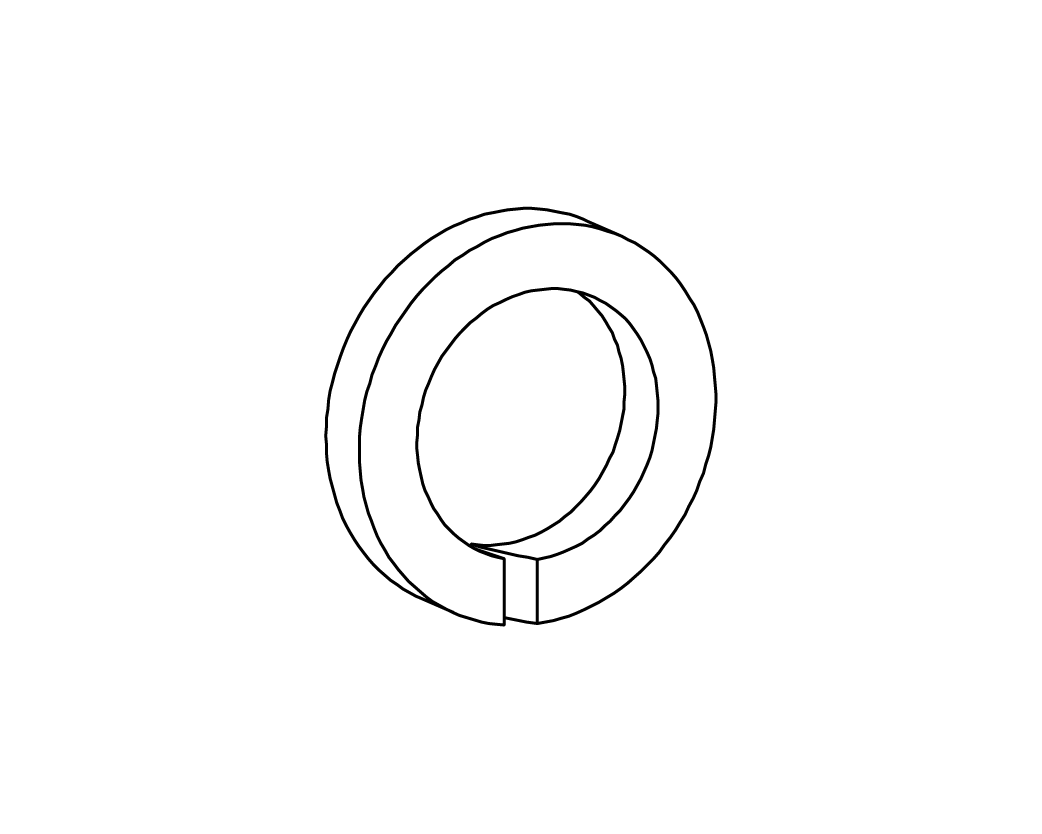
T. Spring Lock Washer (6)
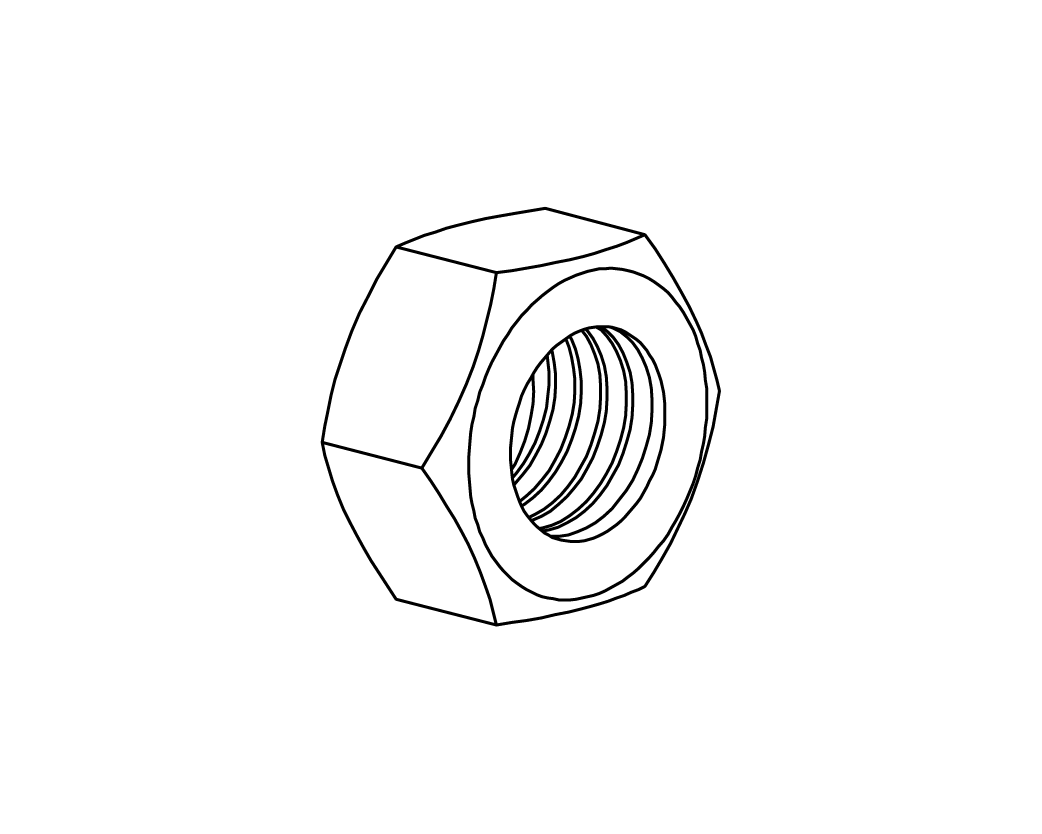
U. Nut (6)
V. Flat Washer (12)

W. Nut Wrench (2)
Assembly & Installation Steps
Step 1
Step 2
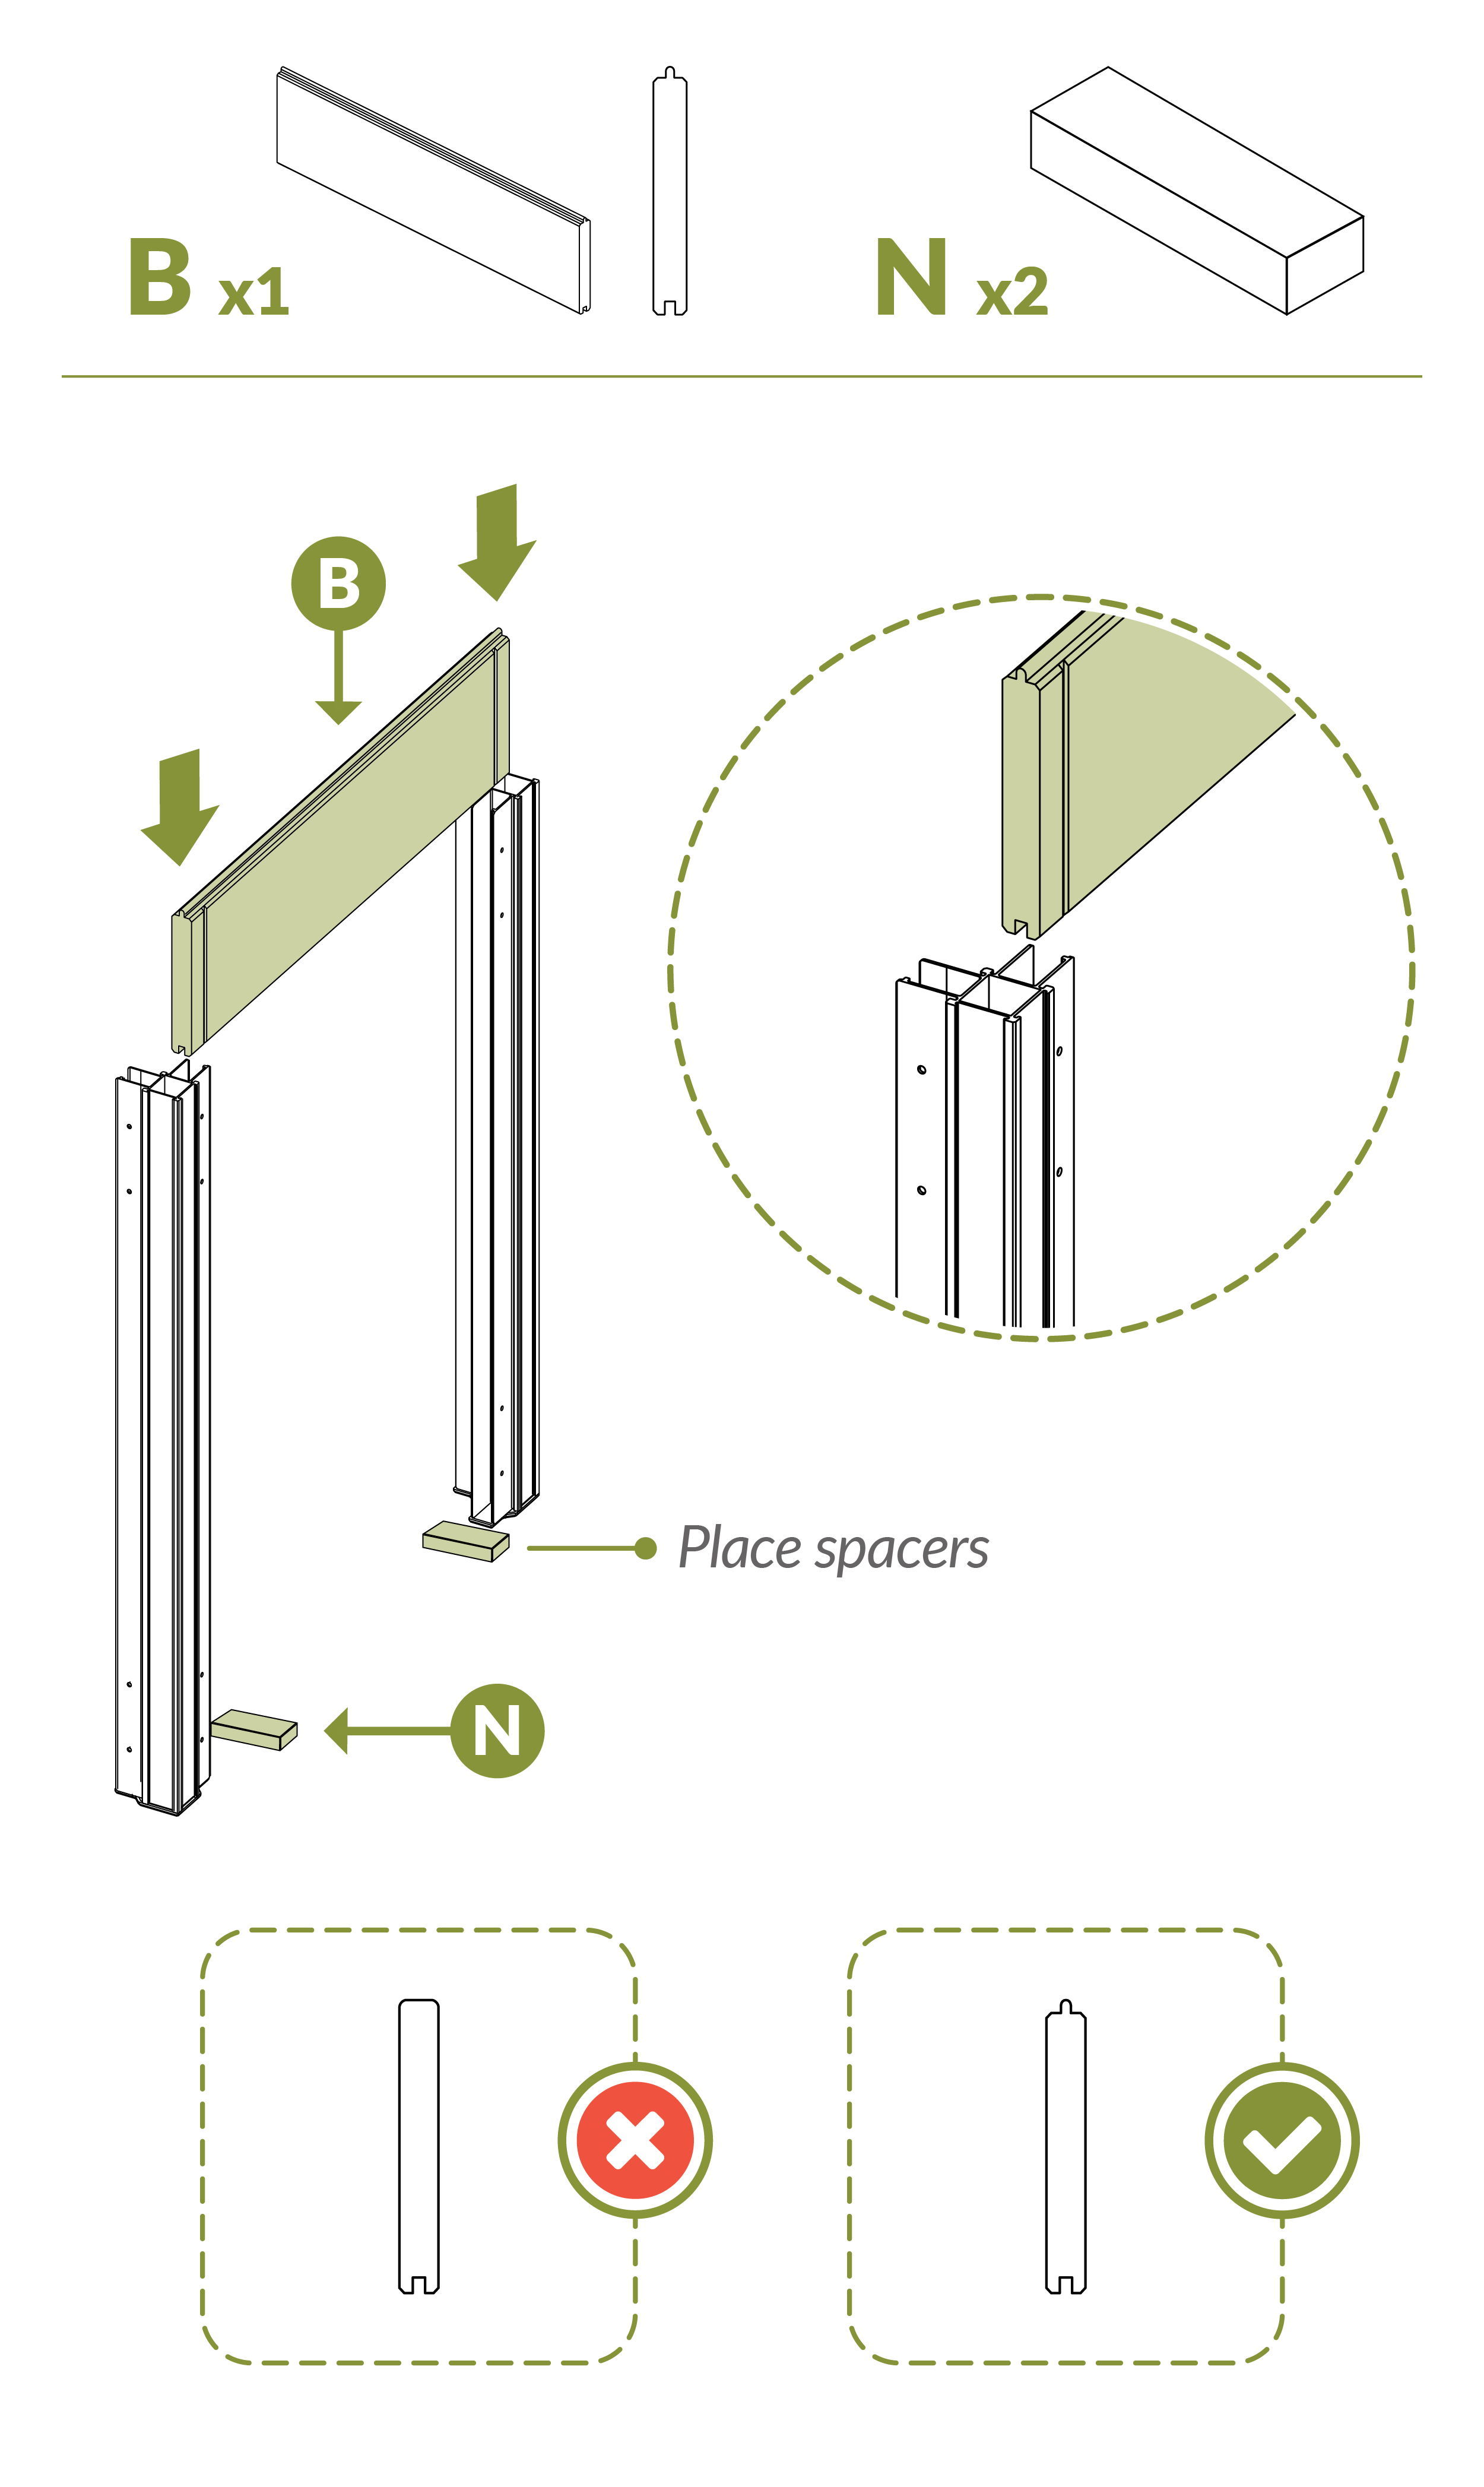
- Install bottom boards with Spacers (N) positioned underneath.
Step 3
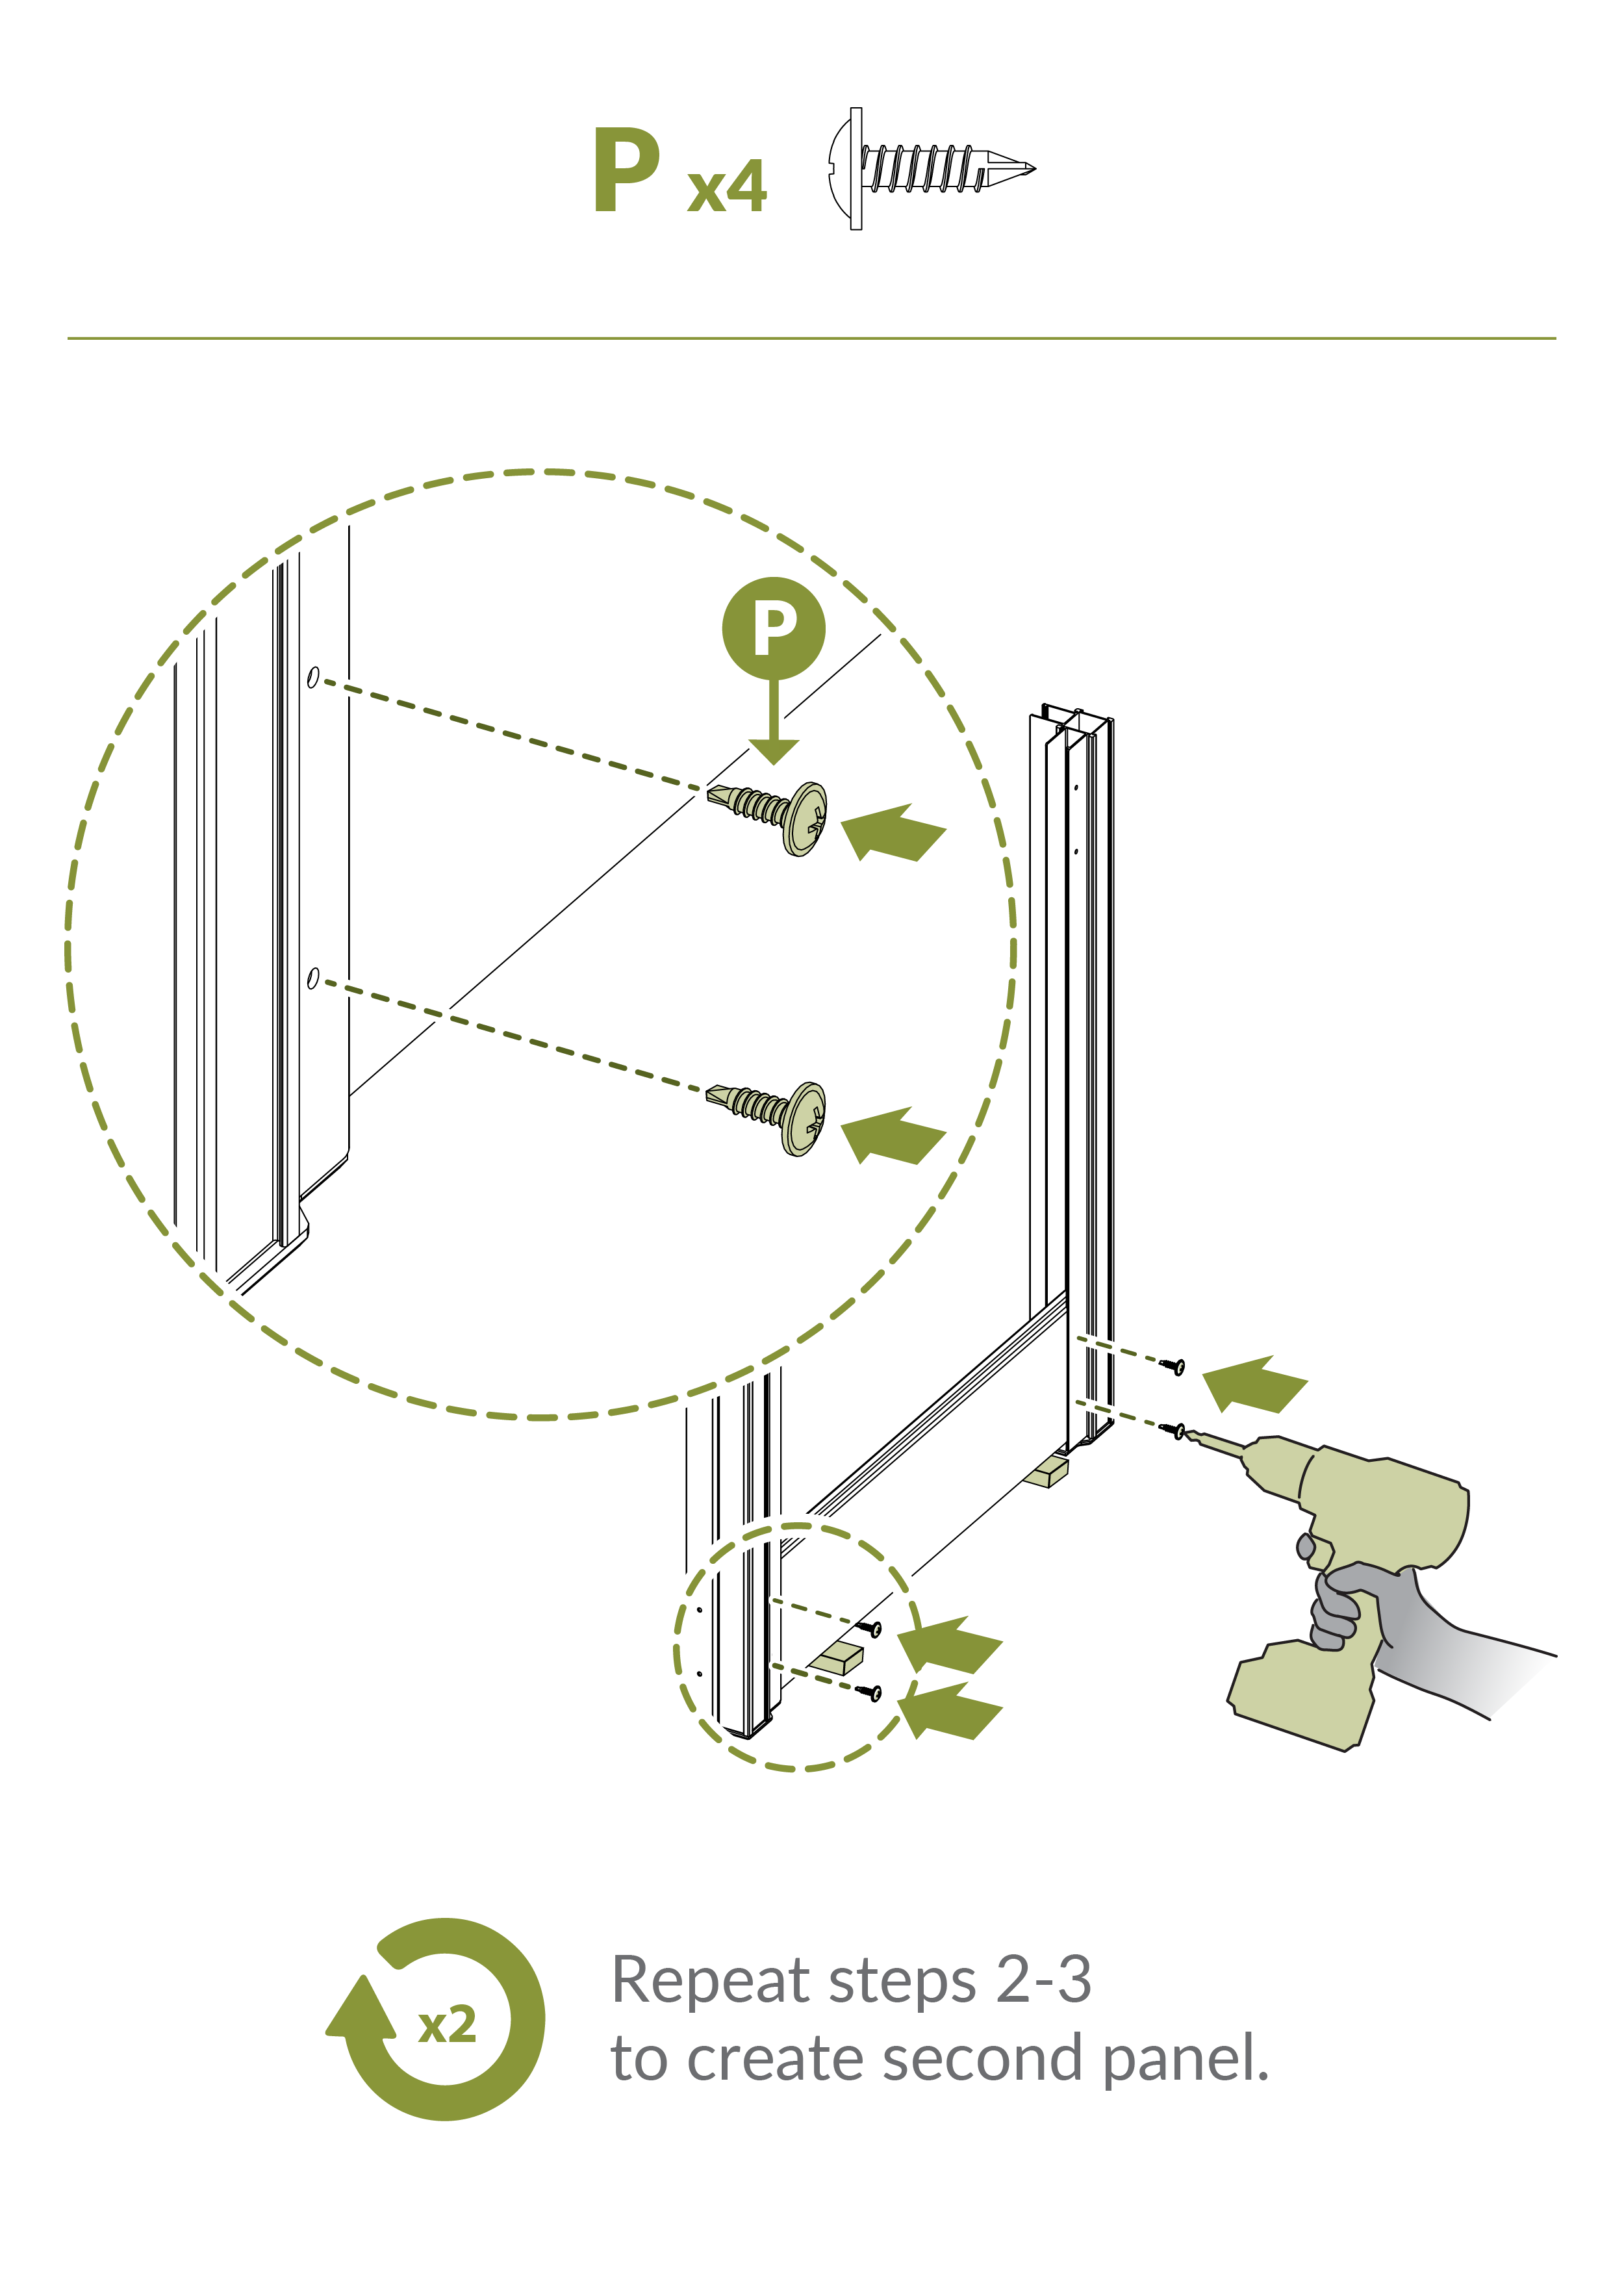
- Secure boards using (4) ⅝" Round Head Self-Drilling Screws (P).
- Repeat to create the second side panel.
Step 4

- Install Floor Support Boards (C) with Spacers (N) beneath.
Step 5
- Secure the base structure with (8) ⅝" Round Head Self-Drilling Screws (P).
Step 6
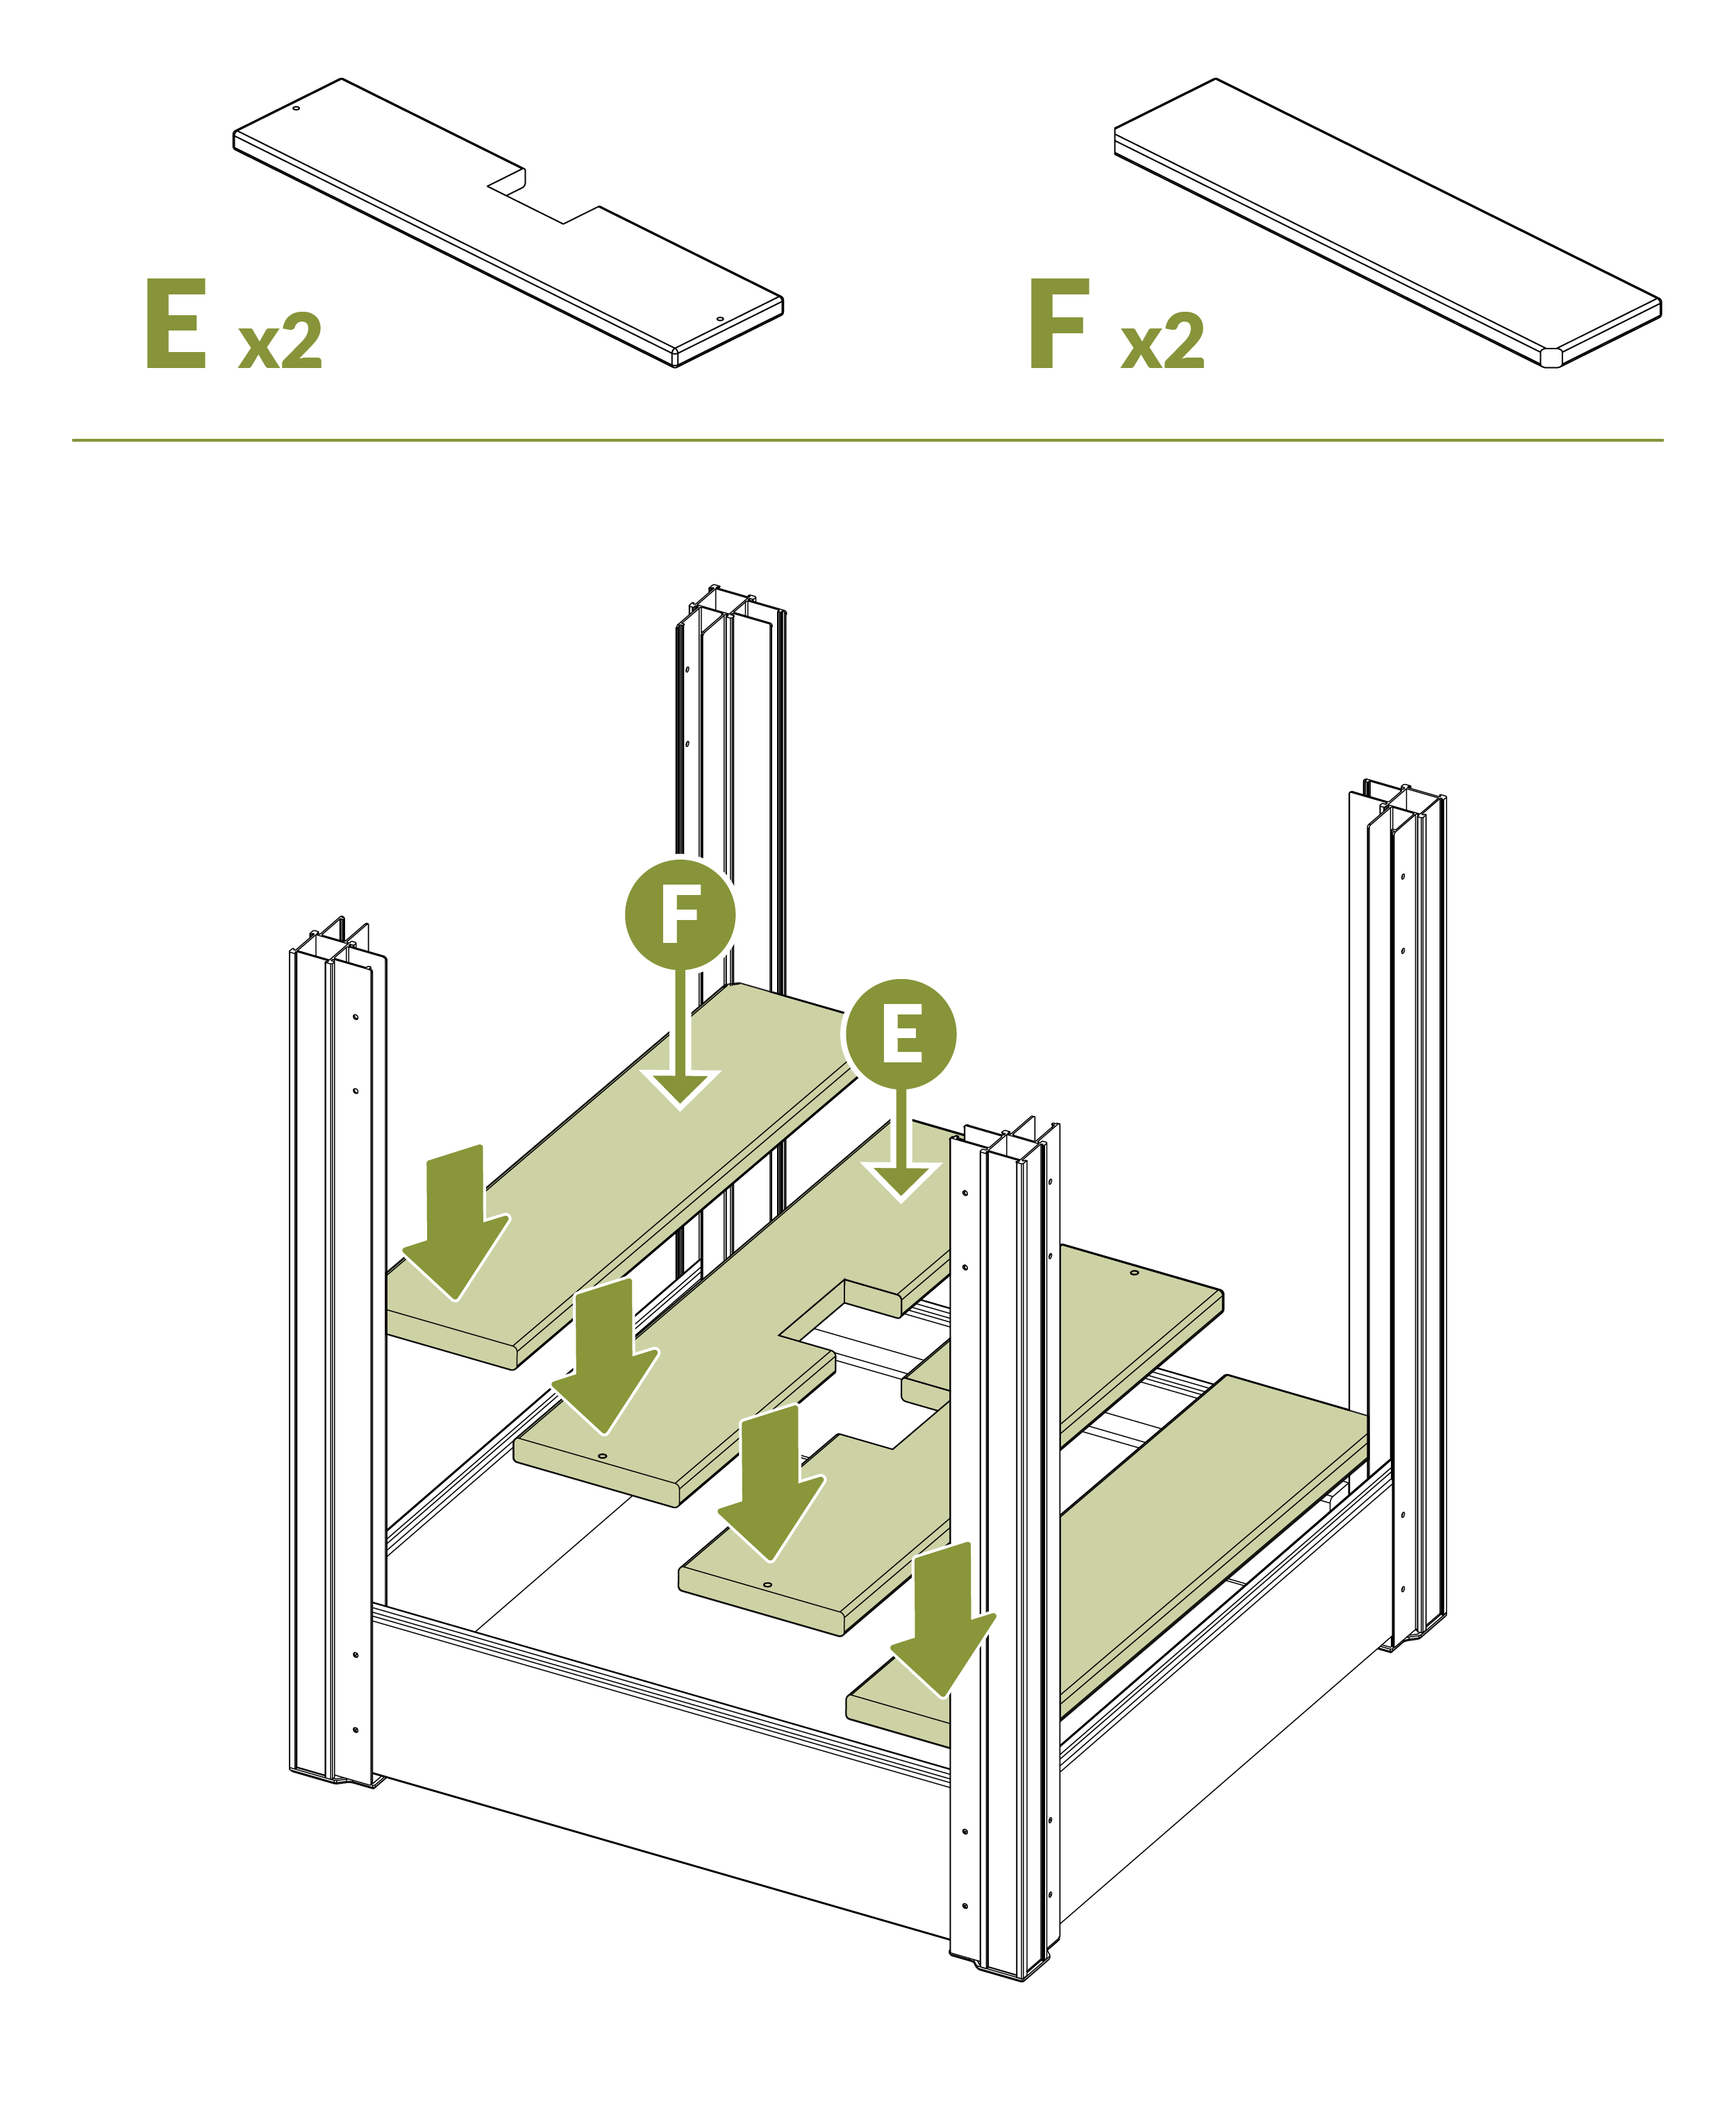
- Install Inside (E) and Outside (F) Floor Boards.
Step 7: Choose Planter Depth Option
Step 7a: Use This Option for a 5" Deep Planter Box
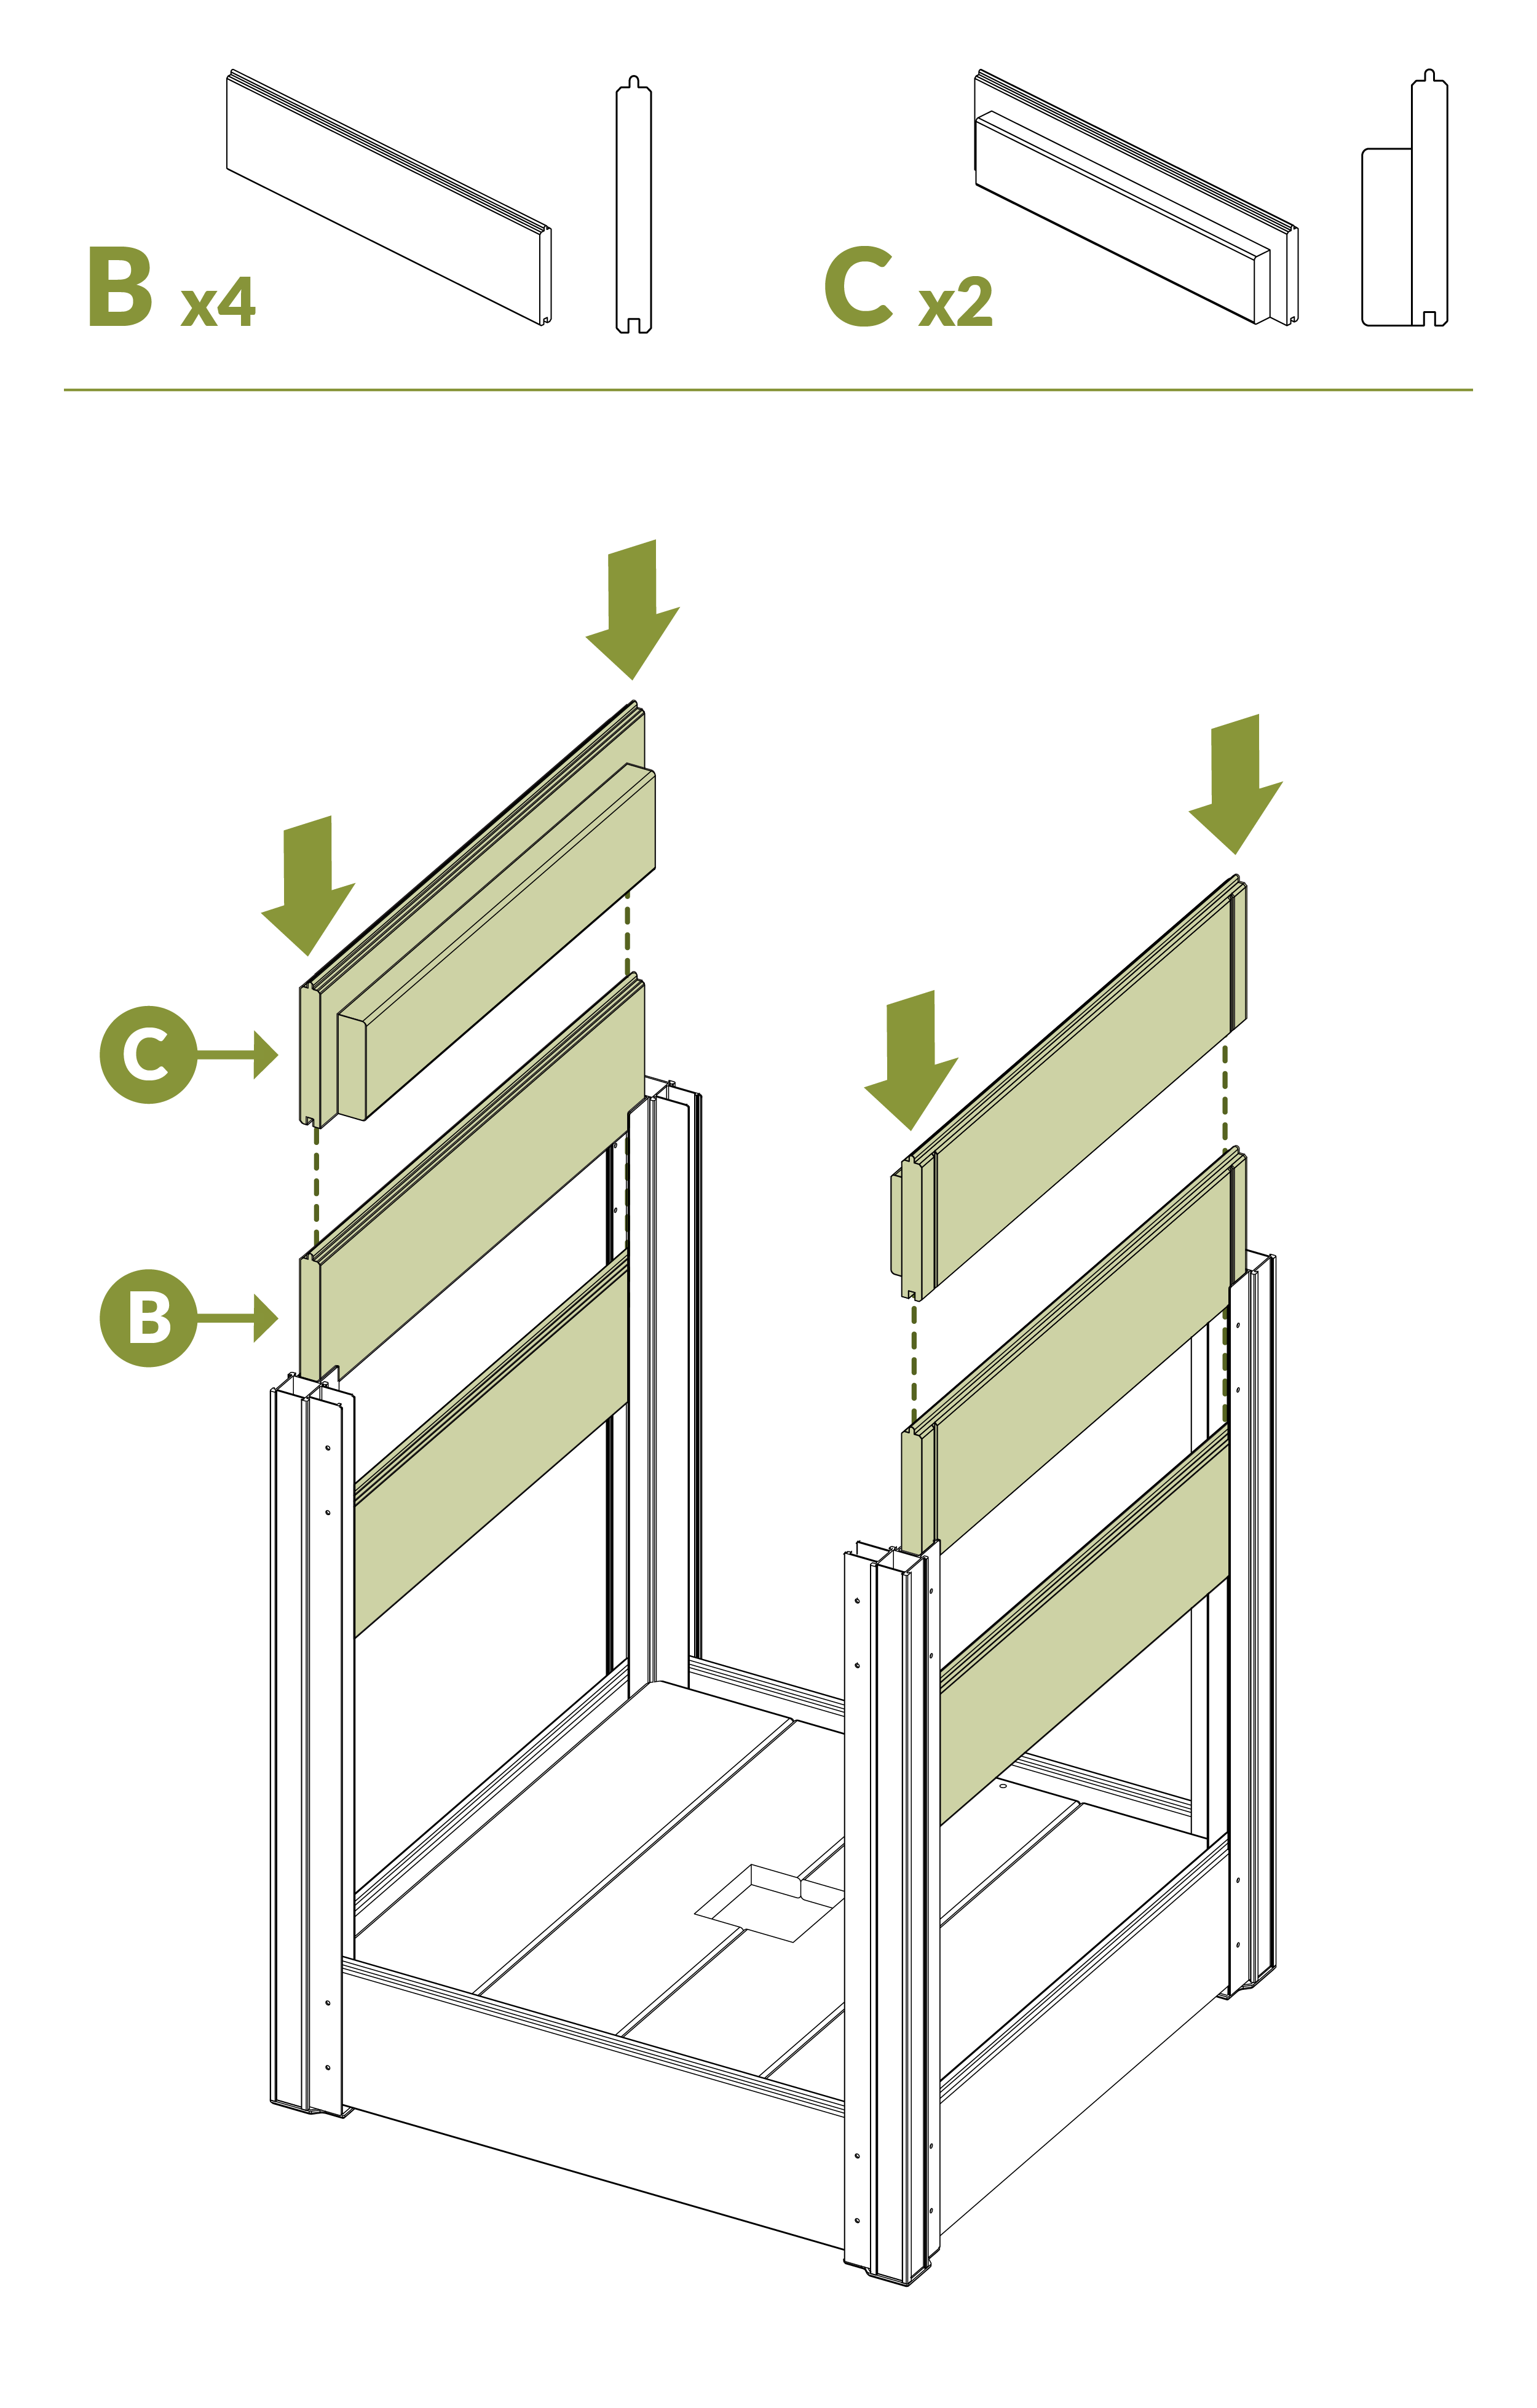
- Top Support Boards (C) should be on the opposite 2 sides of the Bottom Support Boards.
Step 7b: Use This Option for a 9.5" Deep Planter Box
Step 8
Step 9
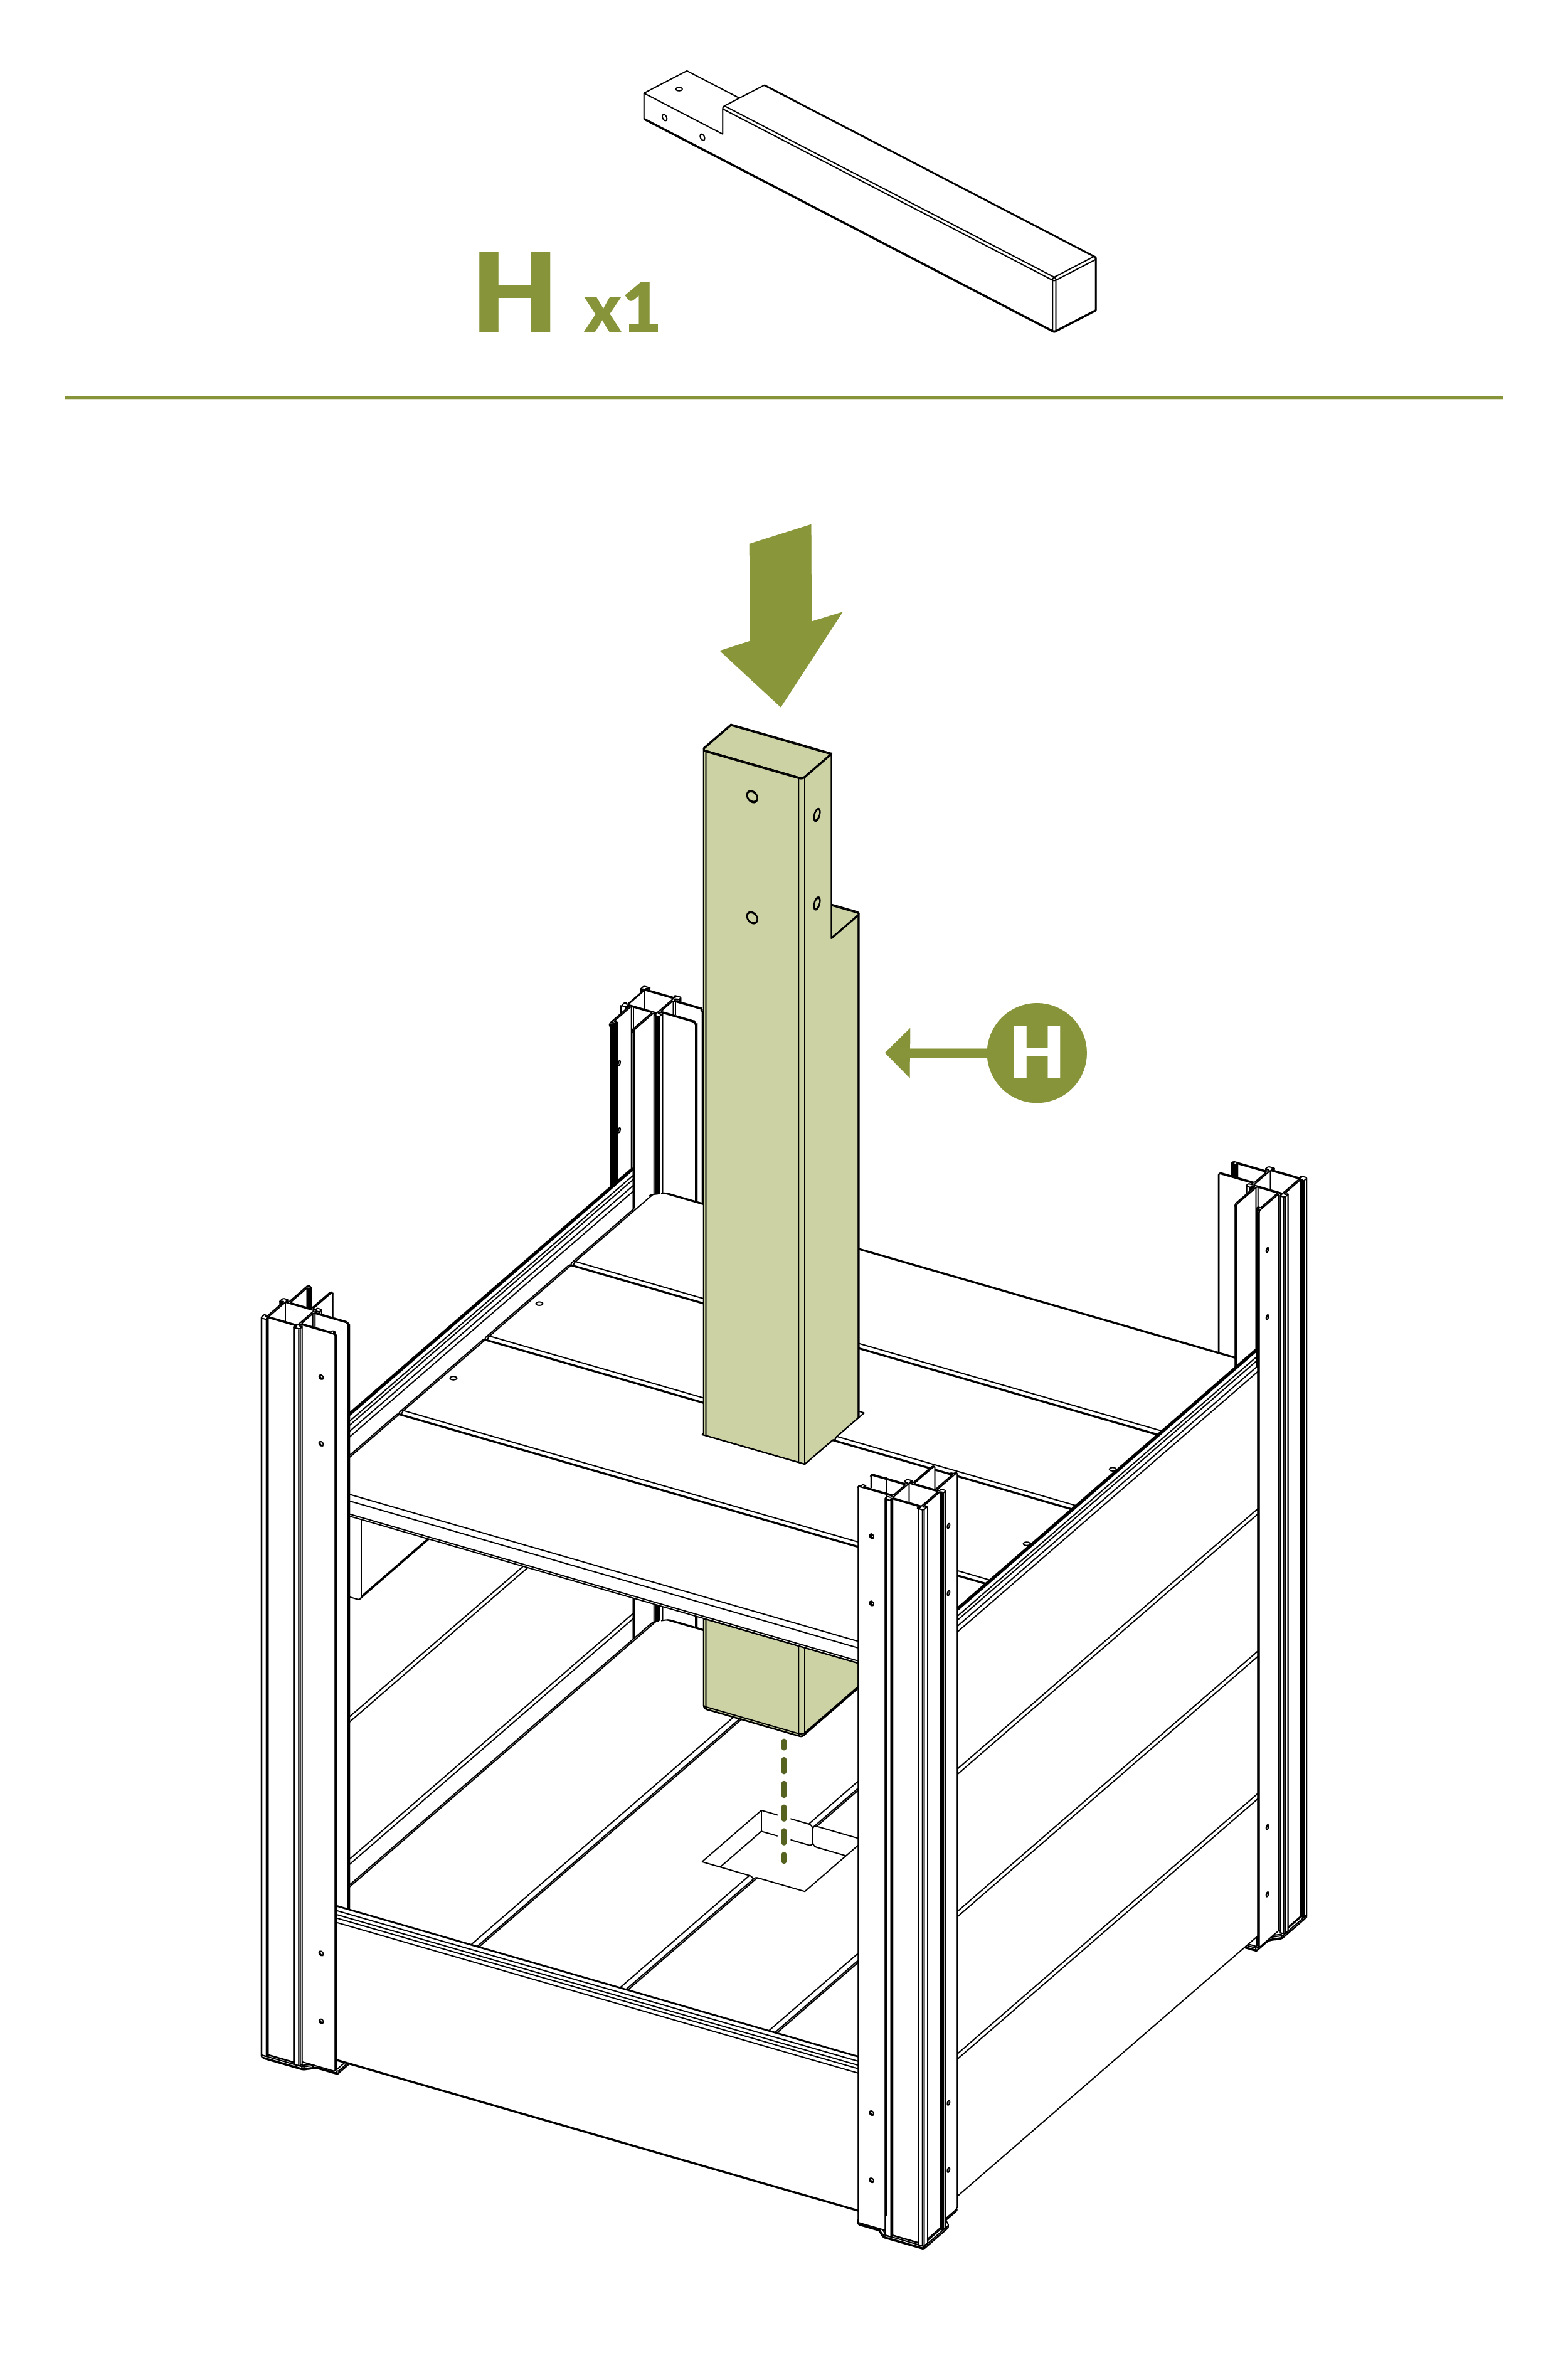
Step 10
- Ensure that Bottom Post (H) is leveled vertically before placing your screws.
Recommended: Temporarily remove your end boards for your next step
Step 11
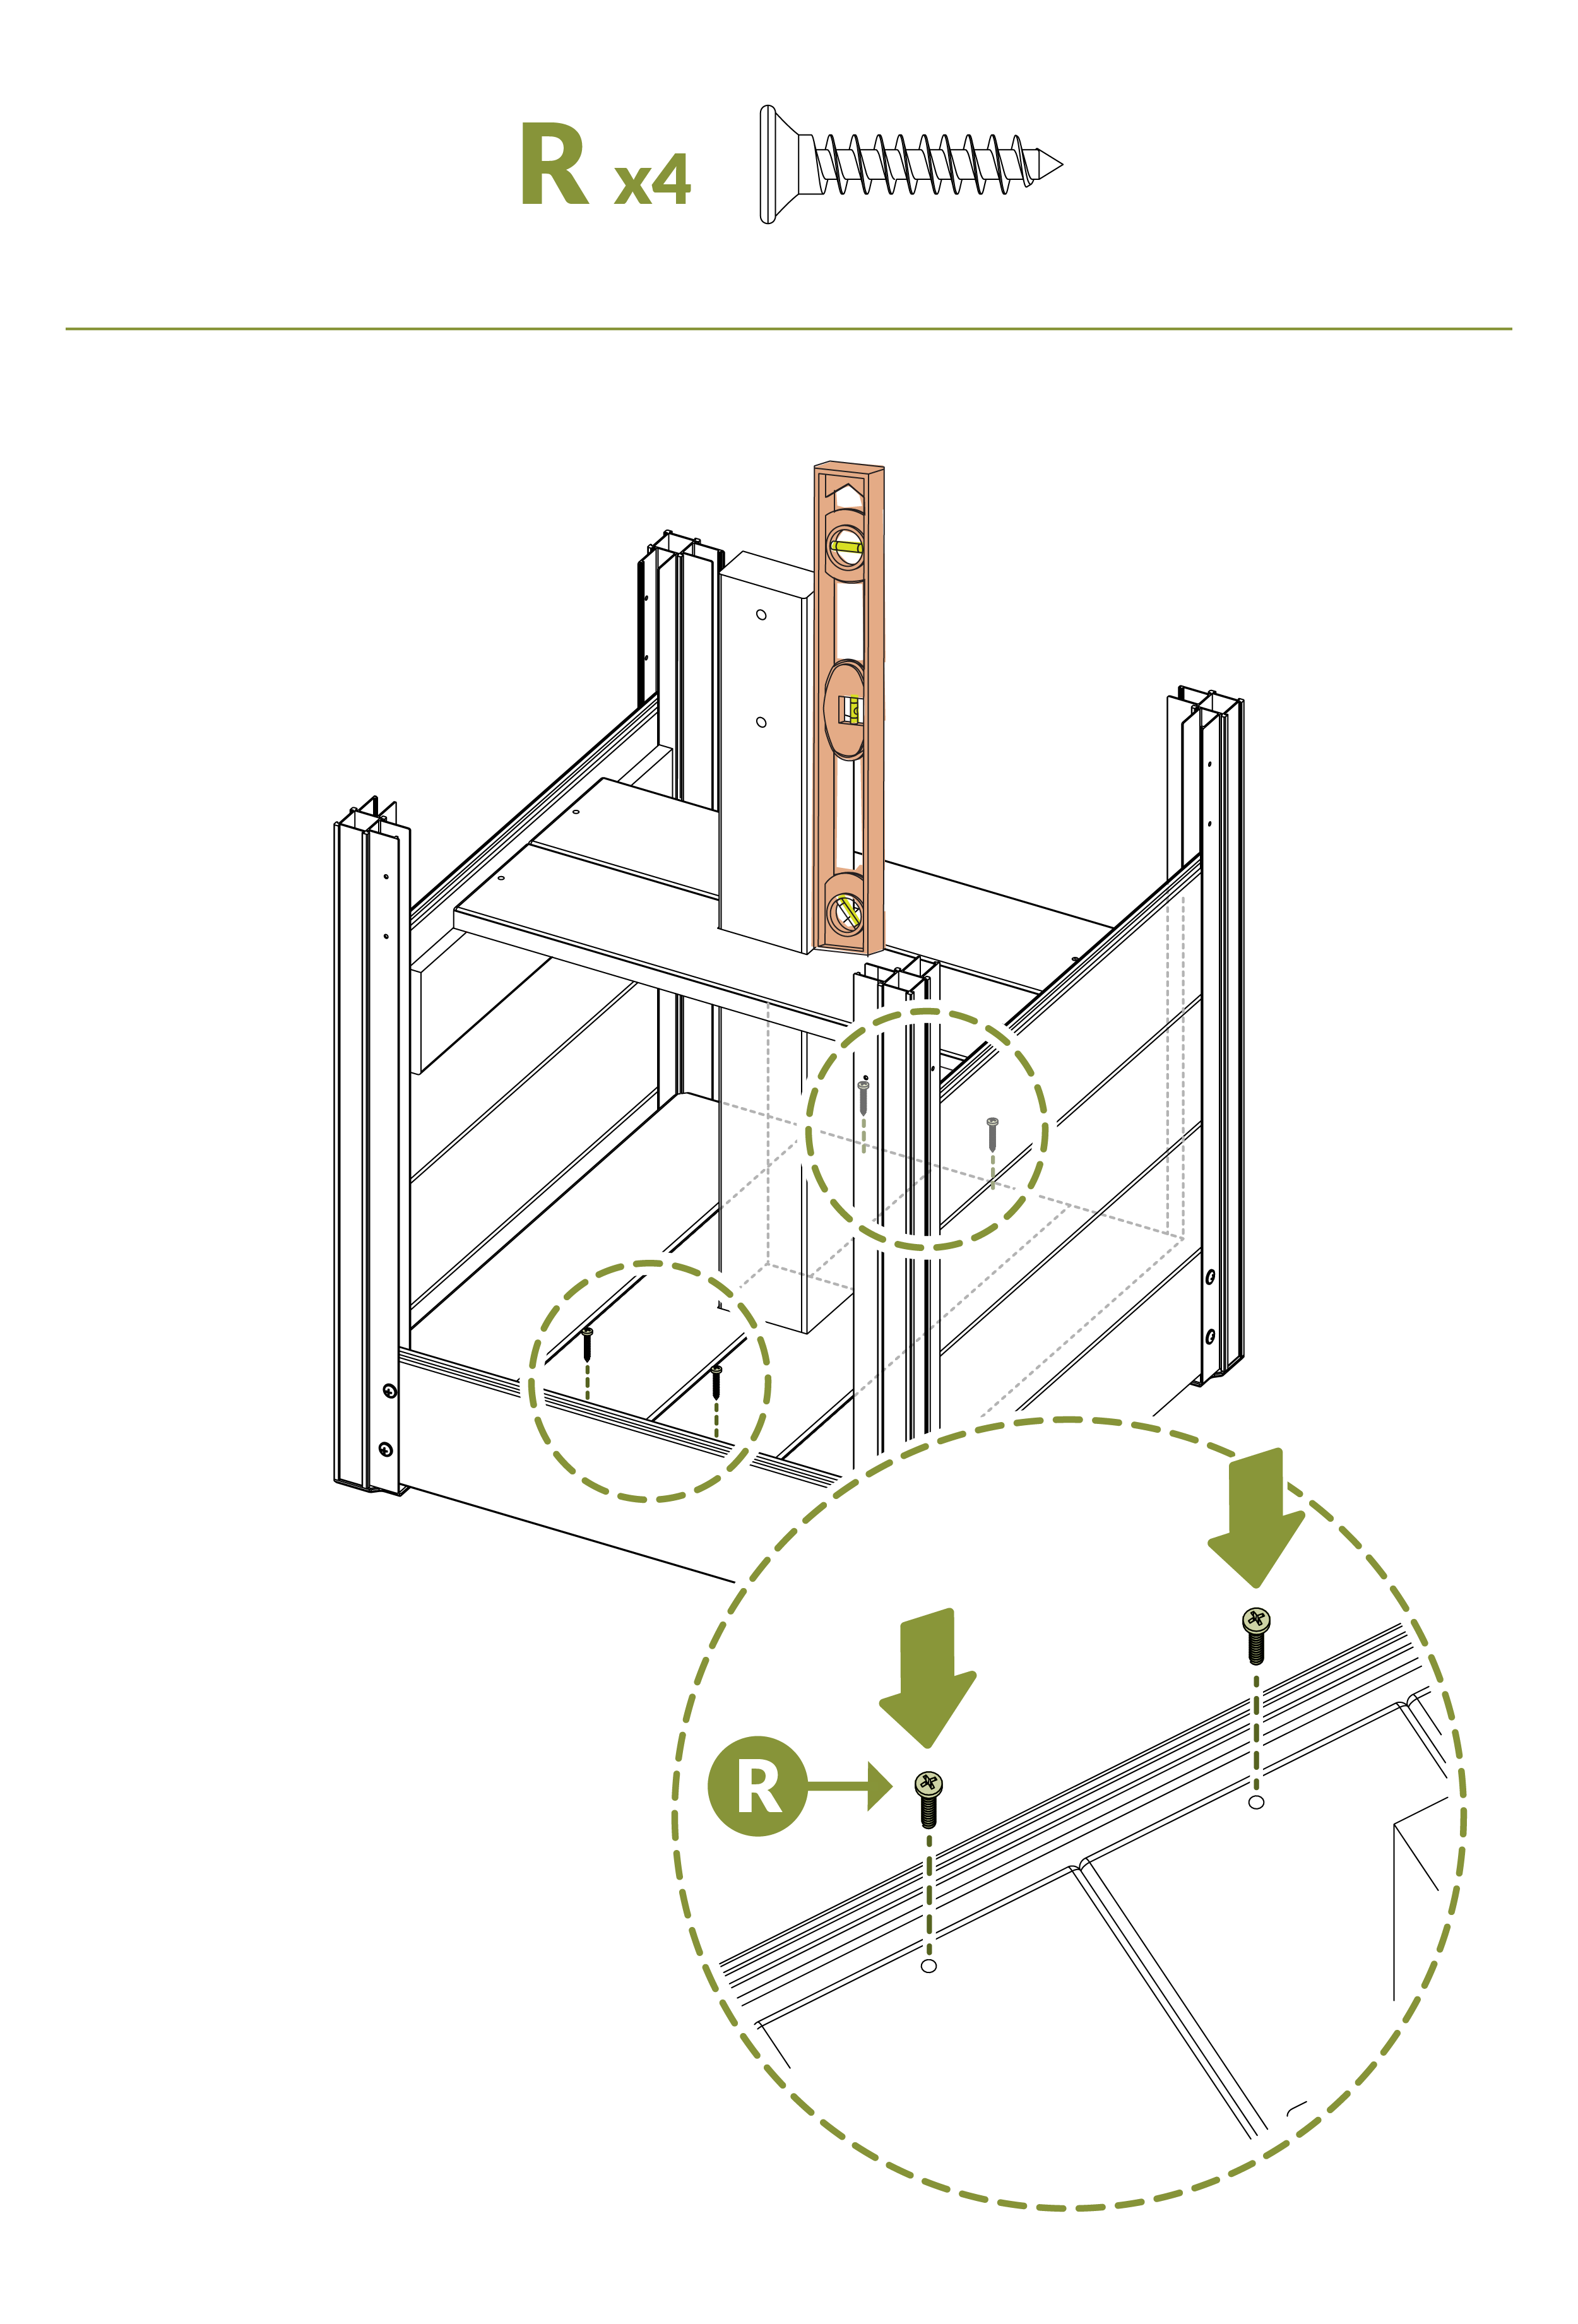
- Ensure that Bottom Post (H) is leveled vertically before placing your screws.
- Secure the lower middle floor boards once your post is level.
Step 12
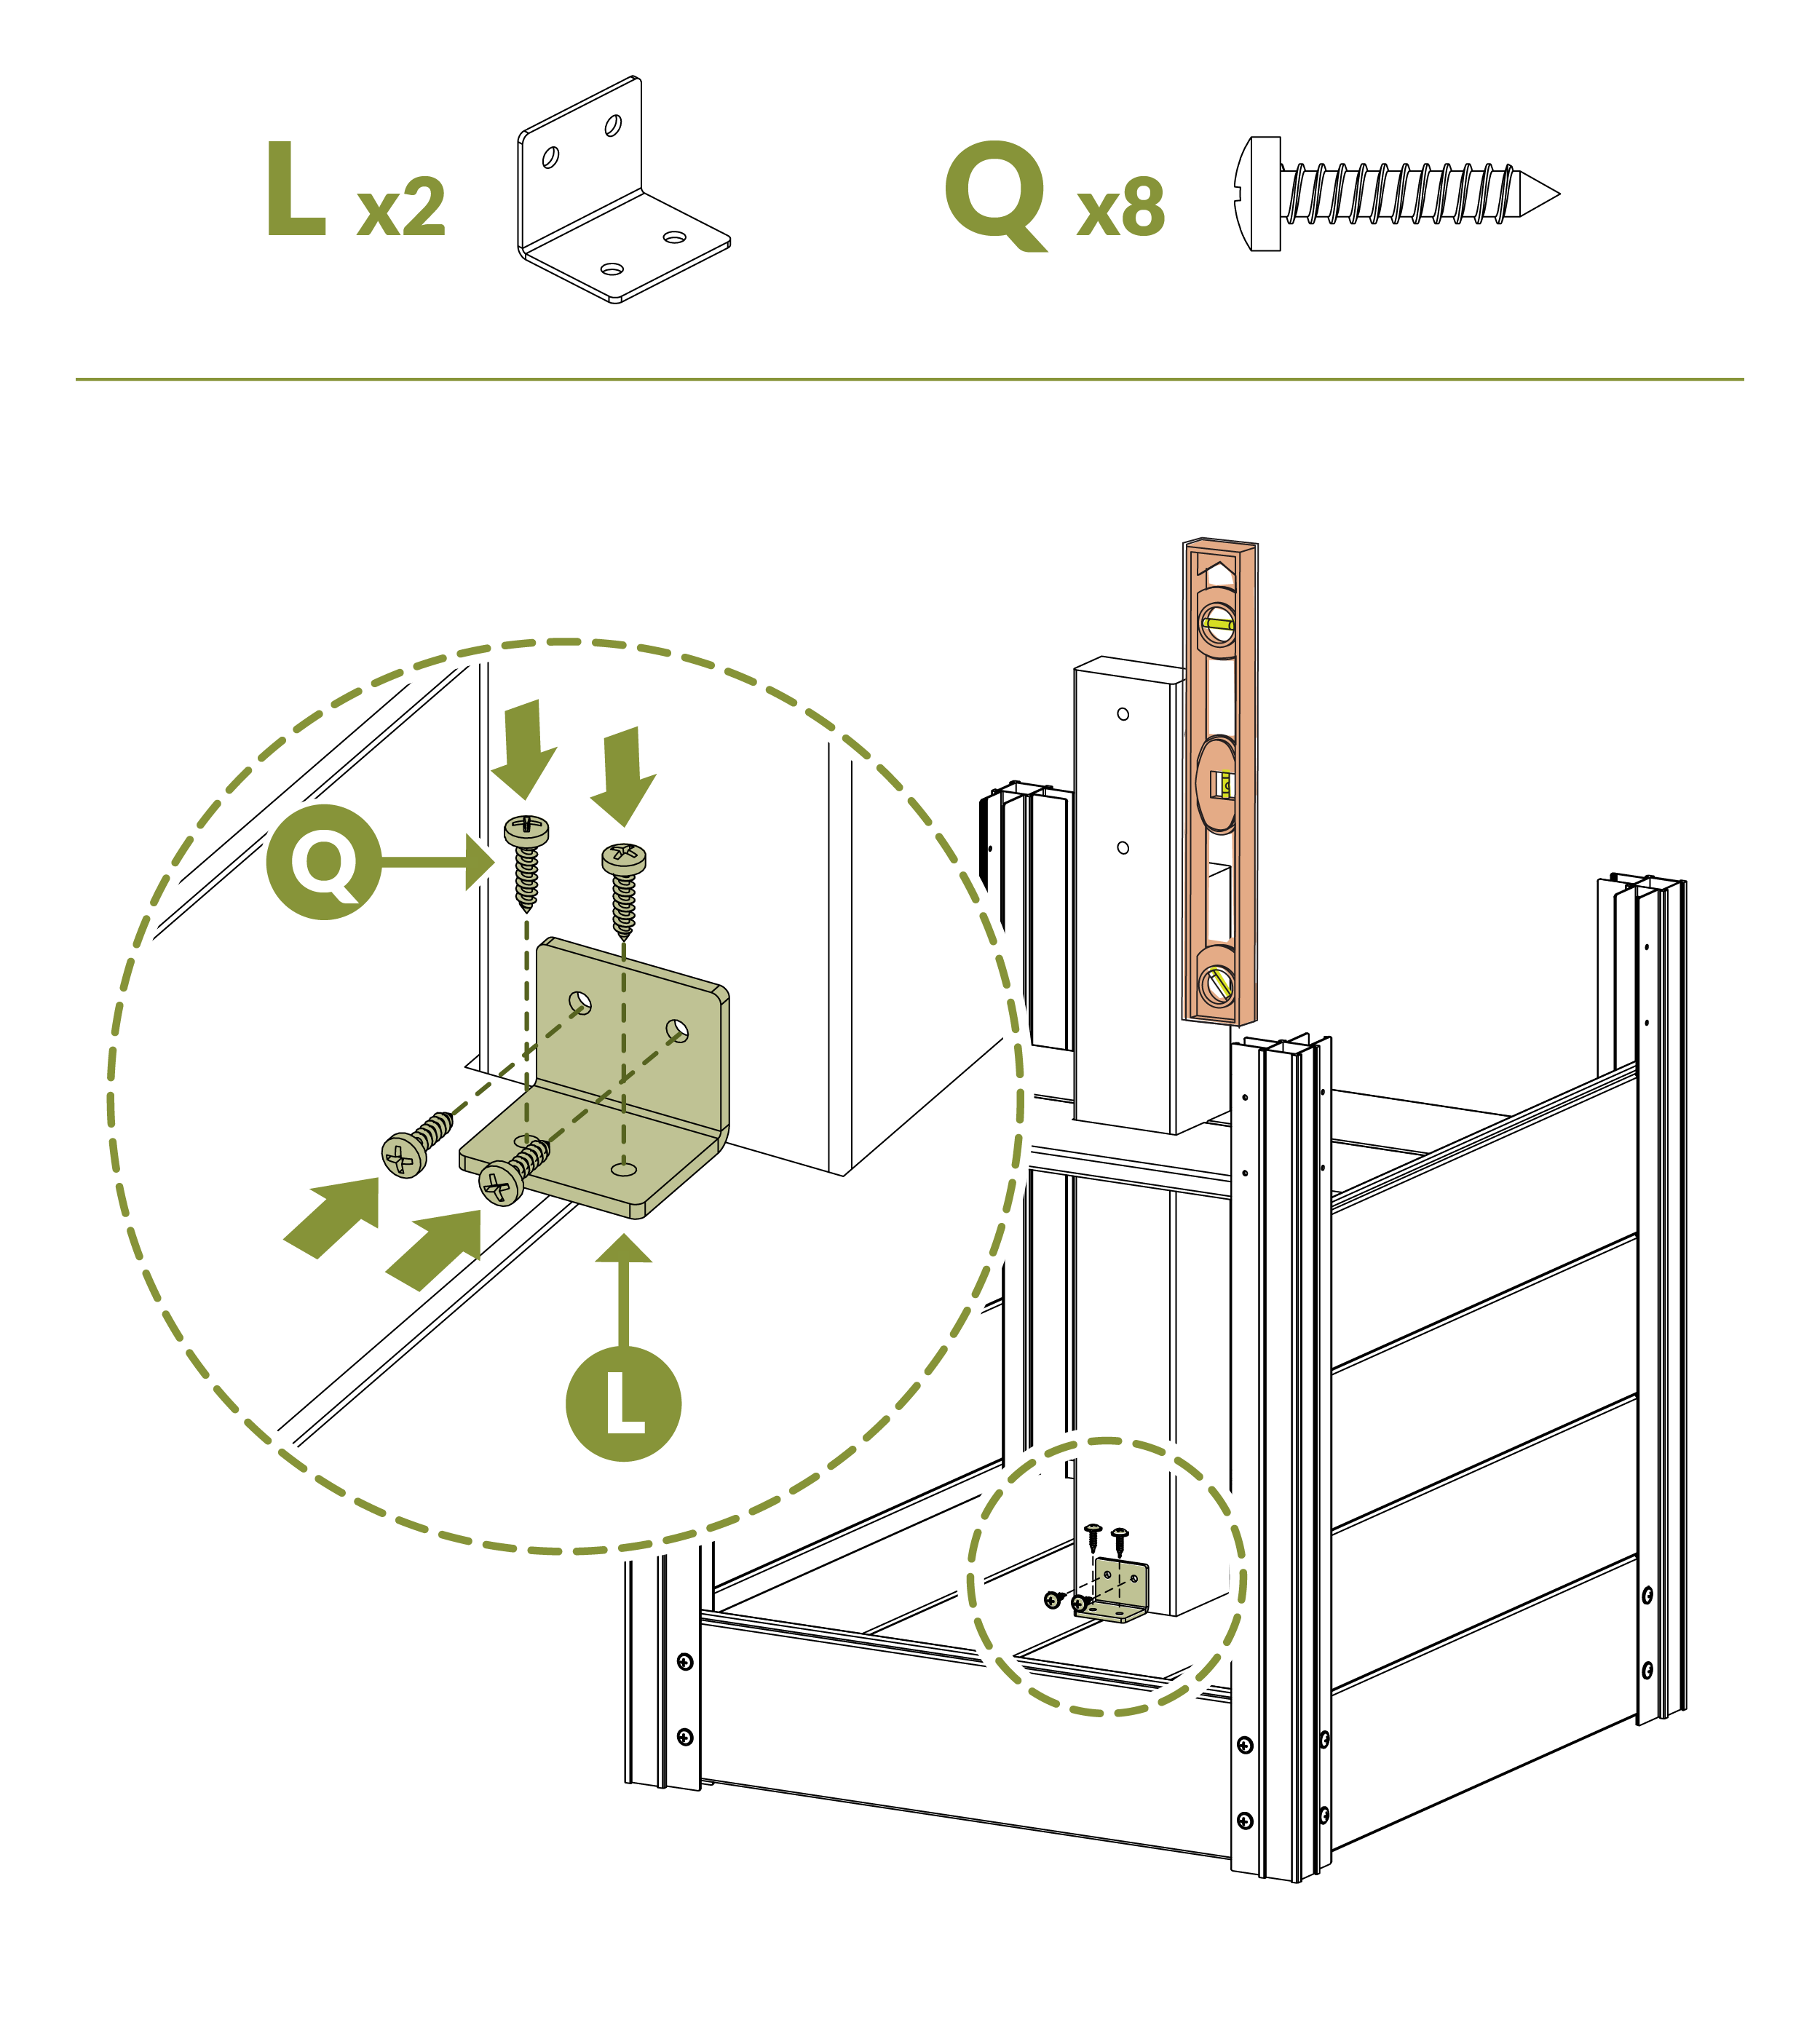
- Ensure that Bracket (L) is secured to both sides of the bottom post.
Recommended: Return the Top End Boards
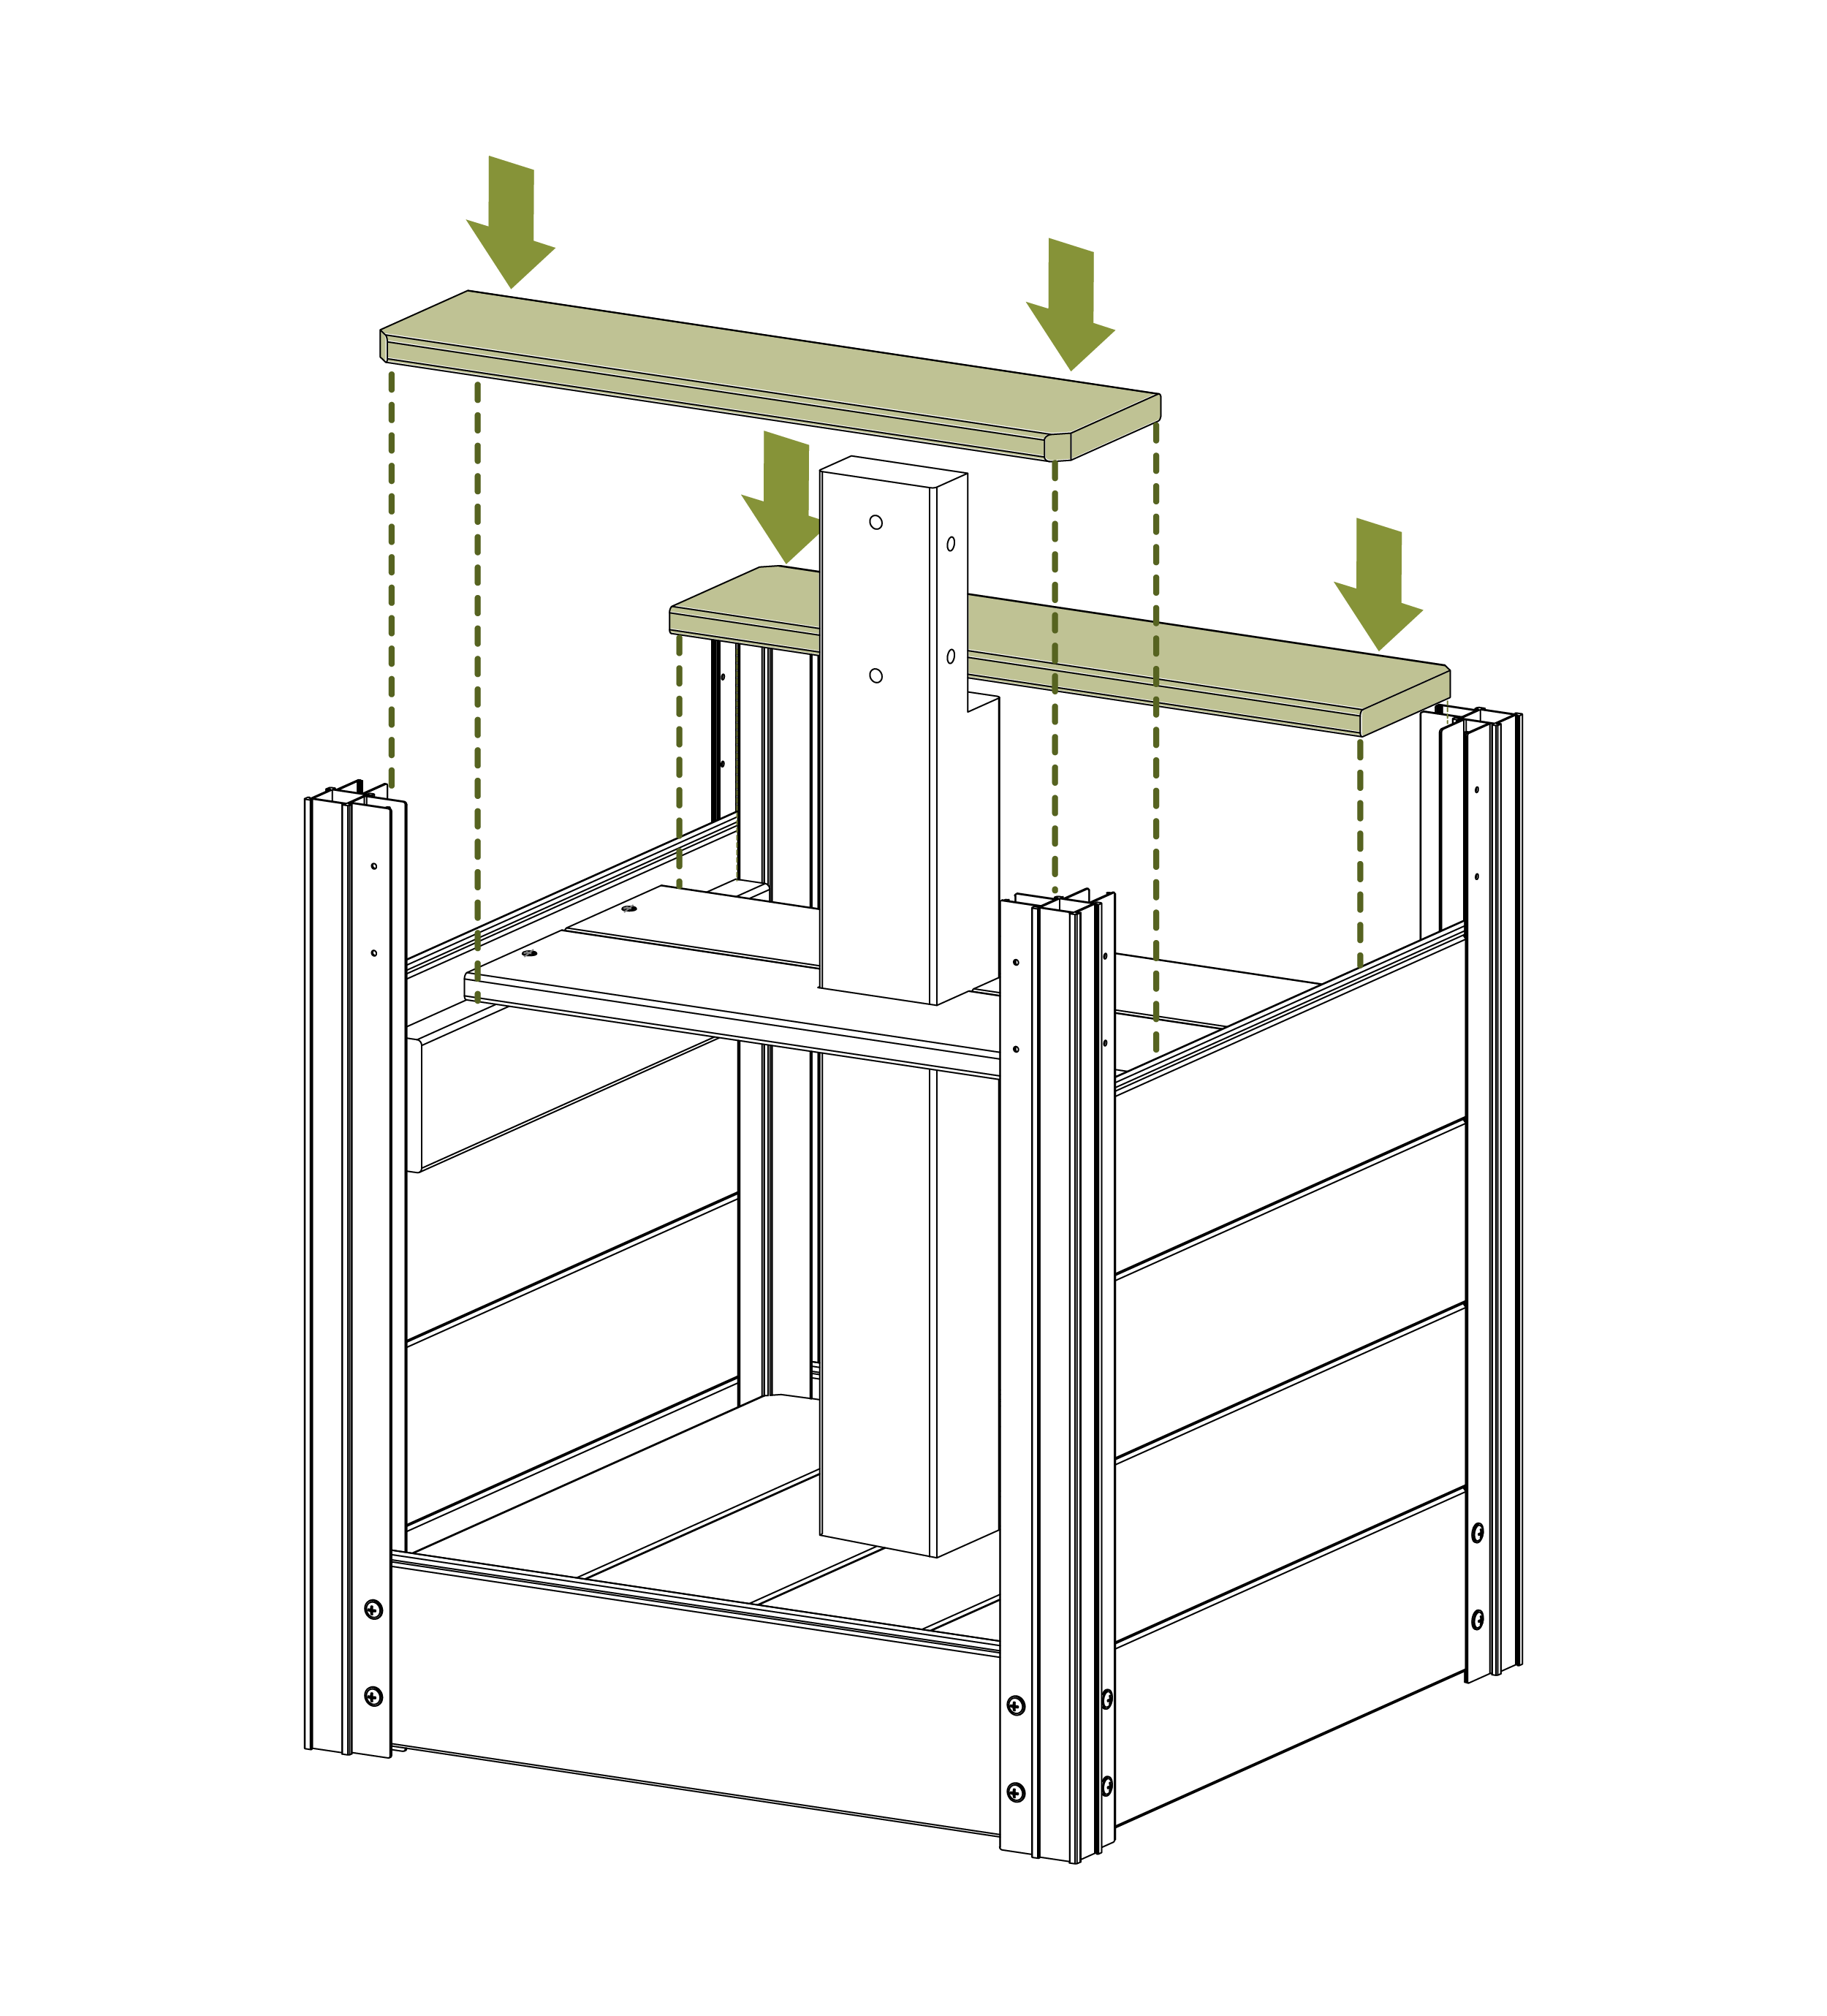
Step 13
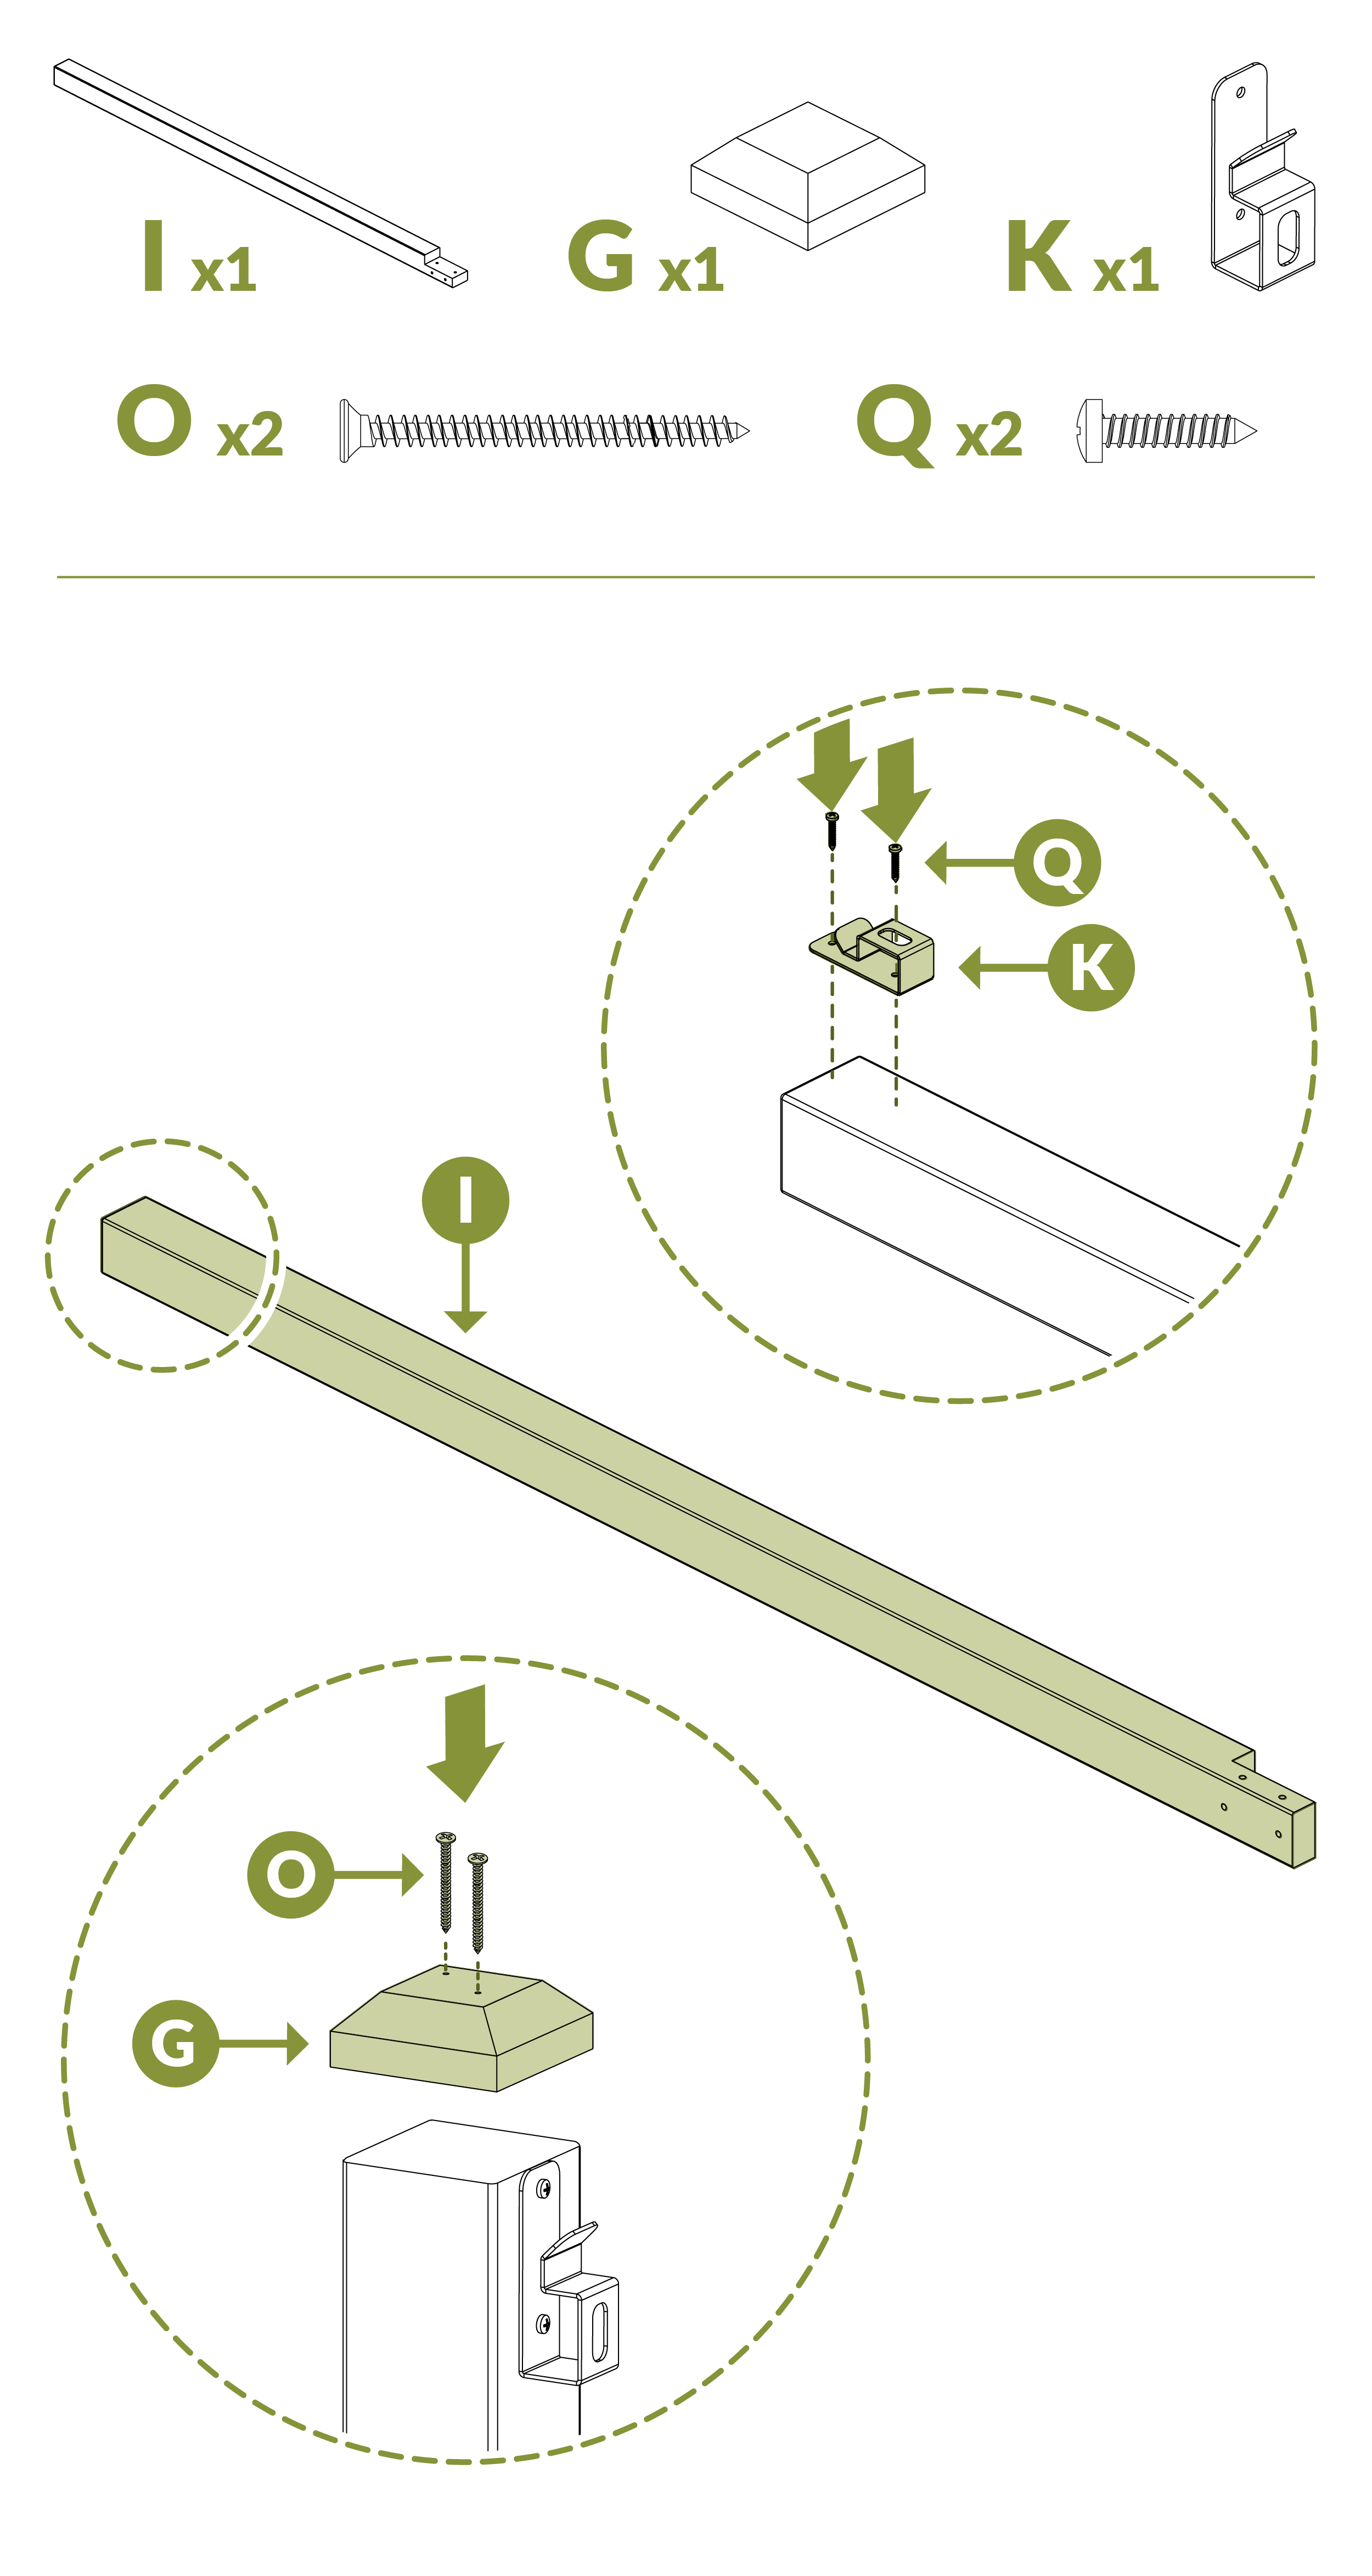
- Hook (K) can be installed anywhere at top of Post (I).
Step 14
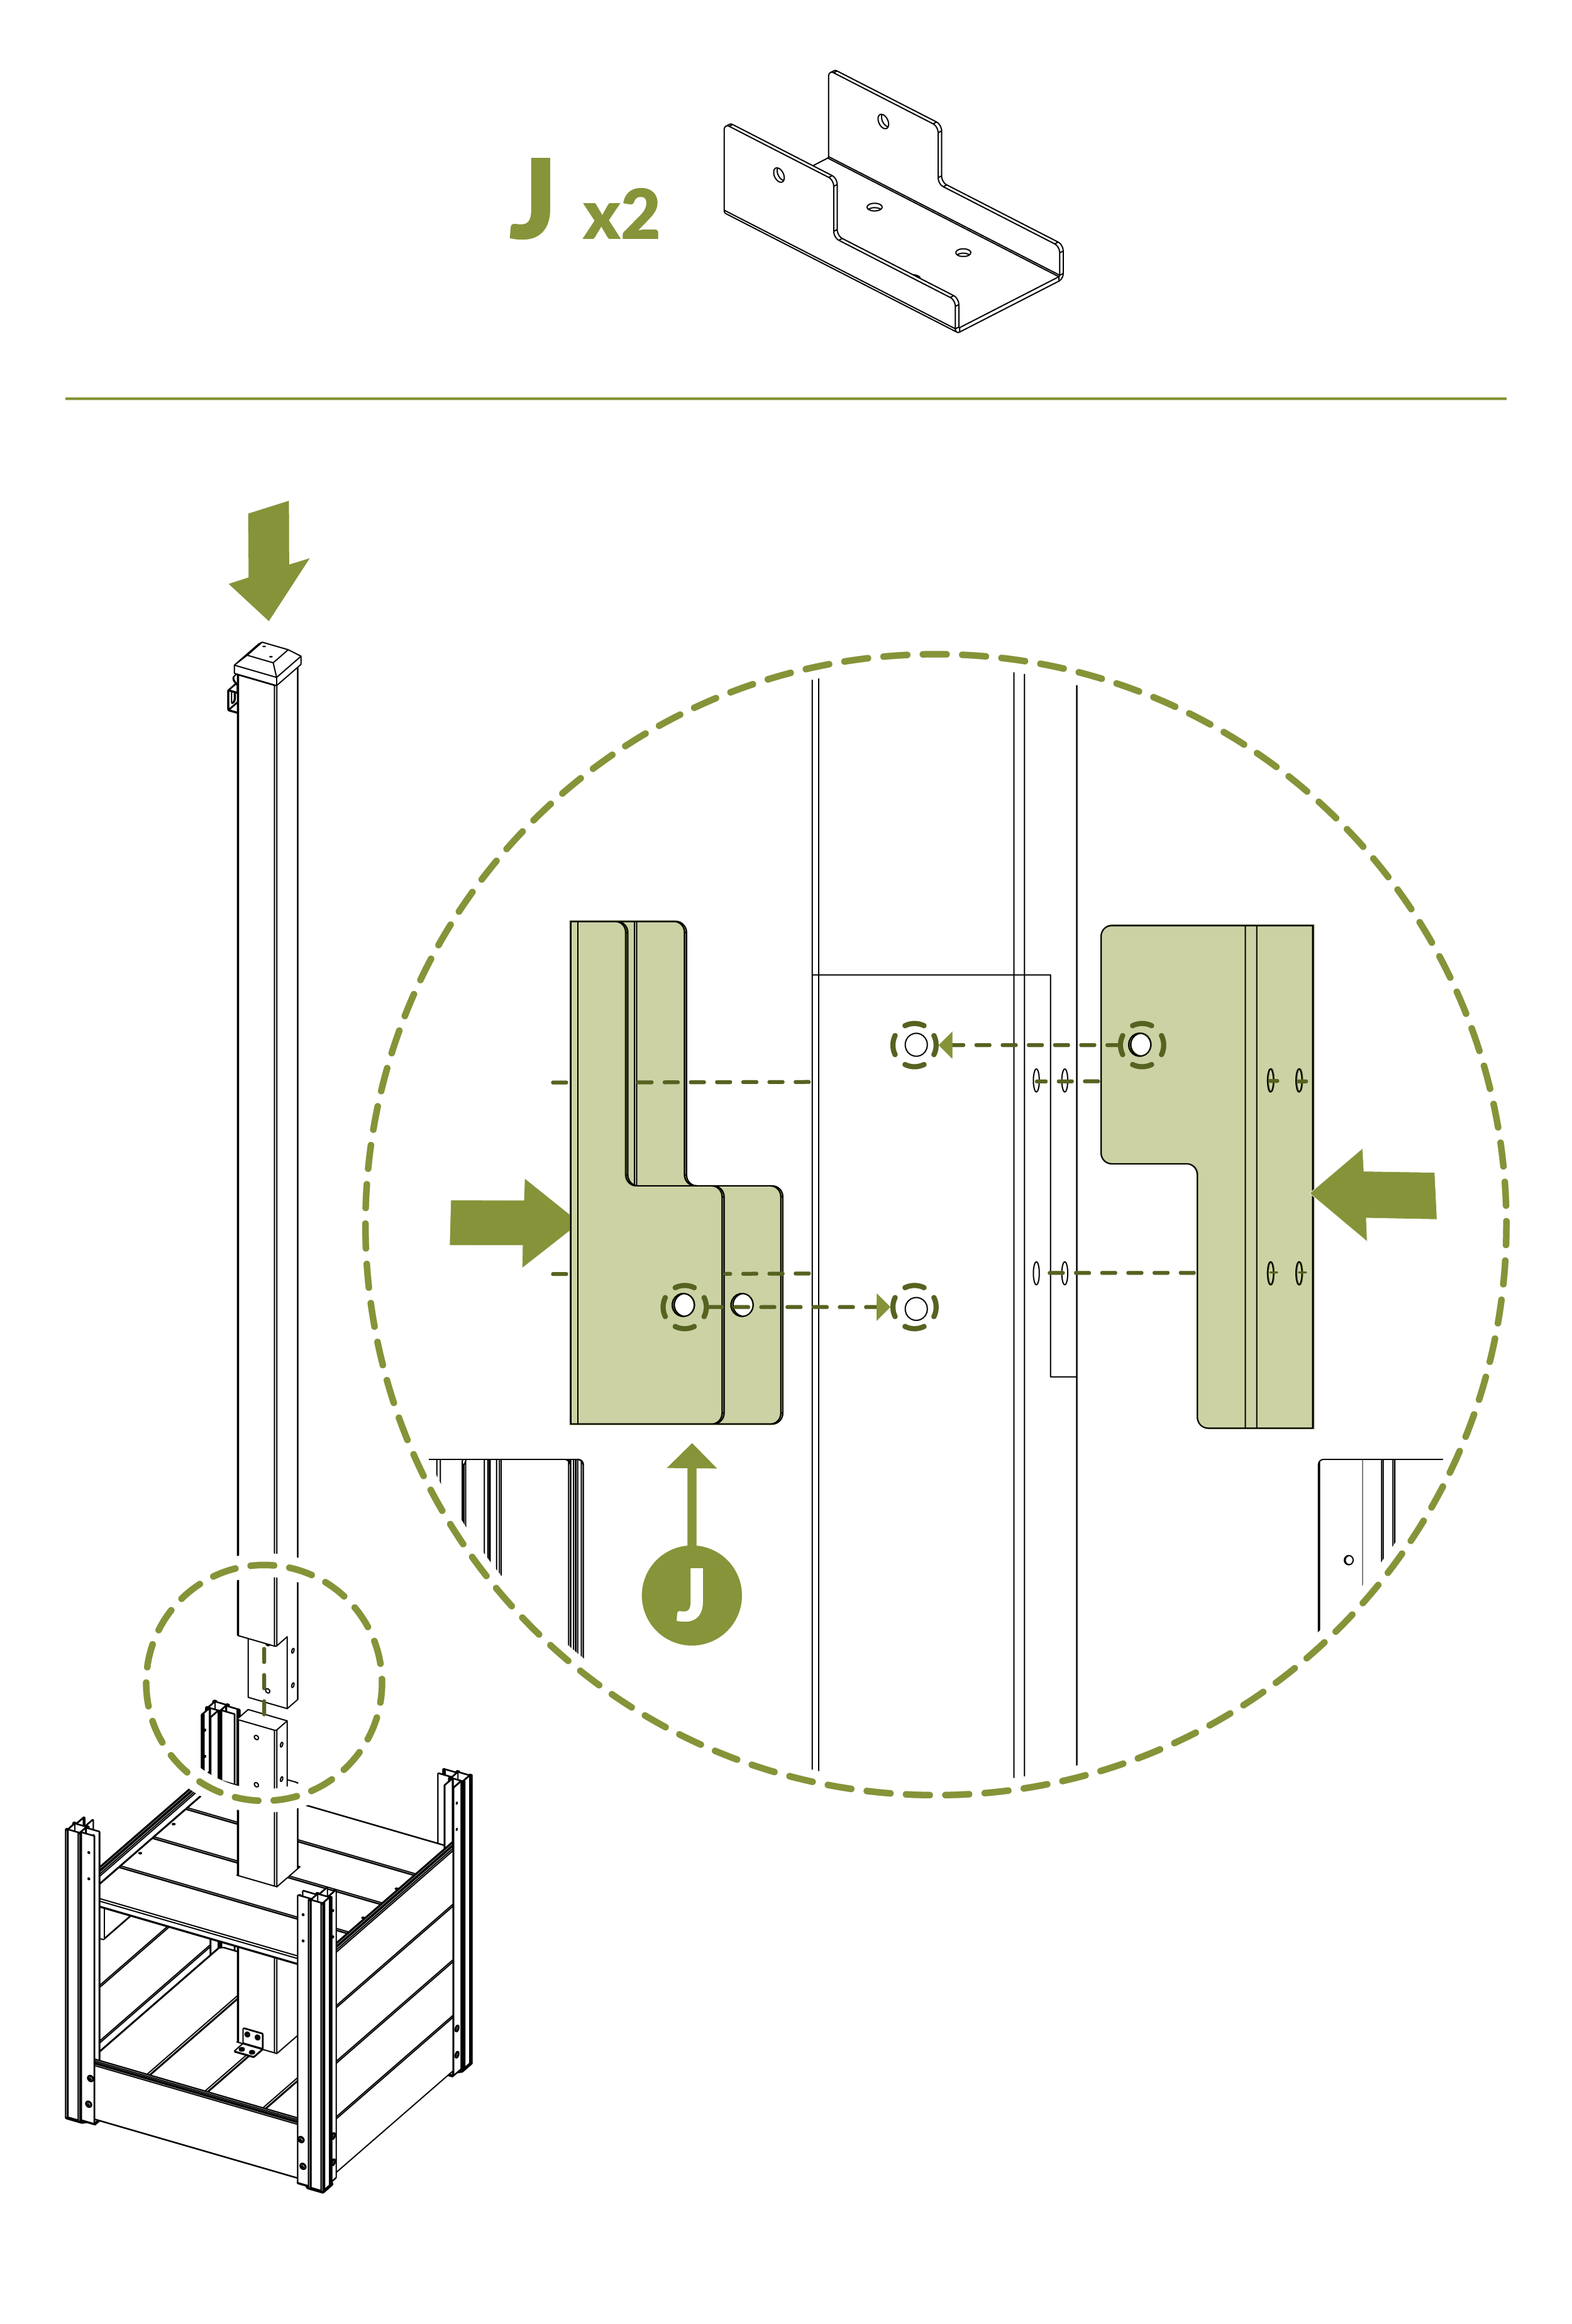
- Attach L-brackets (J) to connect top and bottom posts.
Step 15
Step 16
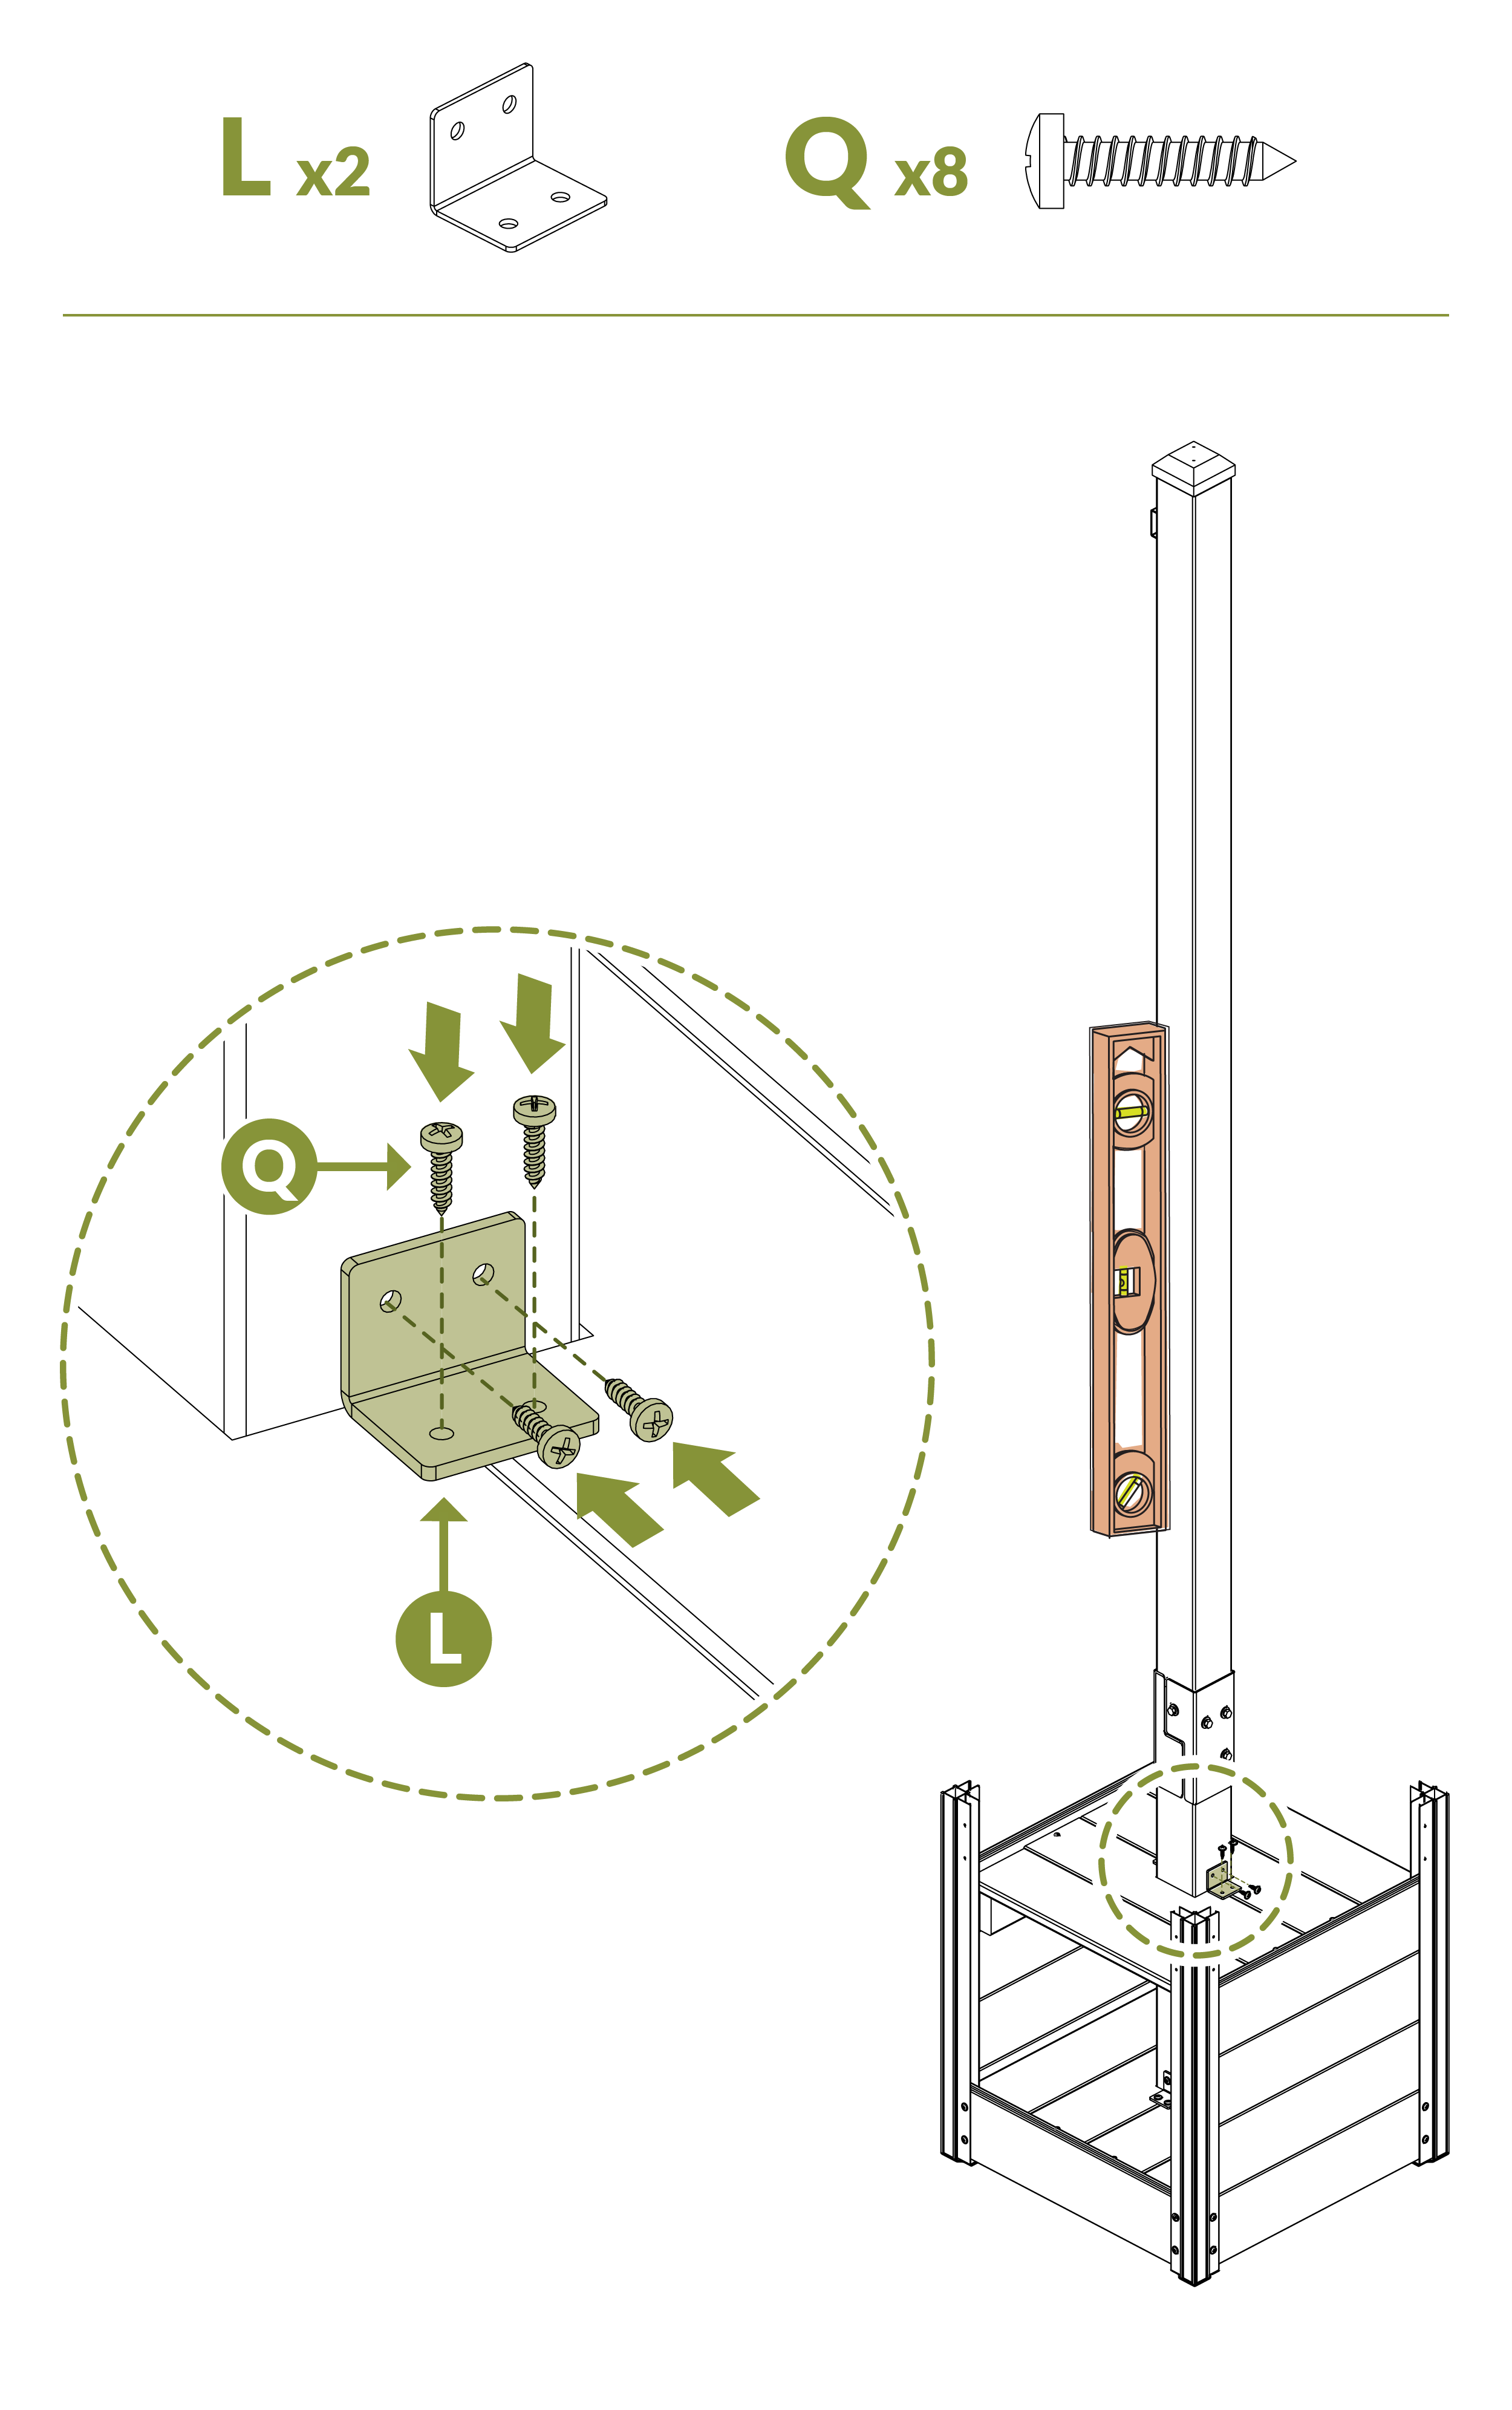
- Ensure top post is level and secure brackets (L) with (8) ⅝" Self-Tapping Screws (Q).
Step 17
Step 18
Step 19
Step 20
Recommended
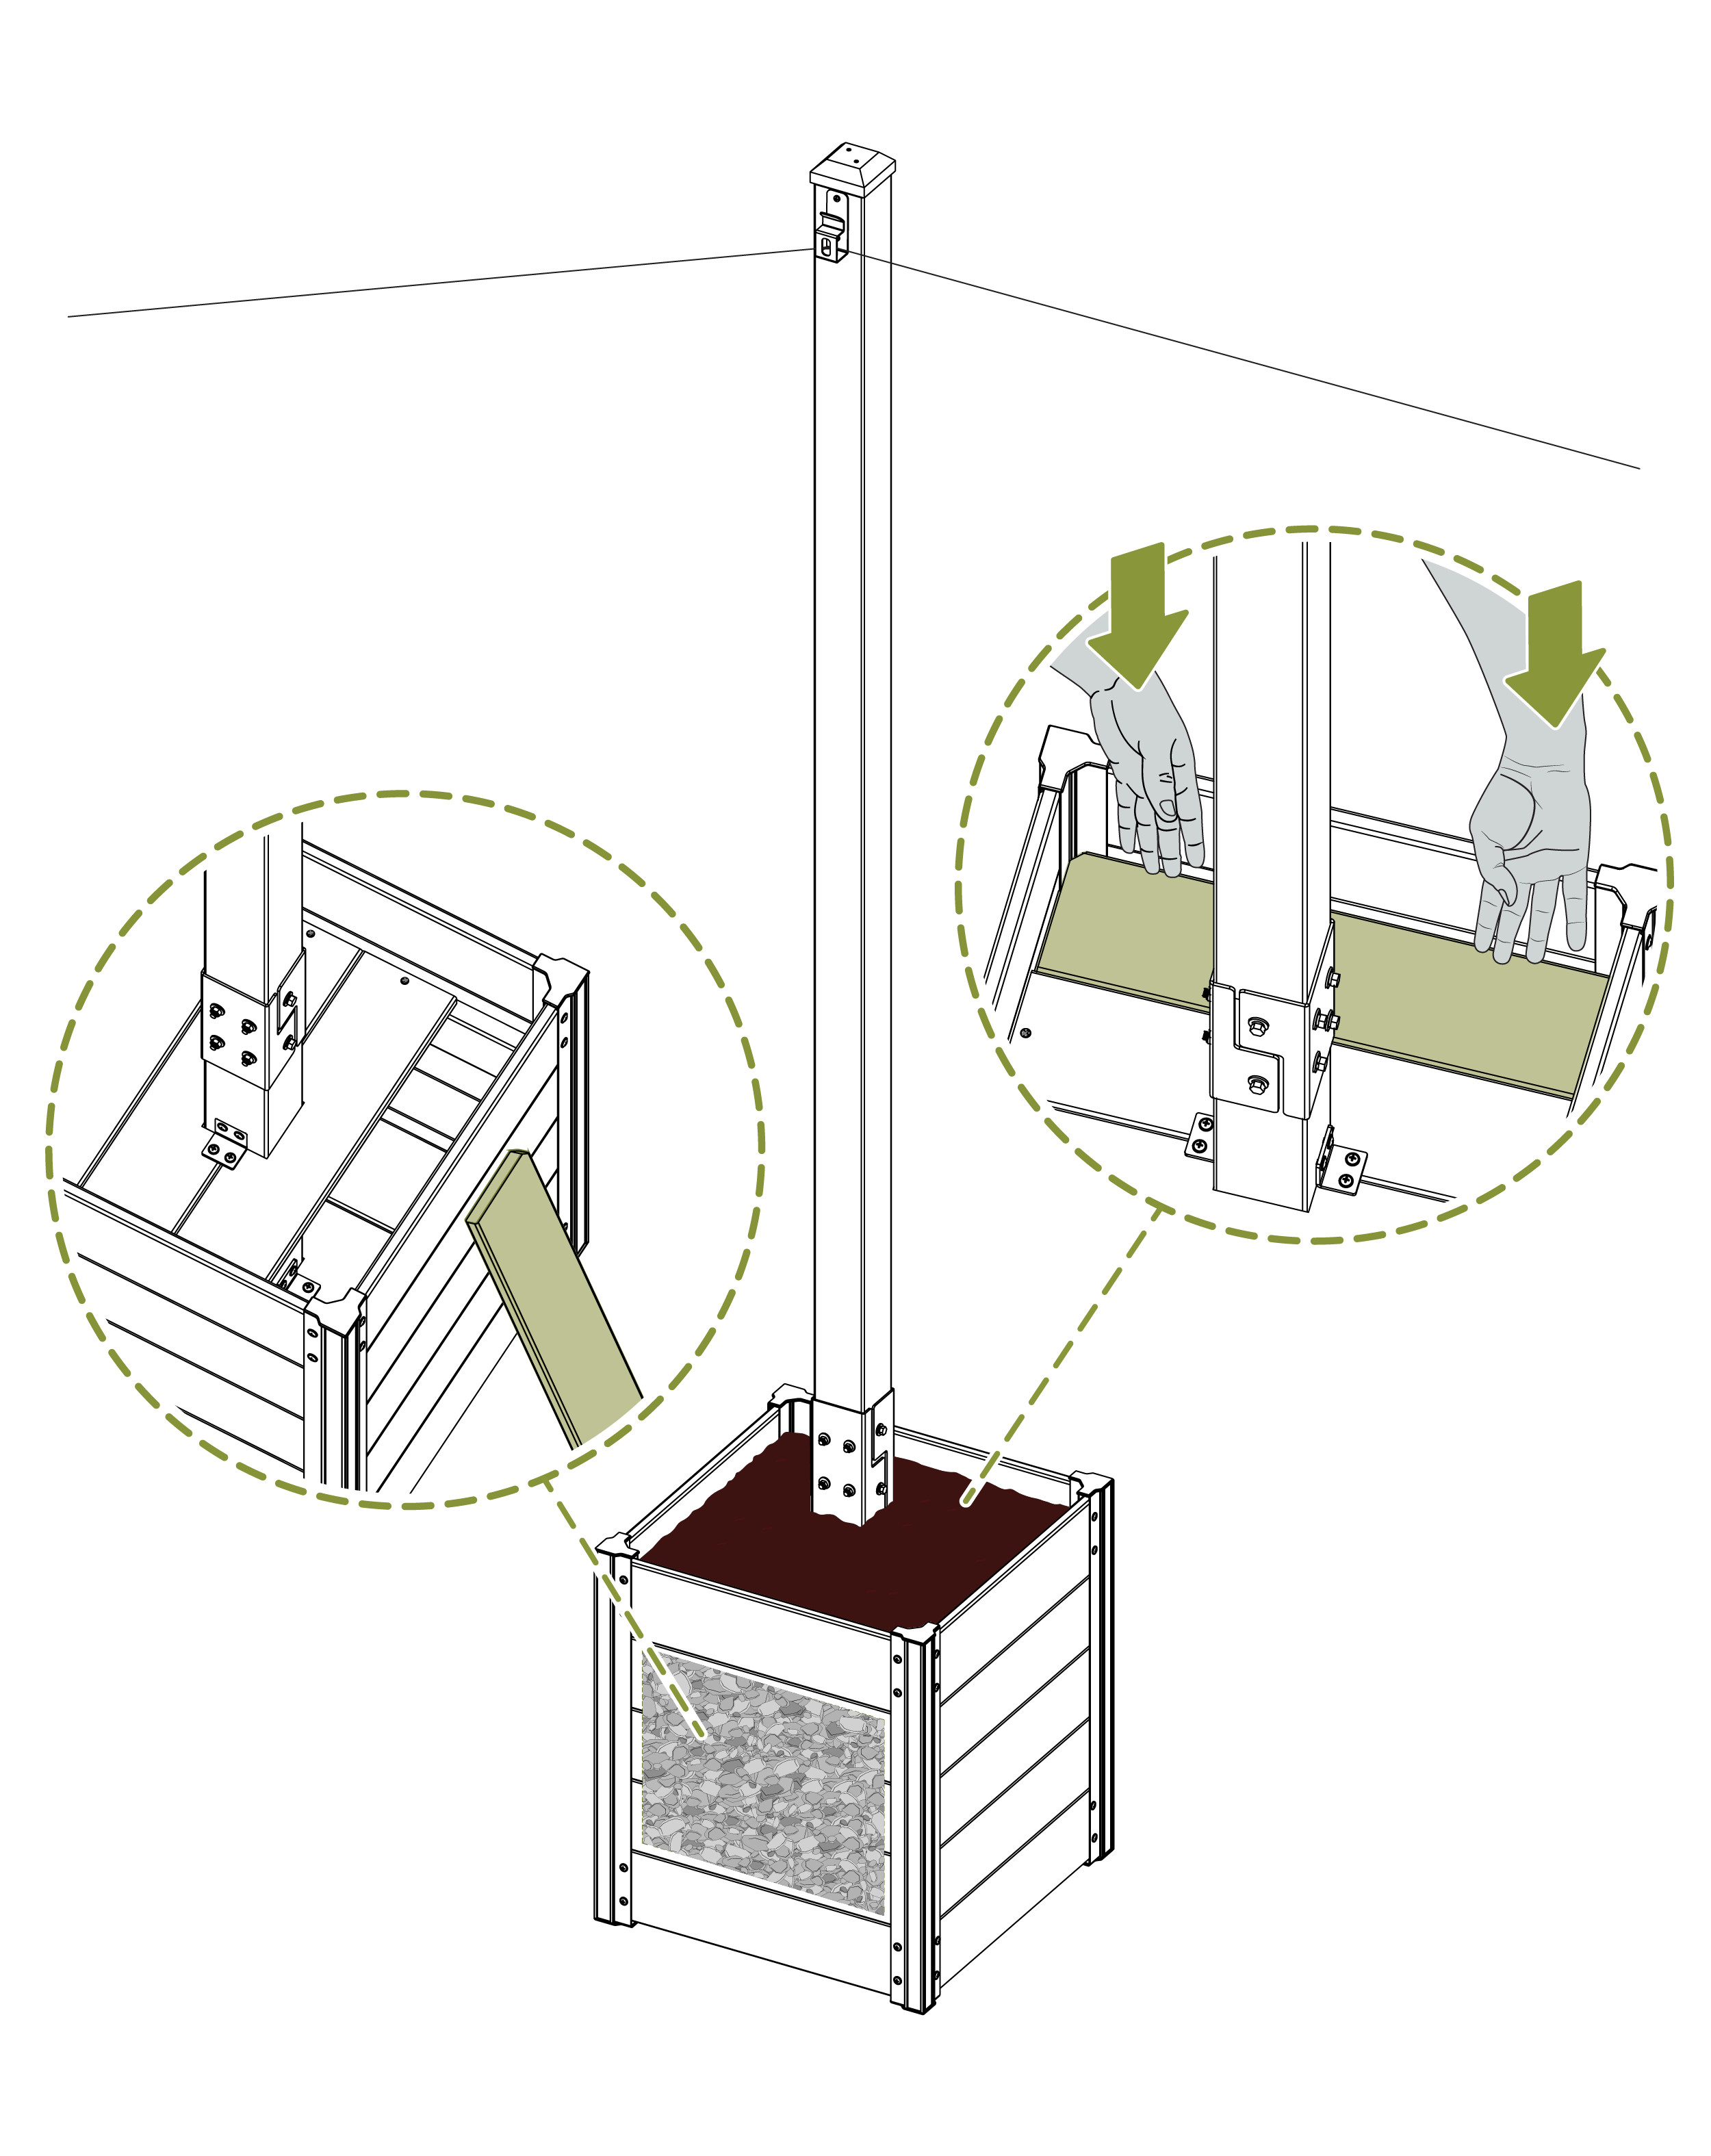
- Temporarily remove outer floor boards to fill lower chamber.
- Before adding soil, fill the bottom chamber of the planter with sandbags, small rocks, or other dense material to maximize the stability of the light post. It is advised to fill the lower chamber with at least 50 lbs of weight.
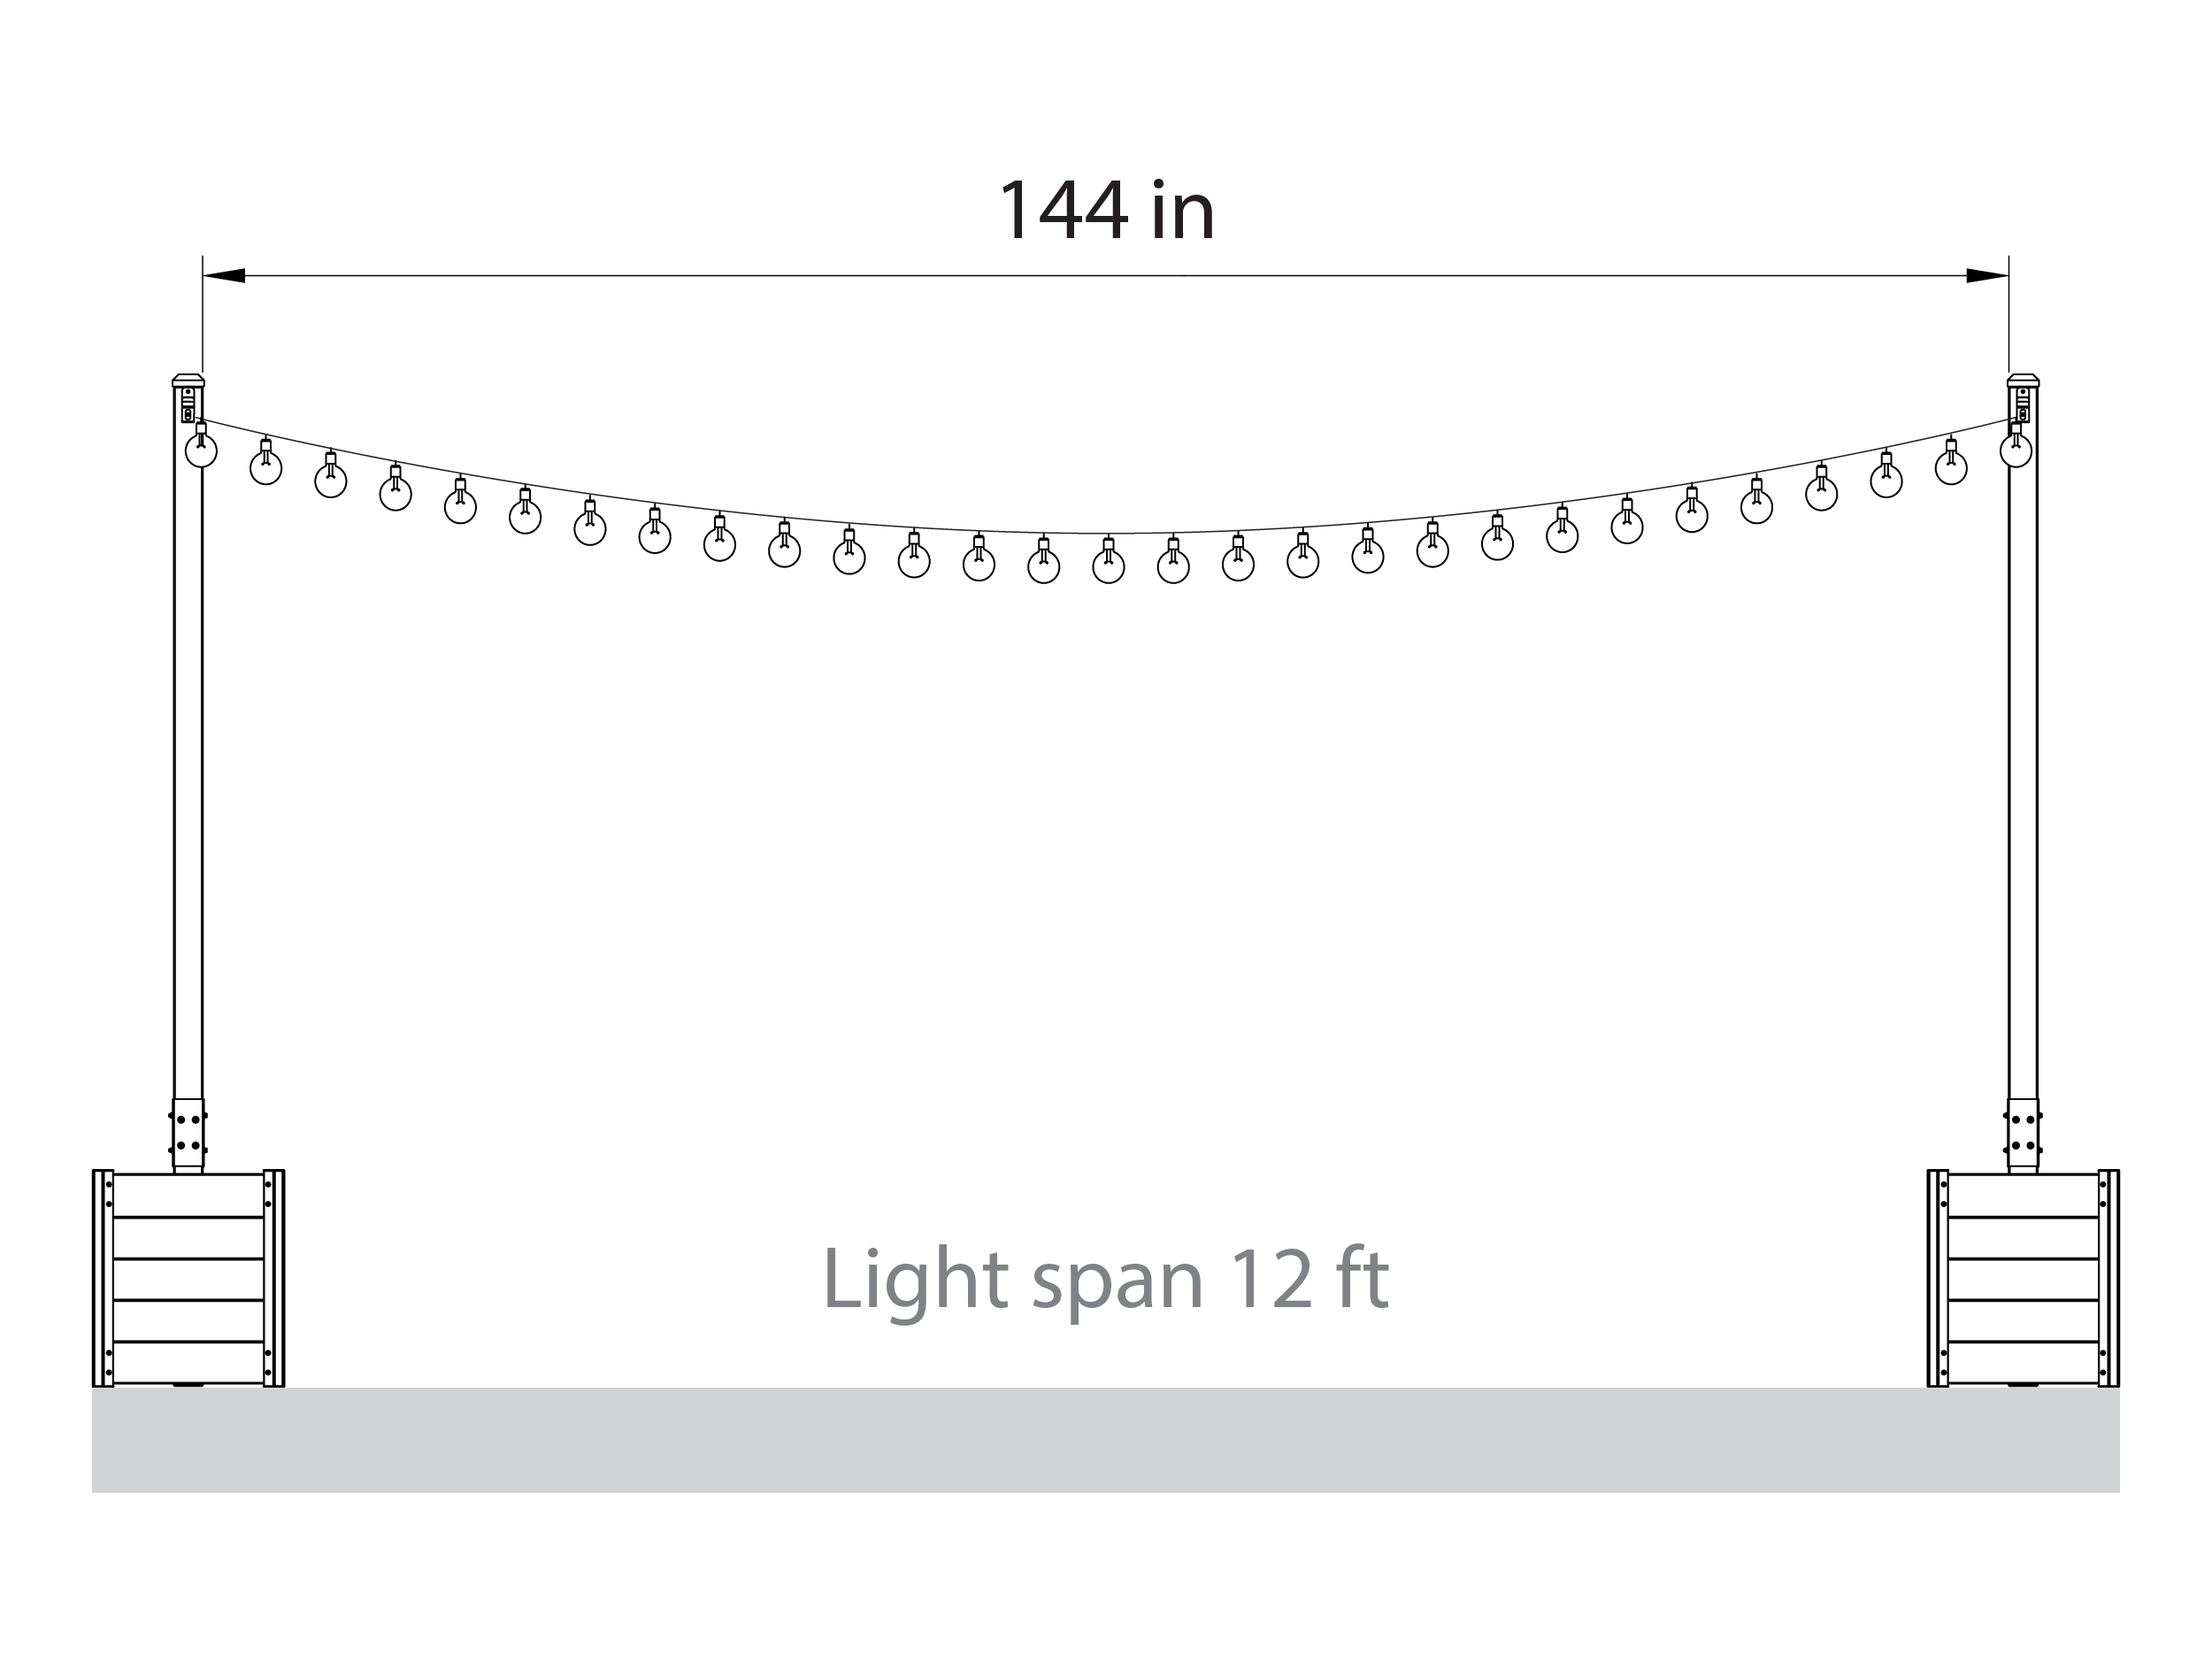
- Light Span 12 ft
Need Help?
- Email: support@zippity-outdoor.com
- Phone: 704-892-5222 or 877-234-6196
- Text: 980-580-6508
